1/32 Hasegawa Bf109K-4 Weisse 8
-
speedgraflex

- Moderator
- Posts: 11399
- Joined: Fri Feb 10, 2017 11:08 pm
- Contact:
Re: 1/32 Hasegawa Bf109K-4 Weisse 8
John, no pressure and no worries, my friend. I watched two of your fishing videos (one old and one new). The world of fishing is a world I associate with spending time with my maternal grandfather who was quietly absorbed in the task of finding fish. There was a lone “smoke shack,” or fish smoking hut at the end of a jetty where the sole proprietor would smoke the whitefish for him. This was on Lake Erie. Those moments—sojourns, really—gave me time to get to know this quiet man. Honestly I do not recall saying much at all to him, but being able to watch him work and quietly focus on fishing reminds me of the simple pleasure of model building. I often think of how such wonderful windows into the past come to life through your work and thank you for being a great influence. From you I learned to respect both the plastic and the paint very differently than before. These are for me and I feel for anyone who builds models important lessons to learn no matter when.
Make more models!

Re: 1/32 Hasegawa Bf109K-4 Weisse 8
jkim wrote:Thanks for checking into the K-4 build! It's on hold, along with my F4U build but I am planning to jump back in at some point this summer. Still in the thick of fishing season and I am gearing up for a long-anticipated outing to my favorite lake this Saturday!
Good luck and good catching!!
Kenny X
Head Mother Trucker In-Charge @ Kenny X’s Reichs Winzigkleines Flugzeugewerks *and now* Airboat Records, too!
Head Mother Trucker In-Charge @ Kenny X’s Reichs Winzigkleines Flugzeugewerks *and now* Airboat Records, too!

Re: 1/32 Hasegawa Bf109K-4 Weisse 8
Hello again. I hope everyone has been well. I've been enduring another long break without the desire to build models. I've checked into SPAM now and then but even that eventually petered out. Fishing season is long over and both my daughters have left the house and are in college. I've got the time but the motivation is still lacking.
I forced myself into the modeling room today. It's a long weekend and I thought Veteran's Day would be an appropriate time to mark a return but... honestly, I don't know how long it will last or how consistent I'll be. I'm trying.
Of the two projects that I have going, I picked to K-4 to do some work on. I feel more comfortable with Late War Luftwaffe subjects than anything else. After reviewing my own build posts to catch myself up on this one, I thought I'd do some riveting.
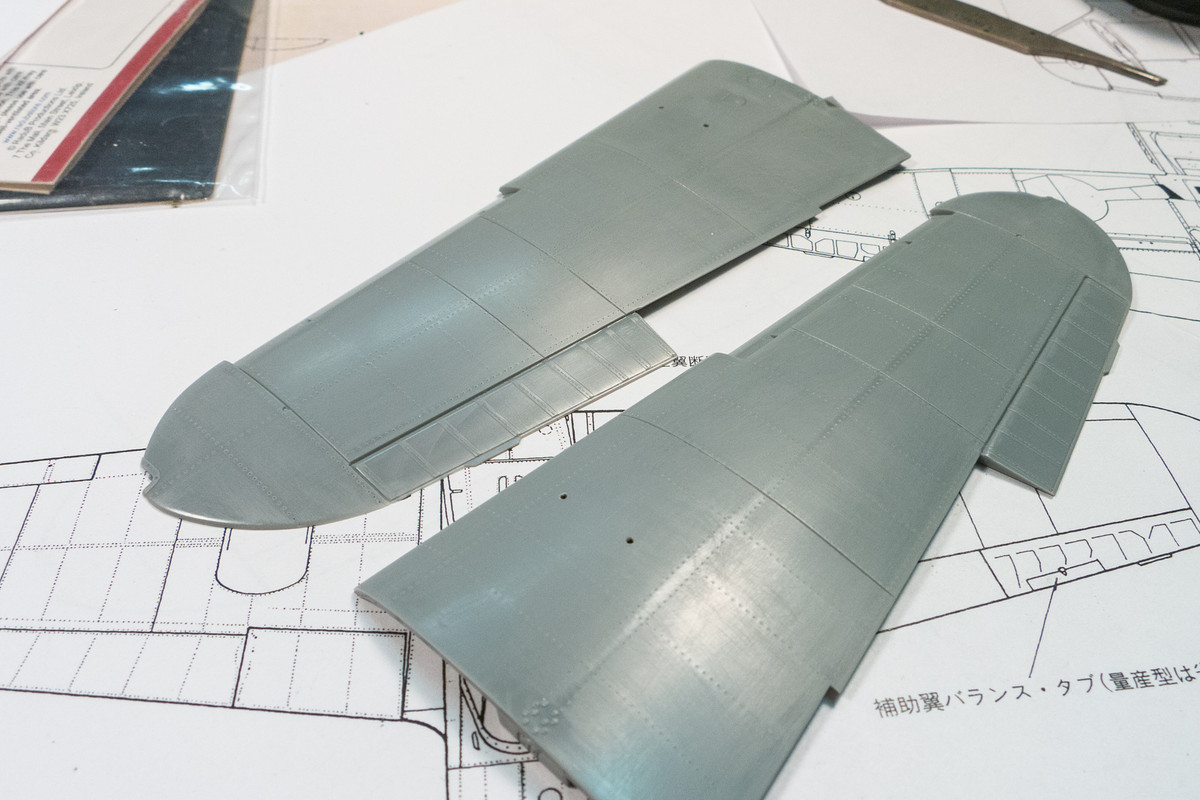
The Hasegawa kit is pretty well molded but does not include any rivet detail. I'm sure it is not everyone's cup of tea but I rather like the visual interest that riveting can give to the surface of an aircraft. Here's what the clean wing looks like before I put hundreds of tiny holes in it.
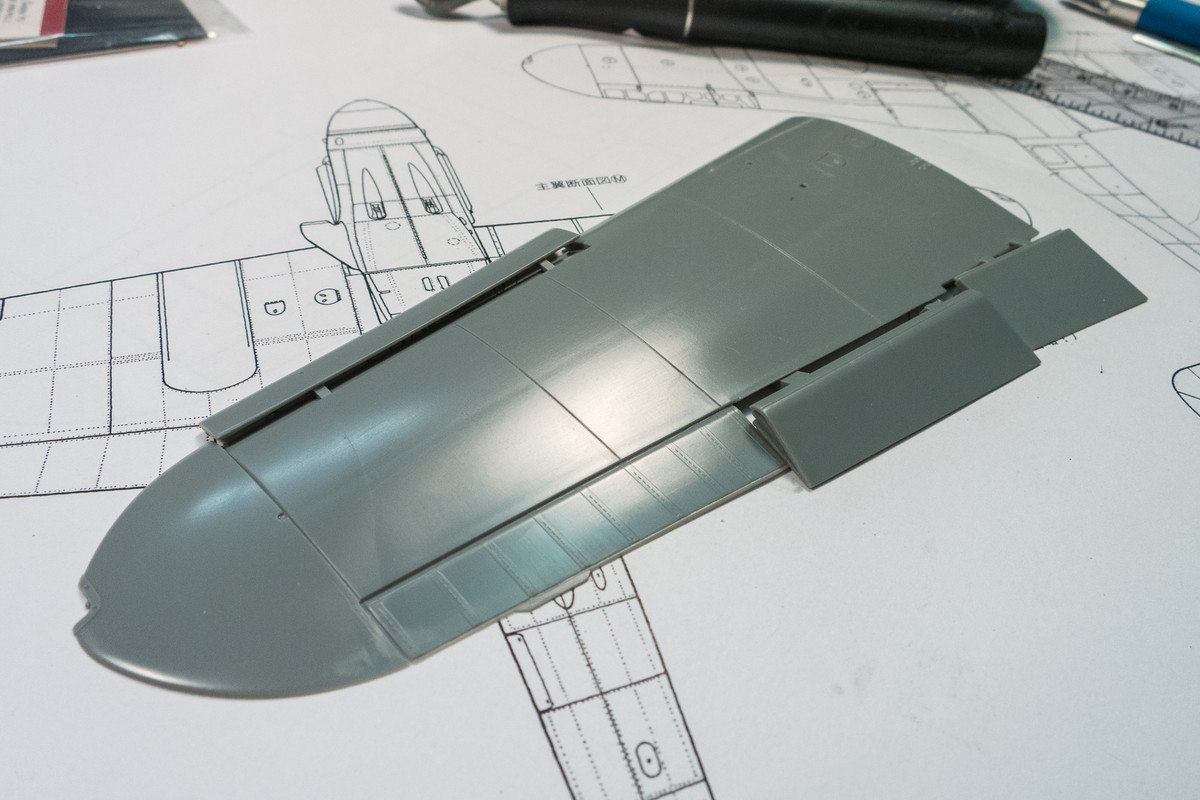
Using a detailed plan view of the Bf109K-4, I draw the lines of rivets on the wing using a soft lead pencil. Balancing the desire for accuracy with my innate laziness, the accuracy meter for these rivets is probably around 75%.
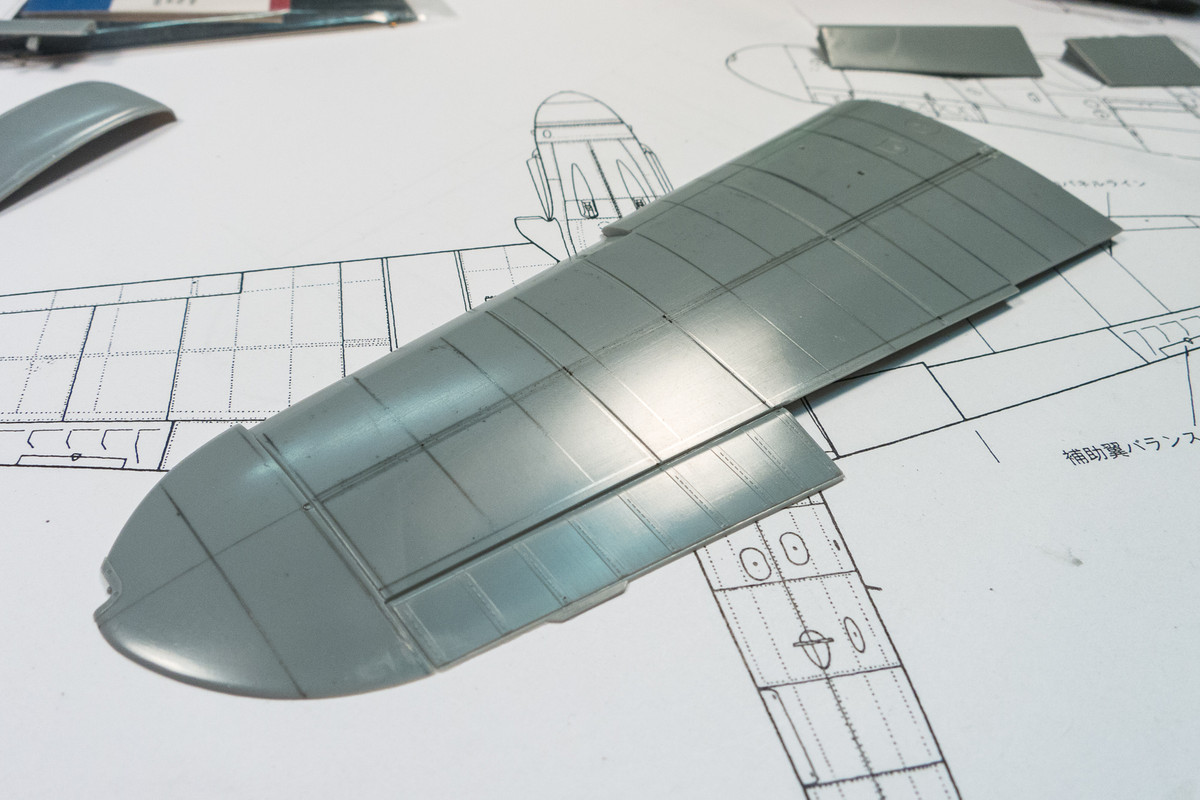
Using a roller-type rivet tool (RB Productions Rivet-R being the accessory of choice), I slowly apply rivets all over the wing, one line at a time. The key is keeping the wing solidly in place on the table while applying steady pressure on the tool as it rolls. It kinda feels like mowing the lawn on a microscopic level.
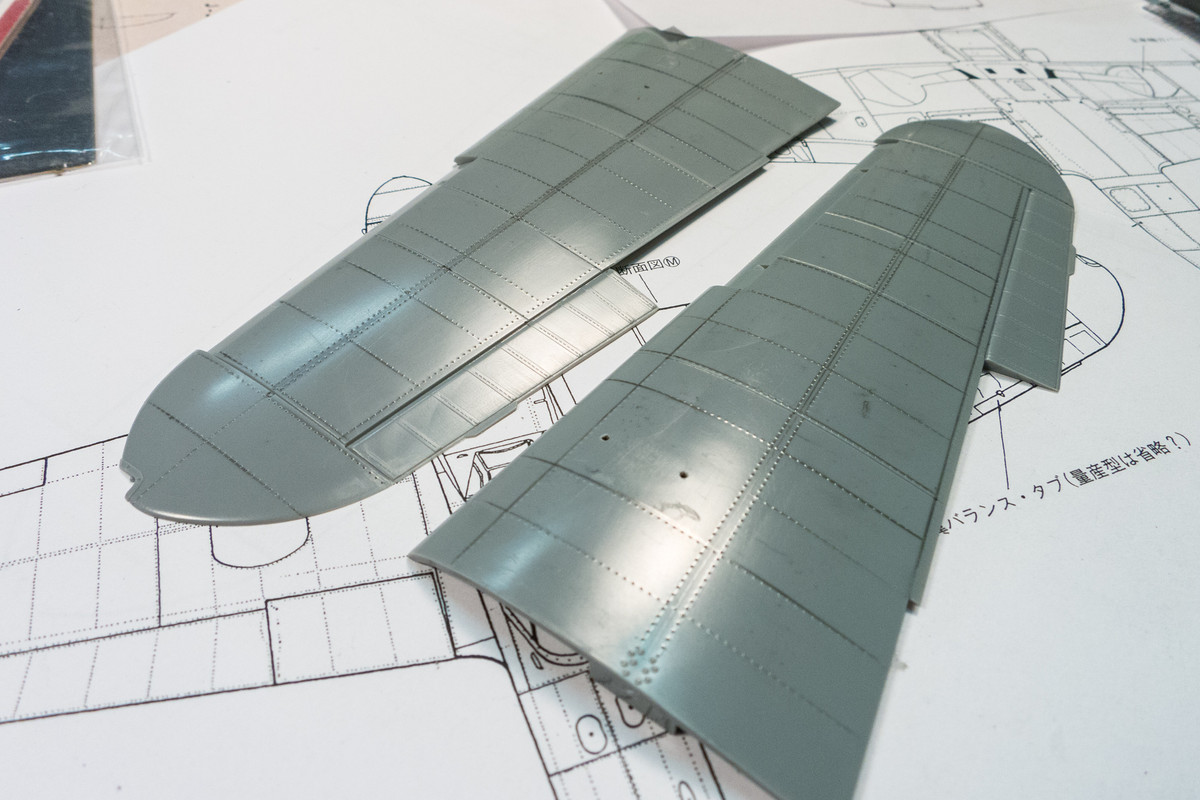
Forcibly punching holes creates little craters of plastic around each hole. I like my rivets to be very subtle so after wiping off the excess pencil marks off with a paper towel damped with iso alcohol, I sand the riveted surface with fine sandpaper to remove the craters but leave the hole.
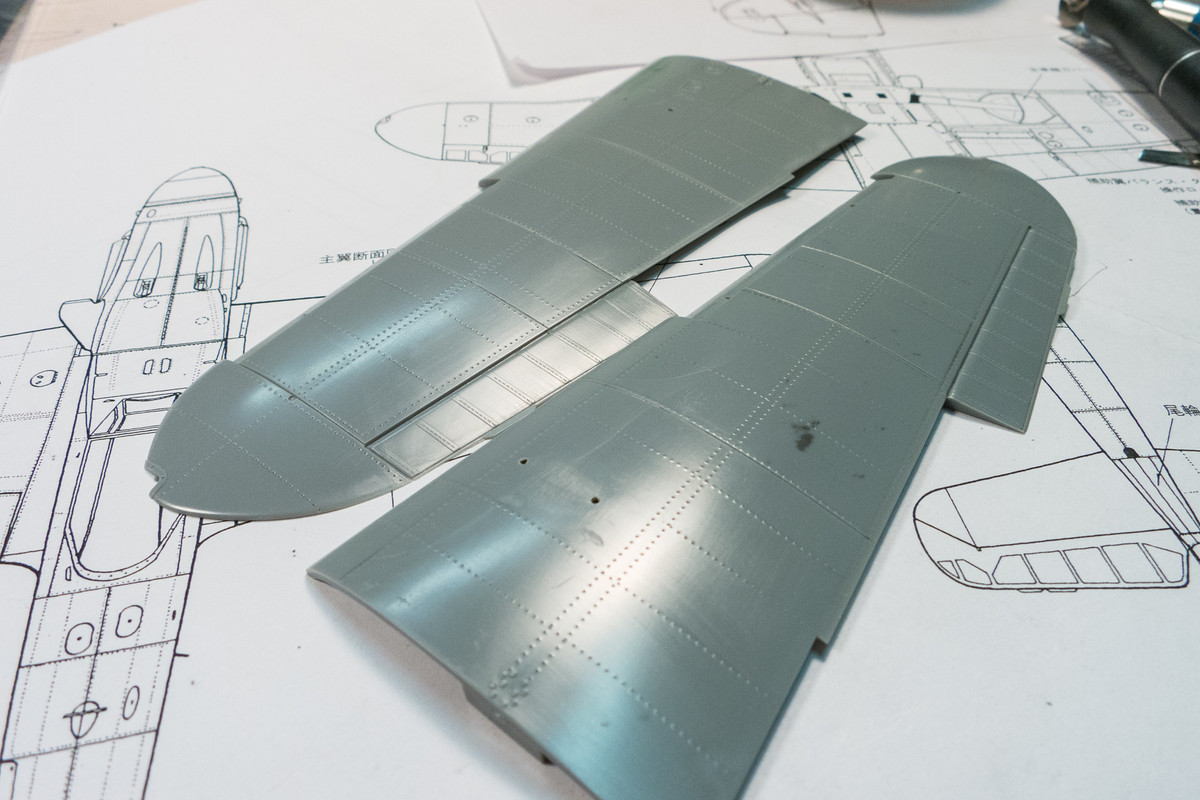
The sanding process makes the riveting work difficult do see in the photos but they are still there! The weathering process way down the road will make them pop out more but for now, the riveting on the wings is complete.
I forced myself into the modeling room today. It's a long weekend and I thought Veteran's Day would be an appropriate time to mark a return but... honestly, I don't know how long it will last or how consistent I'll be. I'm trying.
Of the two projects that I have going, I picked to K-4 to do some work on. I feel more comfortable with Late War Luftwaffe subjects than anything else. After reviewing my own build posts to catch myself up on this one, I thought I'd do some riveting.
The Hasegawa kit is pretty well molded but does not include any rivet detail. I'm sure it is not everyone's cup of tea but I rather like the visual interest that riveting can give to the surface of an aircraft. Here's what the clean wing looks like before I put hundreds of tiny holes in it.
Using a detailed plan view of the Bf109K-4, I draw the lines of rivets on the wing using a soft lead pencil. Balancing the desire for accuracy with my innate laziness, the accuracy meter for these rivets is probably around 75%.
Using a roller-type rivet tool (RB Productions Rivet-R being the accessory of choice), I slowly apply rivets all over the wing, one line at a time. The key is keeping the wing solidly in place on the table while applying steady pressure on the tool as it rolls. It kinda feels like mowing the lawn on a microscopic level.
Forcibly punching holes creates little craters of plastic around each hole. I like my rivets to be very subtle so after wiping off the excess pencil marks off with a paper towel damped with iso alcohol, I sand the riveted surface with fine sandpaper to remove the craters but leave the hole.
The sanding process makes the riveting work difficult do see in the photos but they are still there! The weathering process way down the road will make them pop out more but for now, the riveting on the wings is complete.
John aka JKim
-----------<><

-----------<><
-
tempestjohnny

- Elite Member
- Posts: 3807
- Joined: Sat Oct 15, 2016 4:51 am
- Location: Naples. FL
Re: 1/32 Hasegawa Bf109K-4 Weisse 8
Riveting in this scale looks great

Re: 1/32 Hasegawa Bf109K-4 Weisse 8
Good to see you back at it! I know just how you feel, too. This is looking great. I have tried riveting tools and have failed miserably. You are a master.
To make each build less crappy than the last one. Or, put another way, "Better than the last one, not as good as the next one!"..

Re: 1/32 Hasegawa Bf109K-4 Weisse 8
Good to see you back at the bench John - I hope the mojo lasts. Wonderful additional detail which I kind of feel you need in this scale!
Stuart Templeton 'I may not be good but I'm slow...'
-
Medicman71

- Elite Member
- Posts: 11316
- Joined: Mon Apr 07, 2014 9:32 am
- Location: Houston, Tx
Re: 1/32 Hasegawa Bf109K-4 Weisse 8
Such incredible work.
Mike
Sponsored by Boeing, Lockheed Martin, Northrop Grumman, Saab, BAE, and Dassault
Sponsored by Boeing, Lockheed Martin, Northrop Grumman, Saab, BAE, and Dassault
-
mustang1989

- Moderator
- Posts: 5035
- Joined: Tue Mar 18, 2014 8:35 pm
Re: 1/32 Hasegawa Bf109K-4 Weisse 8
Dang that's lookin' good...…. 
Hope you get past the modeling blues Jim. Your skills are definitely a set to learn from.
Hope you get past the modeling blues Jim. Your skills are definitely a set to learn from.
Re: 1/32 Hasegawa Bf109K-4 Weisse 8
Thanks guys! I hope the fires burn for at least a while longer. I've got about 5-6 projects I want to do and these long breaks aren't helping my progress.
With the wing riveting done, I want to turn my attention to the photoetch landing gear wells. These are made by Radu over at RB Productions and will help dress up the rather simplistic renditions that Hasegawa offers.
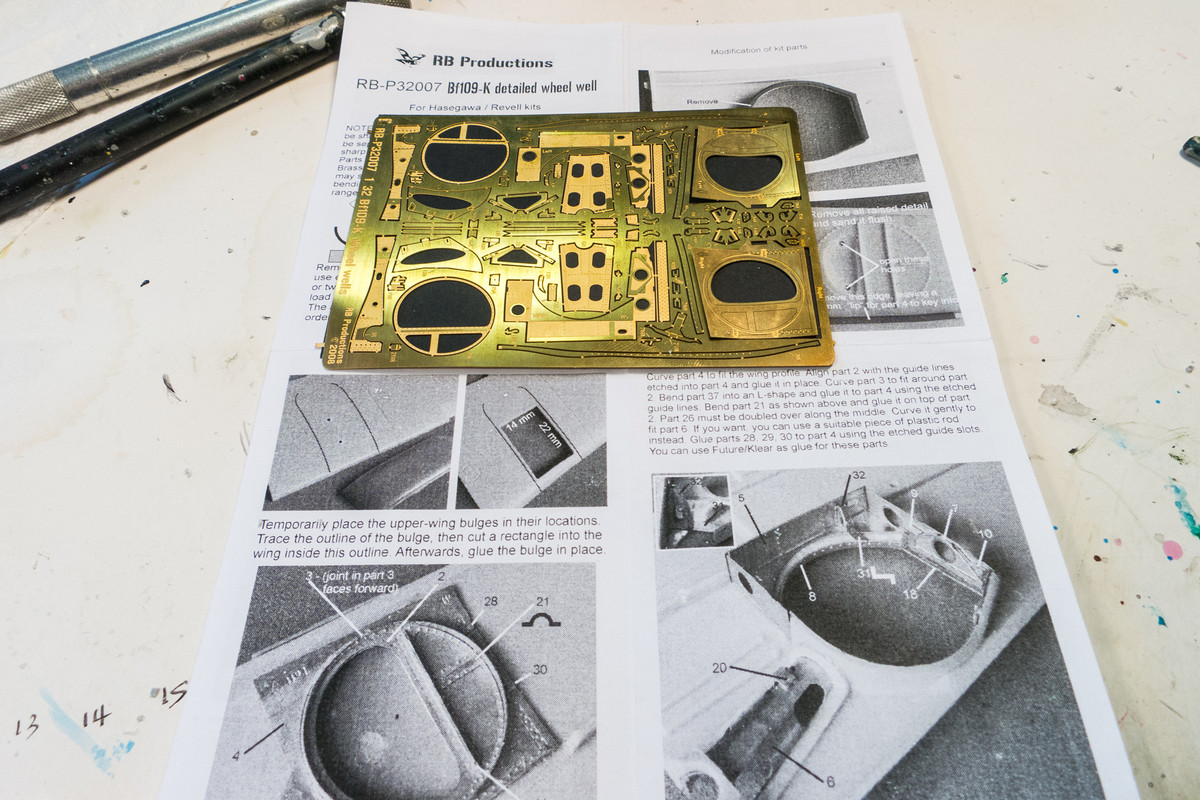
As with many aftermarket detail sets, some removals are necessary to get the new parts to fit. The RB instructions seem very detailed and that gives me a bit of confidence that I won't be getting stuck in a dead end alley.
The molded detail on the inside of the top wings need to be removed. I used a curved x-acto blade to slice off the portruding plastic and then cleaned it up with sandpaper.
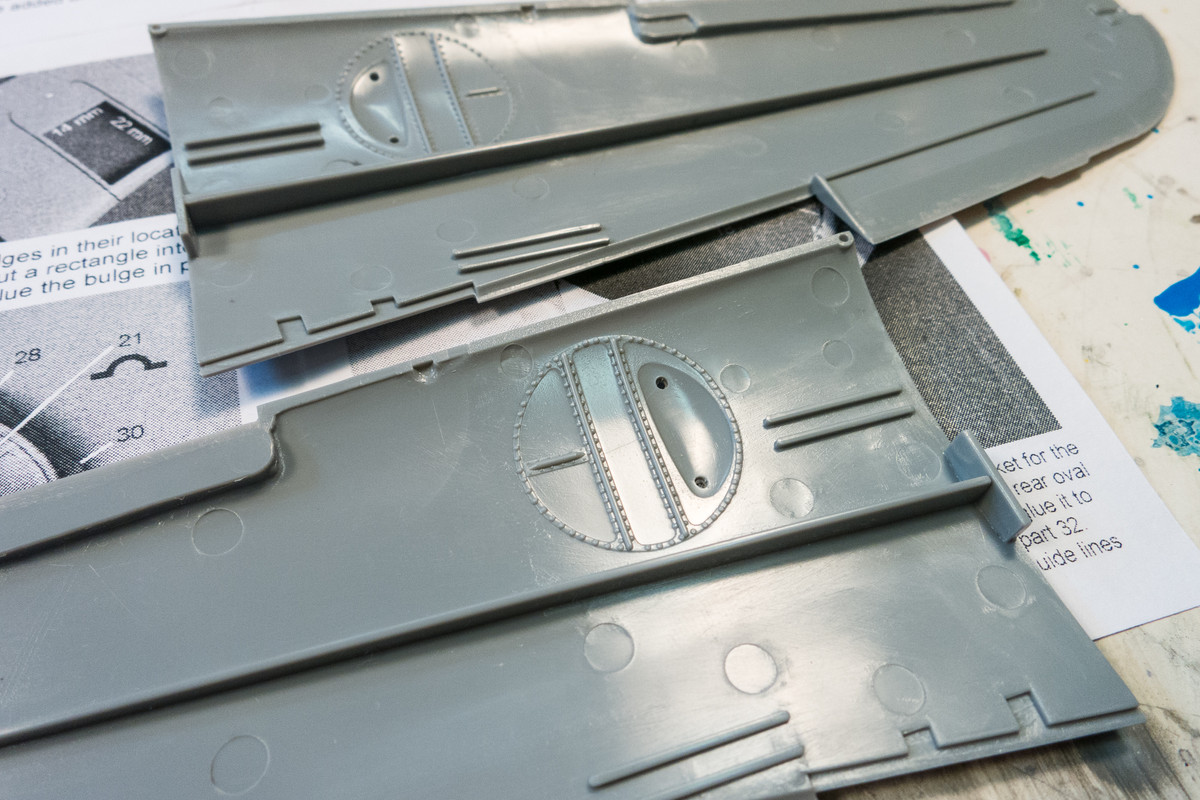
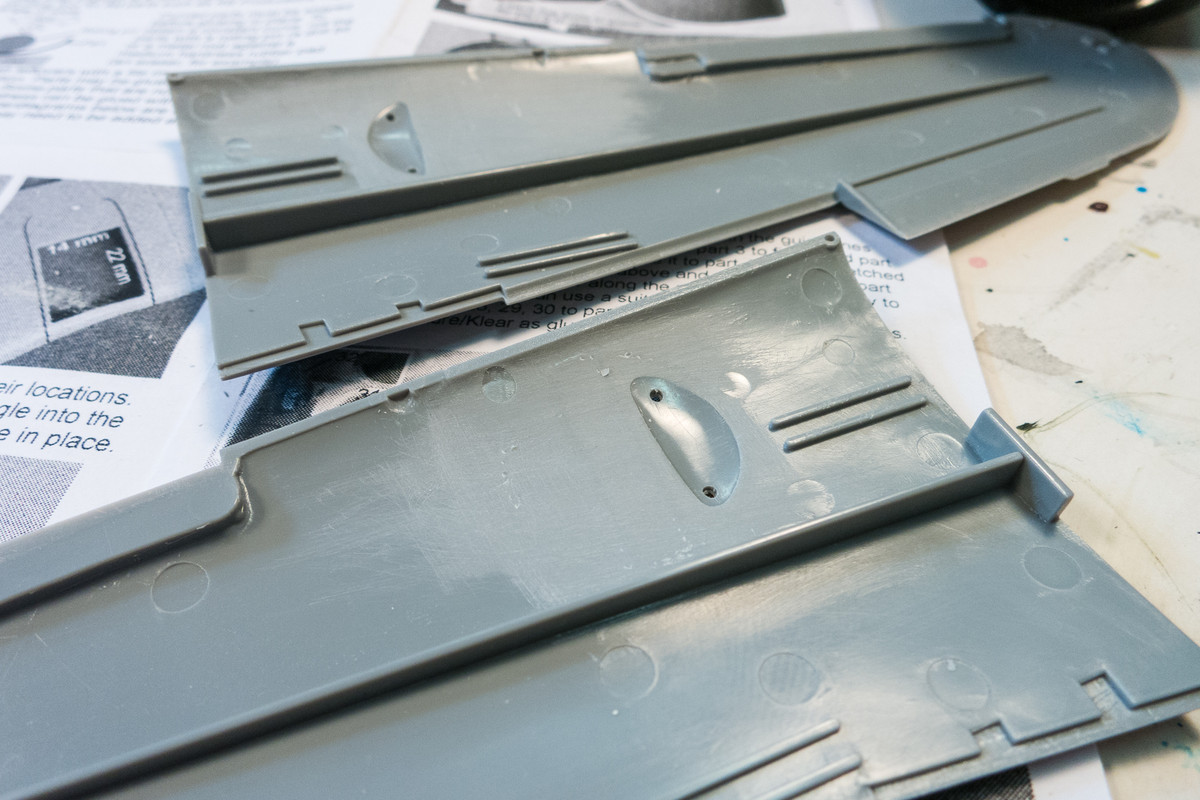
Late model 109G's and K's had fatter tires and therefore had to incorporate a larger upper wing bulge to accommodate the new rubber. The RB photoetch takes that into consideration and requires a rectangular cut-out from the upper wing to portray this additional space. Outlines are made of the wing bulge parts and then the inner rectangle is traced onto the upper wing using the measurements in the RB instructions.
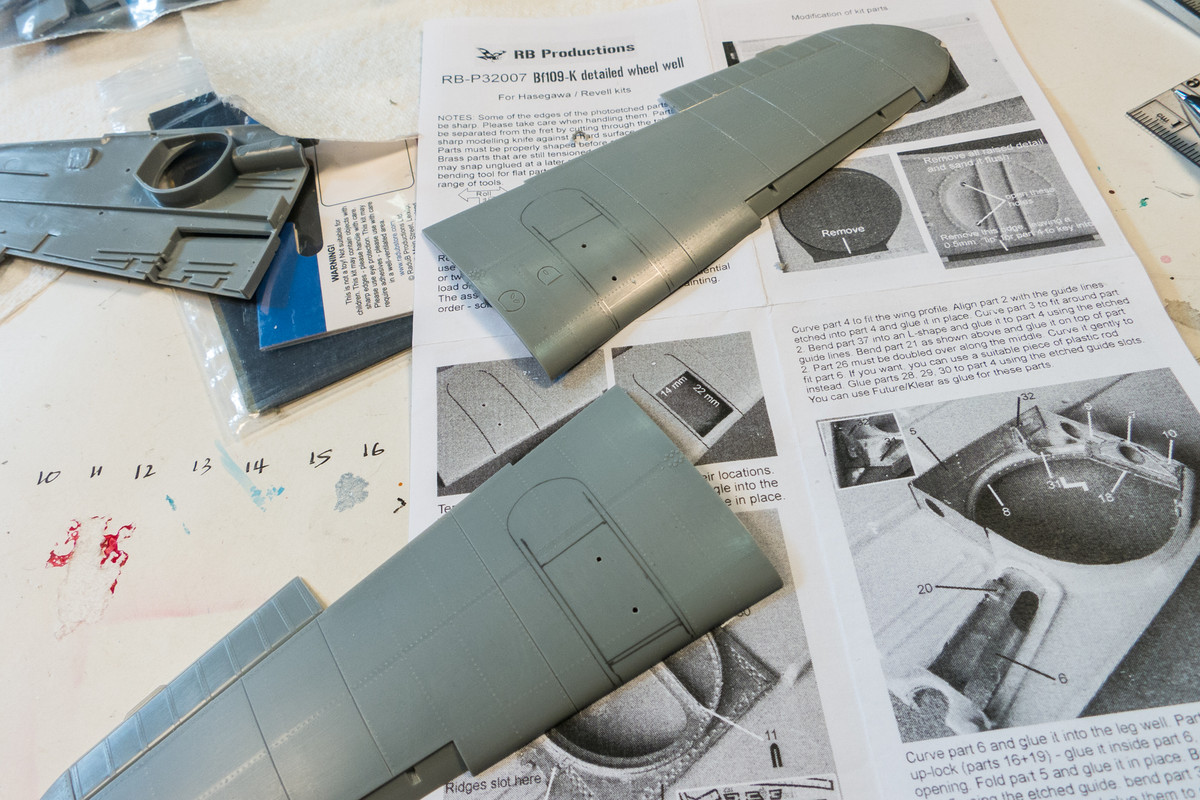
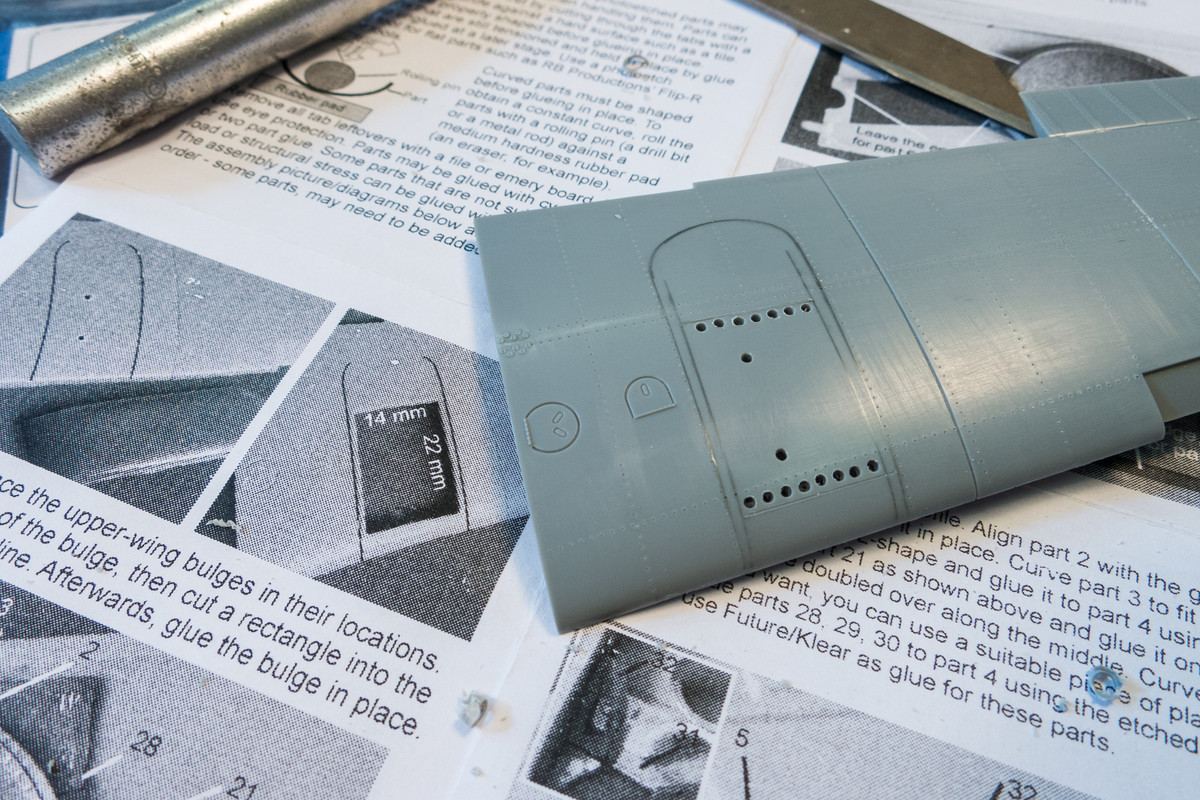
I chain-drilled holes to facilitate the lateral cuts. The aerodynamic curve of the upper wing allowed me to use a straight saw to start the longitudinal cuts.
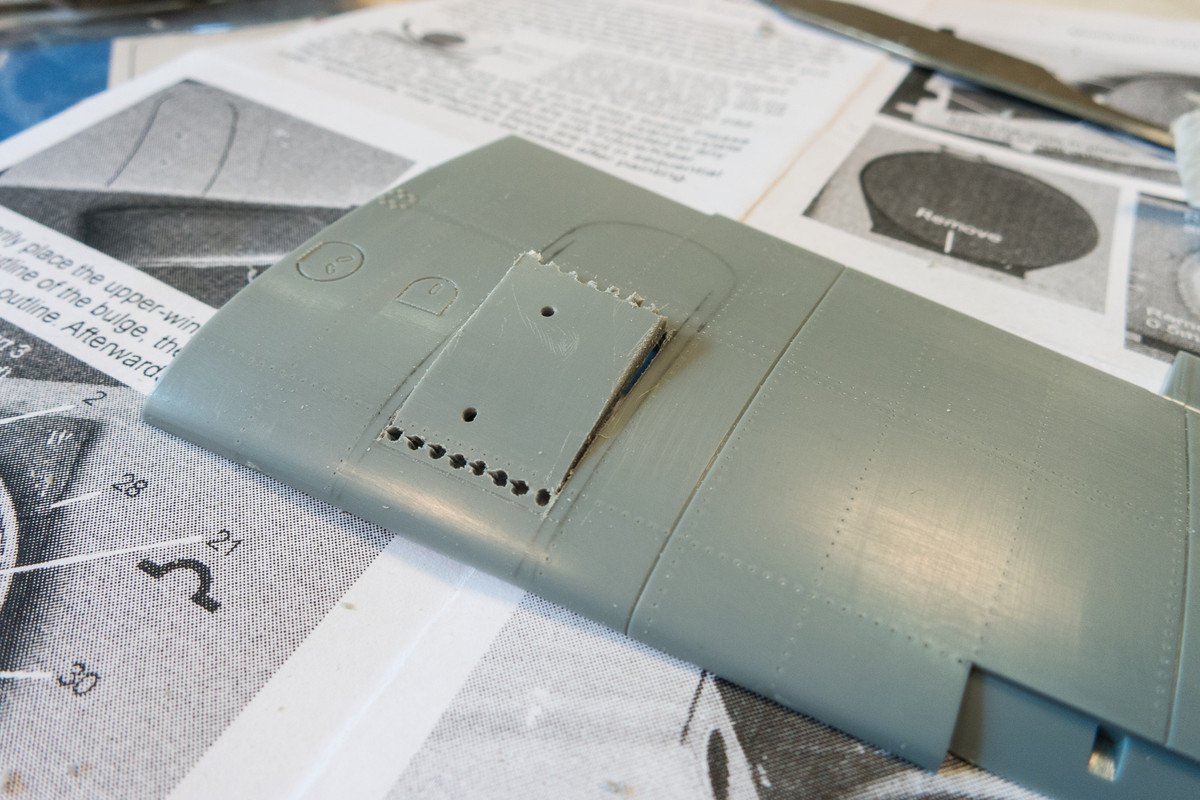
The holes are complete and wing bulges can now be glued onto the upper wings but there are some ejector pin marks that need to be filled before I do that.
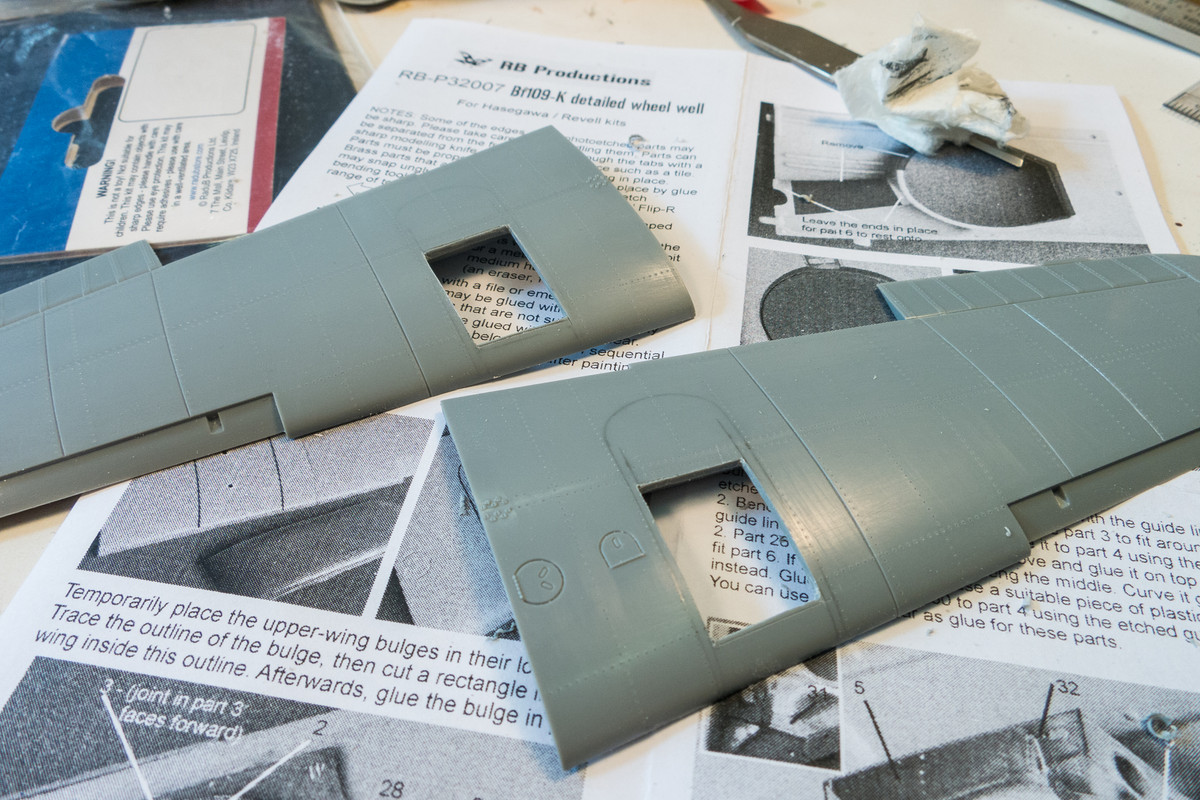
Some removals are also required from the wing bottoms. The photoetch also calls for the replacement of the half-tunnel gear leg receptacles but I'm playing with simply hollowing out the holes in the kit part since the required removals are bit tedious.
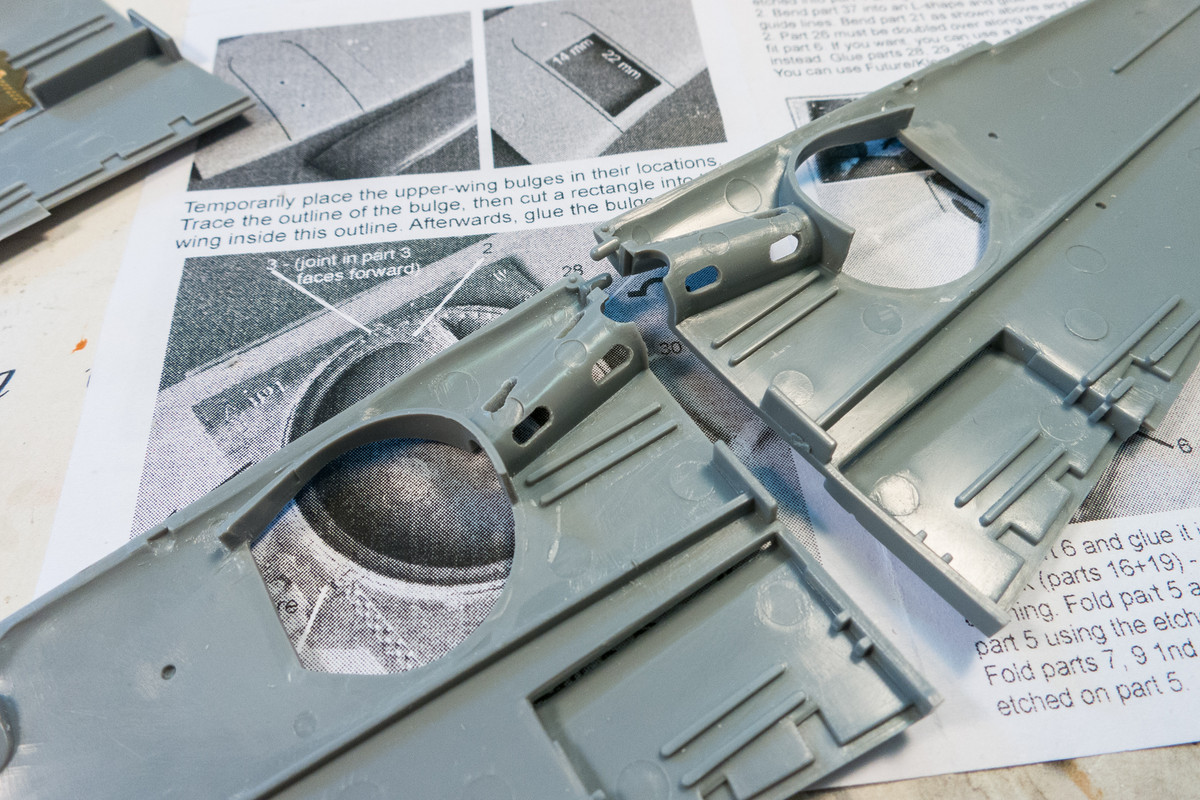
The wheel well roof is dry-fit onto the upper wings. Comparing with the first photo, you can see how the deeper accommodation for the fatter tires is better replicated than the kit parts.
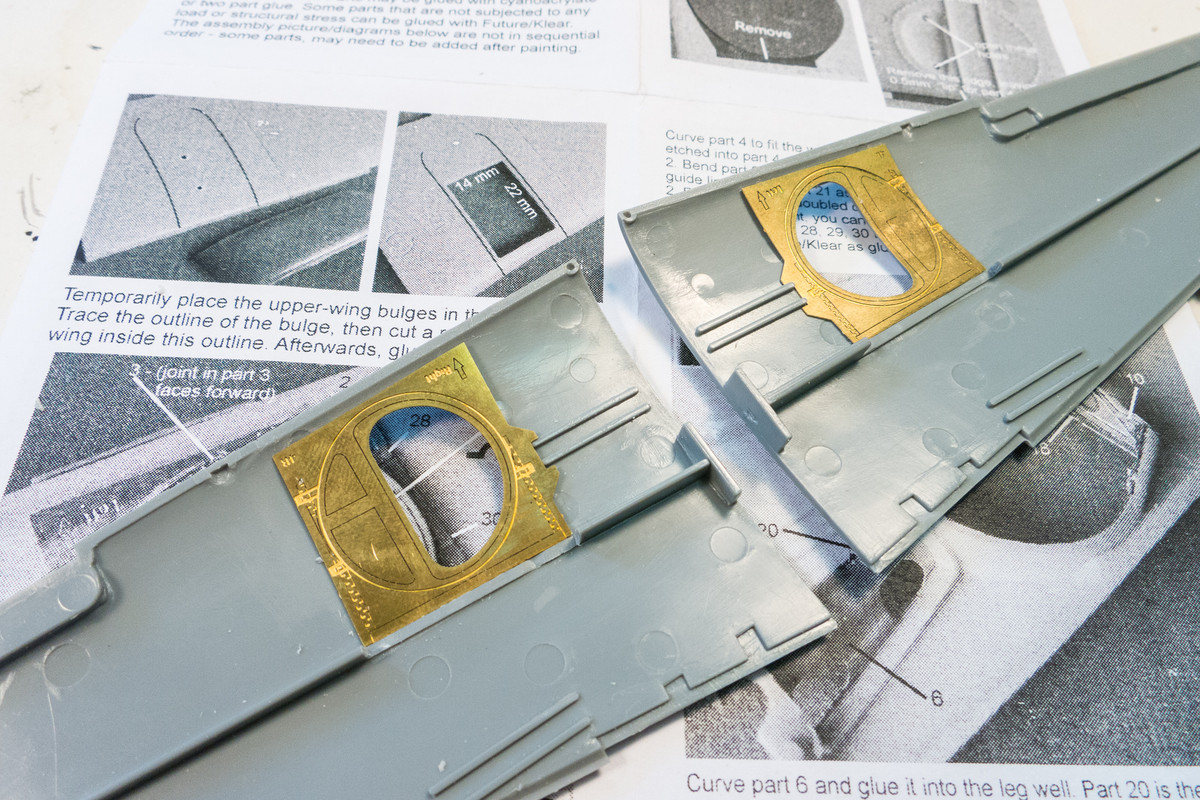
With the wing riveting done, I want to turn my attention to the photoetch landing gear wells. These are made by Radu over at RB Productions and will help dress up the rather simplistic renditions that Hasegawa offers.
As with many aftermarket detail sets, some removals are necessary to get the new parts to fit. The RB instructions seem very detailed and that gives me a bit of confidence that I won't be getting stuck in a dead end alley.
The molded detail on the inside of the top wings need to be removed. I used a curved x-acto blade to slice off the portruding plastic and then cleaned it up with sandpaper.
Late model 109G's and K's had fatter tires and therefore had to incorporate a larger upper wing bulge to accommodate the new rubber. The RB photoetch takes that into consideration and requires a rectangular cut-out from the upper wing to portray this additional space. Outlines are made of the wing bulge parts and then the inner rectangle is traced onto the upper wing using the measurements in the RB instructions.
I chain-drilled holes to facilitate the lateral cuts. The aerodynamic curve of the upper wing allowed me to use a straight saw to start the longitudinal cuts.
The holes are complete and wing bulges can now be glued onto the upper wings but there are some ejector pin marks that need to be filled before I do that.
Some removals are also required from the wing bottoms. The photoetch also calls for the replacement of the half-tunnel gear leg receptacles but I'm playing with simply hollowing out the holes in the kit part since the required removals are bit tedious.
The wheel well roof is dry-fit onto the upper wings. Comparing with the first photo, you can see how the deeper accommodation for the fatter tires is better replicated than the kit parts.
John aka JKim
-----------<><
-----------<><

Re: 1/32 Hasegawa Bf109K-4 Weisse 8
In this scale you would expect the rivets to be molded in, at least on newer kits, I'm not sure of the age of this one. Be watching how your gearbays turn out
March as one, Don't look back
Odin's sons... Attack!
Unleash hell! Do not repent! Warfare grants us no lament
Let your weapons slash and tear This is no place for fear
Hold the lines! Move as one! In unity our victory's won
Our shields will form a mighty wall
United we shall never fall
Odin's sons... Attack!
Unleash hell! Do not repent! Warfare grants us no lament
Let your weapons slash and tear This is no place for fear
Hold the lines! Move as one! In unity our victory's won
Our shields will form a mighty wall
United we shall never fall