1//32 Hasegawa Ki-61-1 Tei Hien
-
Medicman71

- Elite Member
- Posts: 11221
- Joined: Mon Apr 07, 2014 9:32 am
- Location: Houston, Tx
Re: 1//32 Hasegawa Ki-61-1 Tei Hien
Man that metal finish looks so nice!
Mike
Sponsored by Boeing, Lockheed Martin, Northrop Grumman, Saab, BAE, and Dassault
Sponsored by Boeing, Lockheed Martin, Northrop Grumman, Saab, BAE, and Dassault
-
Stikpusher

- Moderator
- Posts: 21033
- Joined: Sat Apr 05, 2014 8:37 pm
- Location: Ceti Alpha 5
Re: 1//32 Hasegawa Ki-61-1 Tei Hien
And thanks for the masking over Alclad with Post Its tip.
"Surely I have made my meaning plain? I intend to avenge myself upon you, Admiral. I have deprived your ship of power, and when I swing 'round, I intend to deprive you of your life."
FLSM
FLSM

Re: 1//32 Hasegawa Ki-61-1 Tei Hien
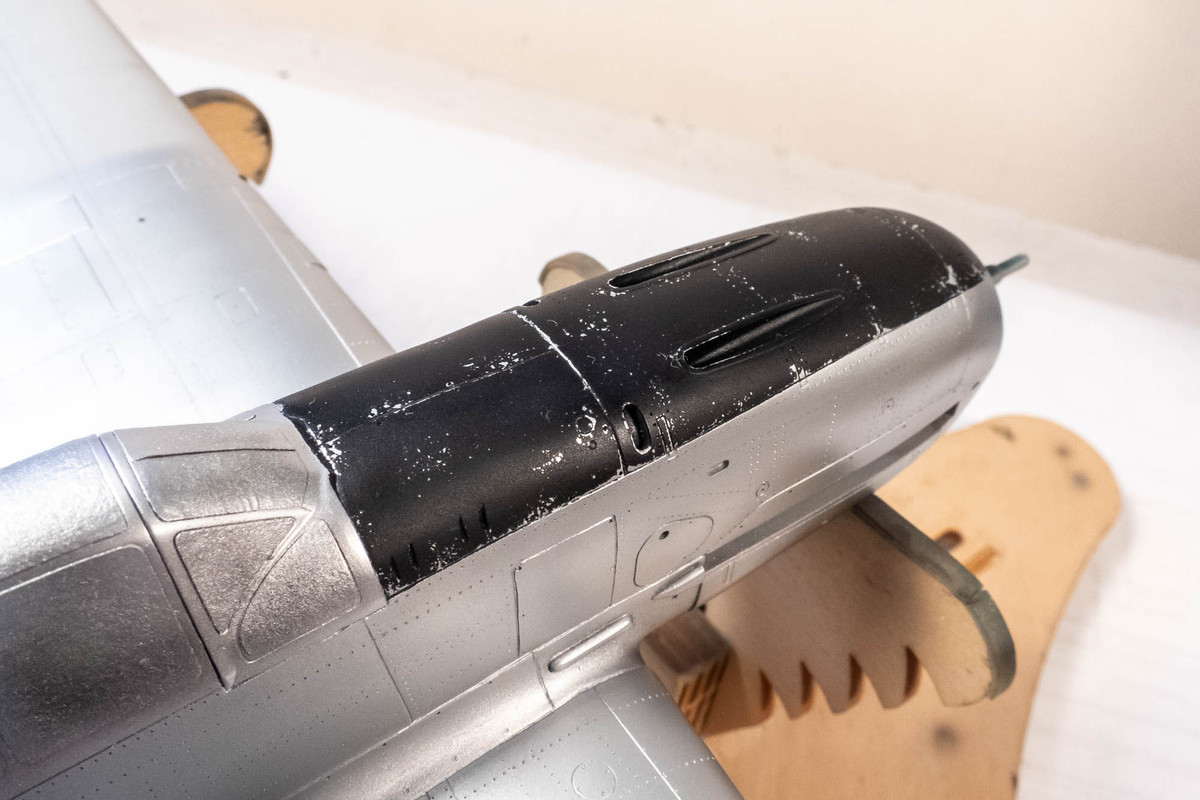
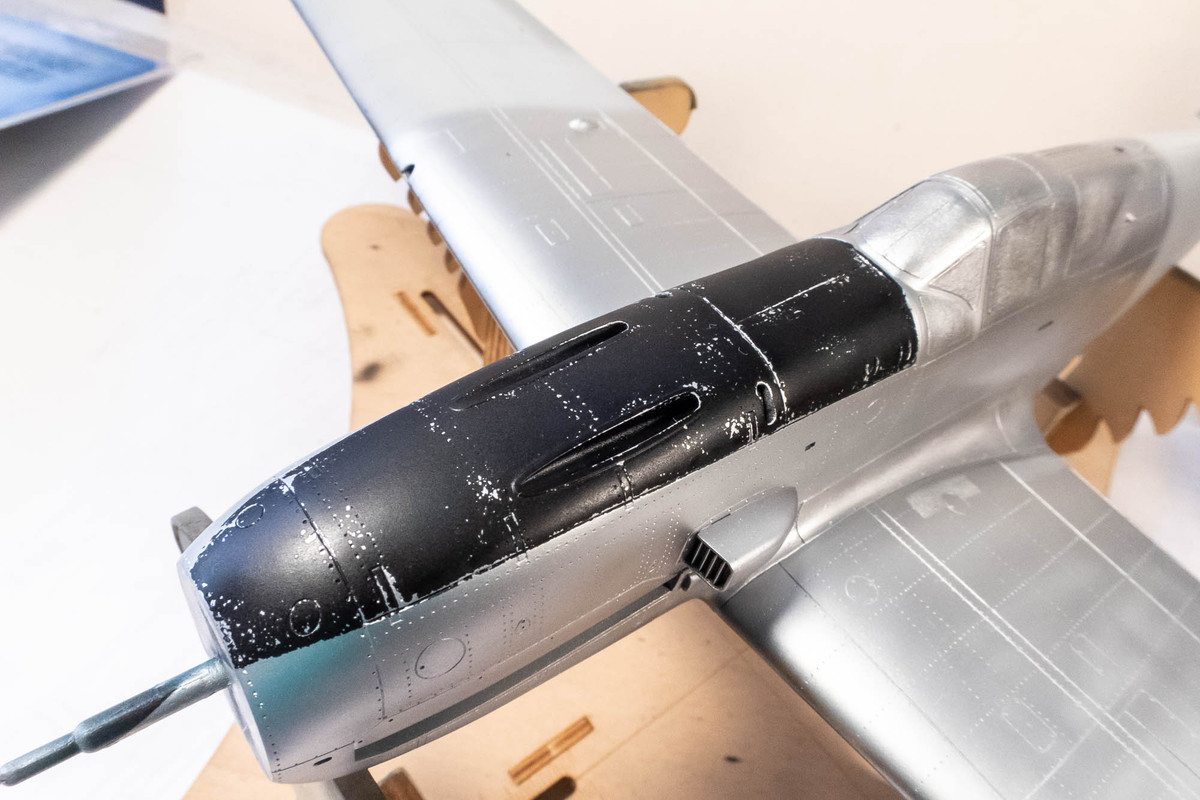
Thanks guys! After the Tamiya AS-12 has been sprayed on the top parts, I am going to isolate the black anti-glare panel first. Hairspray chipping can be a very finicky technique for me. Right now, I am comfortable in chipping one paint layer over the hairspray and I thought the best way to do the anti-glare panel was to paint it first, chip it, seal it with a gloss coat and then mask it off when it comes time to paint the darker camo color on top.
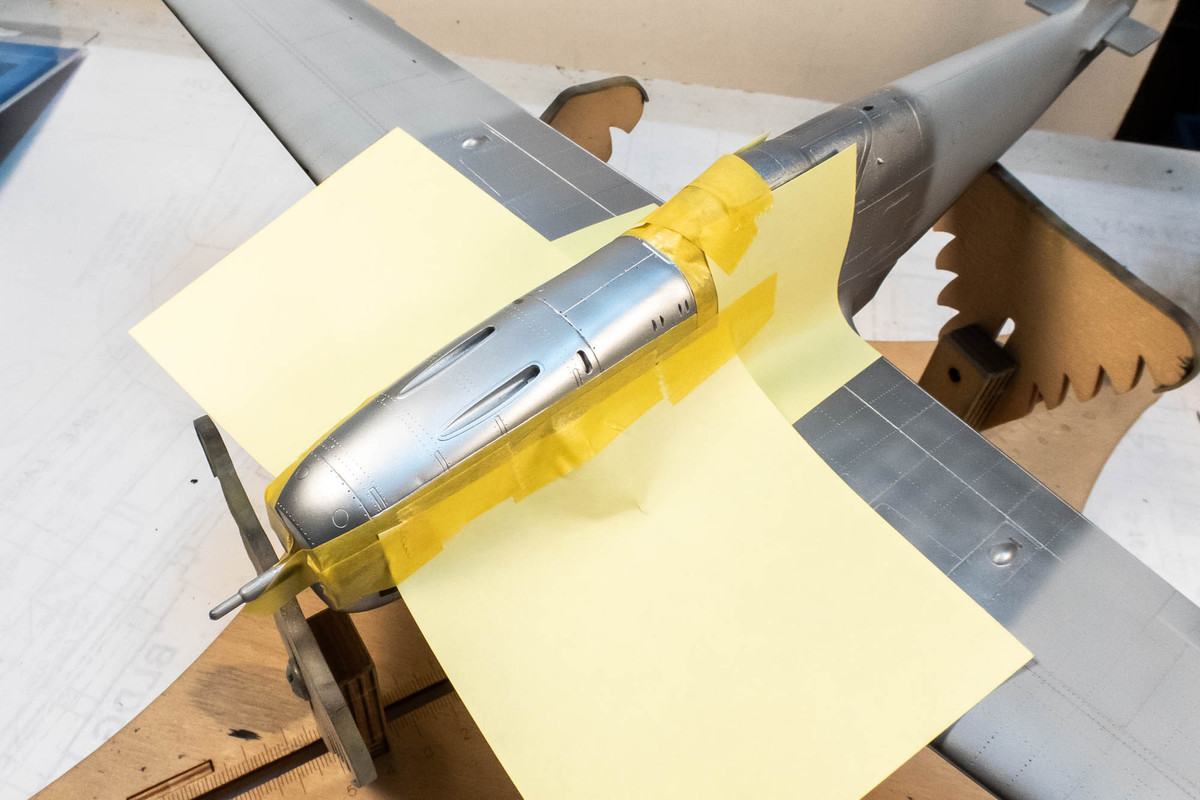
The anti-glare panel is masked off with Tamiya tape and Post-Its and then a couple of layers of hairspray are applied and allowed to dry.
The anti-glare panel is actually a blue-black, a 50:50 mix of Tamiya Flat Black XF-1 and Tamiya Blue X-4. I've gotten better hairspray chipping results with flats rather than glosses and I think that has to do with the relative porosity of a flat finish versus a gloss.
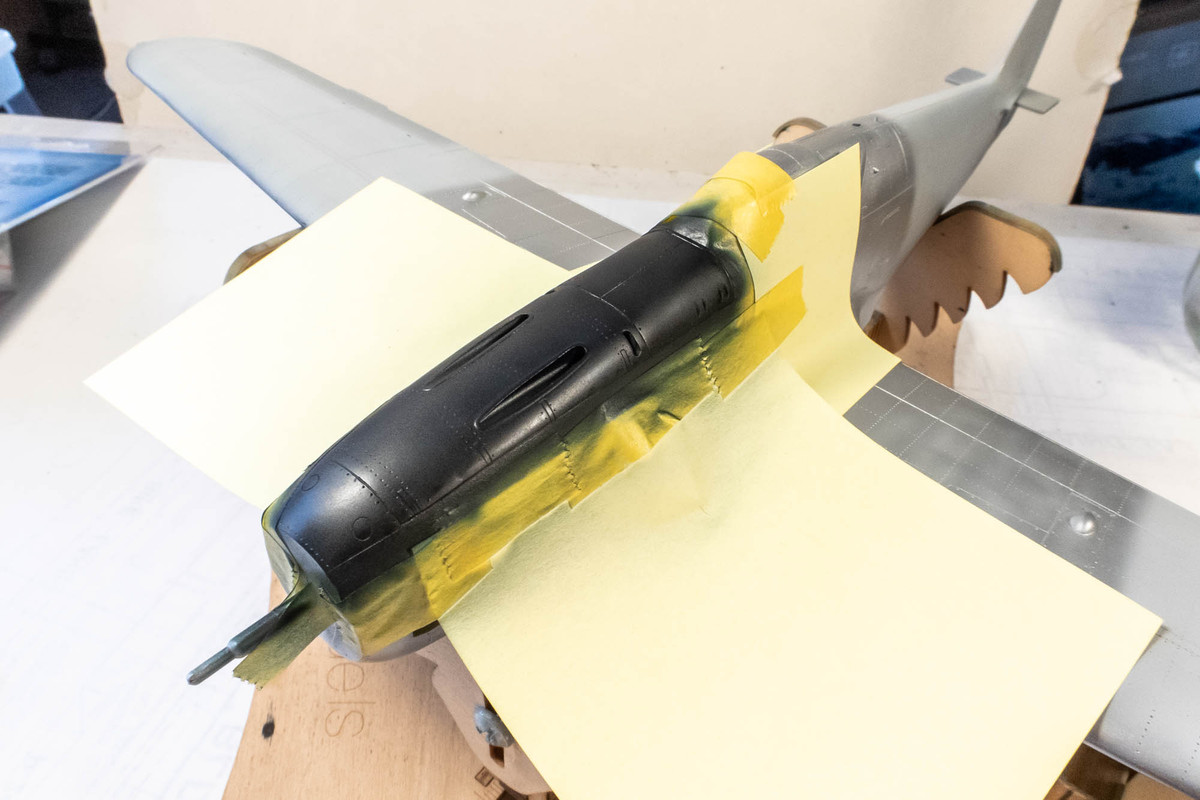
The masking is removed and I'm ready to start chipping. I use a small stiff-bristled paint brush dipped in water and start rubbing it back and forth over a small area. As the water soaks down to the hairspray, the paint layer above becomes unstable and starts flaking off. I do this in very small, focused areas. As soon as I start to get some good chipping, I STOP and blot the area dry and move to the next area. If an area gets too wet, the paint can really start coming off in bunches and you can't undo it... better to work slowly and deliberately.
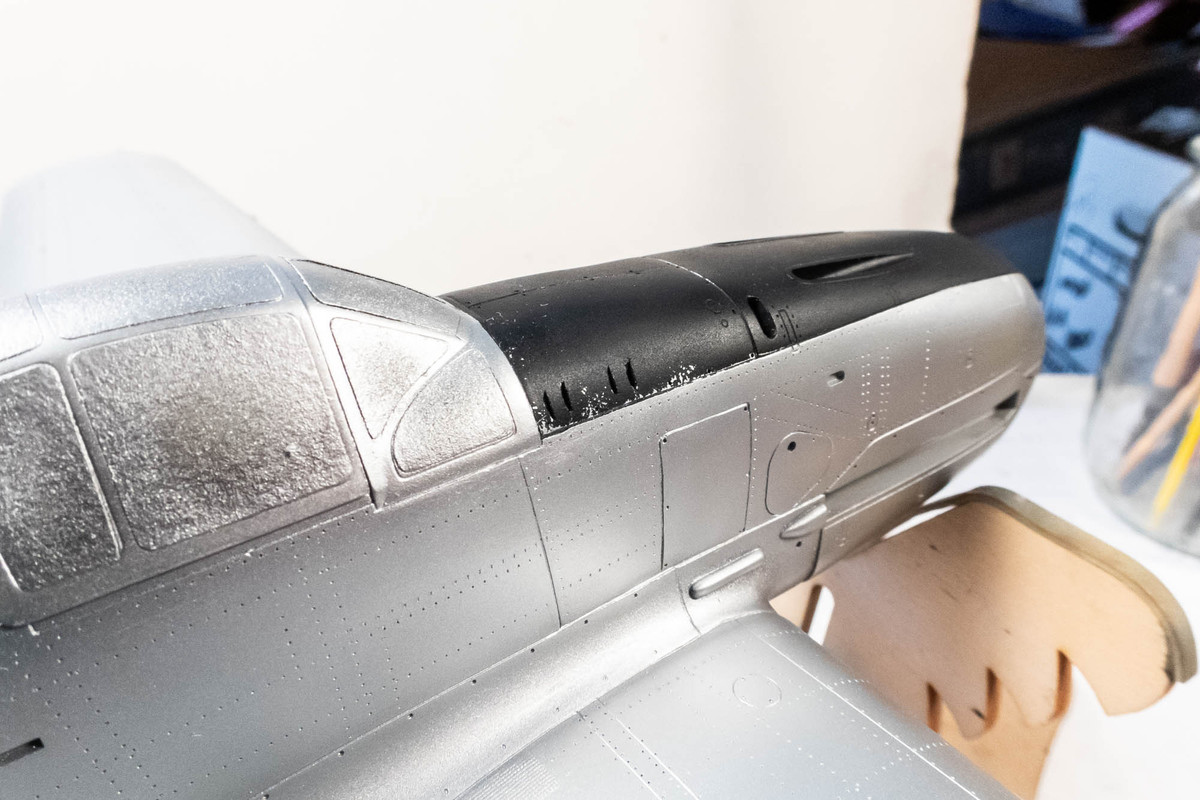
So I work my way around the anti-glare panel. I try to be somewhat systematic, focusing the chipping effects along the panel lines, hinges and rivet lines instead of being totally random.
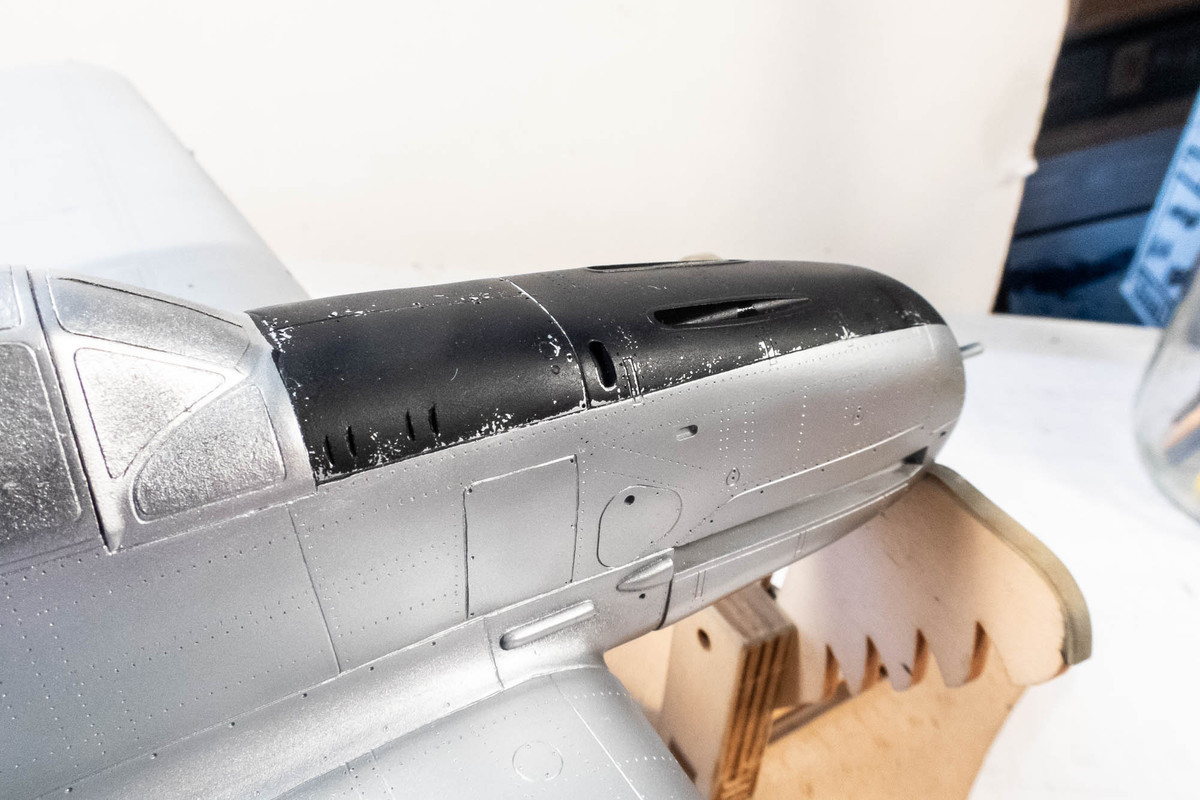
Here is the anti-glare panel after hairspray chipping has been completed. I'm going to let this dry out for a few hours and then seal it with light mist coats of Alclad Aqua Gloss thinned with 90% iso alcohol. Typically, I thin my Aqua Gloss with Mr Leveling Thinner but the last thing I want with this chipped layer is for the thinned gloss to cut down into the hairspray and create havoc in the form of spider-webbing.
The anti-glare panel is masked off with Tamiya tape and Post-Its and then a couple of layers of hairspray are applied and allowed to dry.
The anti-glare panel is actually a blue-black, a 50:50 mix of Tamiya Flat Black XF-1 and Tamiya Blue X-4. I've gotten better hairspray chipping results with flats rather than glosses and I think that has to do with the relative porosity of a flat finish versus a gloss.
The masking is removed and I'm ready to start chipping. I use a small stiff-bristled paint brush dipped in water and start rubbing it back and forth over a small area. As the water soaks down to the hairspray, the paint layer above becomes unstable and starts flaking off. I do this in very small, focused areas. As soon as I start to get some good chipping, I STOP and blot the area dry and move to the next area. If an area gets too wet, the paint can really start coming off in bunches and you can't undo it... better to work slowly and deliberately.
So I work my way around the anti-glare panel. I try to be somewhat systematic, focusing the chipping effects along the panel lines, hinges and rivet lines instead of being totally random.
Here is the anti-glare panel after hairspray chipping has been completed. I'm going to let this dry out for a few hours and then seal it with light mist coats of Alclad Aqua Gloss thinned with 90% iso alcohol. Typically, I thin my Aqua Gloss with Mr Leveling Thinner but the last thing I want with this chipped layer is for the thinned gloss to cut down into the hairspray and create havoc in the form of spider-webbing.
John aka JKim
-----------<><

-----------<><
-
BlackSheep214

- Elite Member
- Posts: 13233
- Joined: Sun Apr 06, 2014 8:47 pm
Re: 1//32 Hasegawa Ki-61-1 Tei Hien
Spider webbing via airbrush… things of nightmare I don’t like to see happen. Nor had it happen to me…..yet.
“Who controls the skies, controls the fate of this Earth”
Author unknown- 352nd Fighter Group, Blue-Nosed Bastards of Bodney
“Send one plane it’s a sortie; send two planes it’s a flight; send four planes it’s a test of airpower. - Richard Kohn
Author unknown- 352nd Fighter Group, Blue-Nosed Bastards of Bodney
“Send one plane it’s a sortie; send two planes it’s a flight; send four planes it’s a test of airpower. - Richard Kohn
Re: 1//32 Hasegawa Ki-61-1 Tei Hien
I should clarify... what I mean is spider web cracking. Like a crackling effect due to the interaction between the hot thinner and the hairspray layer. It's happened to me a few times so I've careful to avoid it.
John aka JKim
-----------<><
-----------<><
Re: 1//32 Hasegawa Ki-61-1 Tei Hien
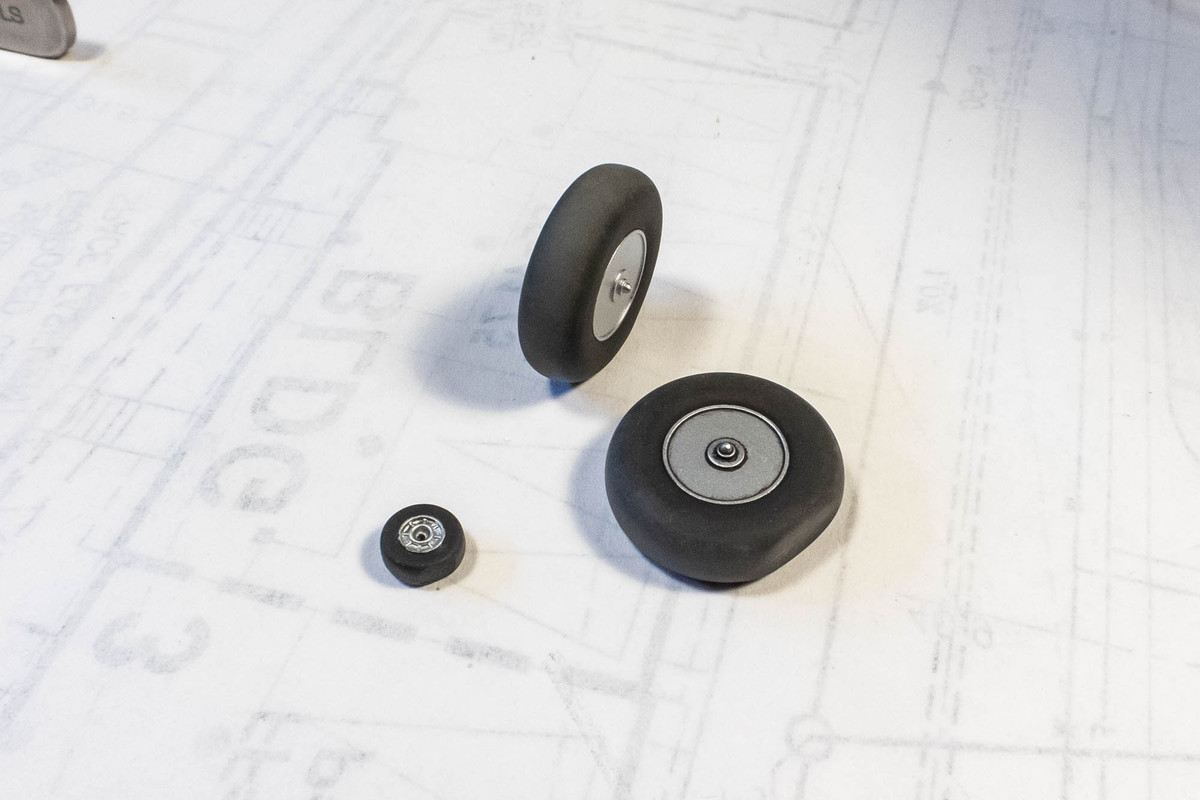
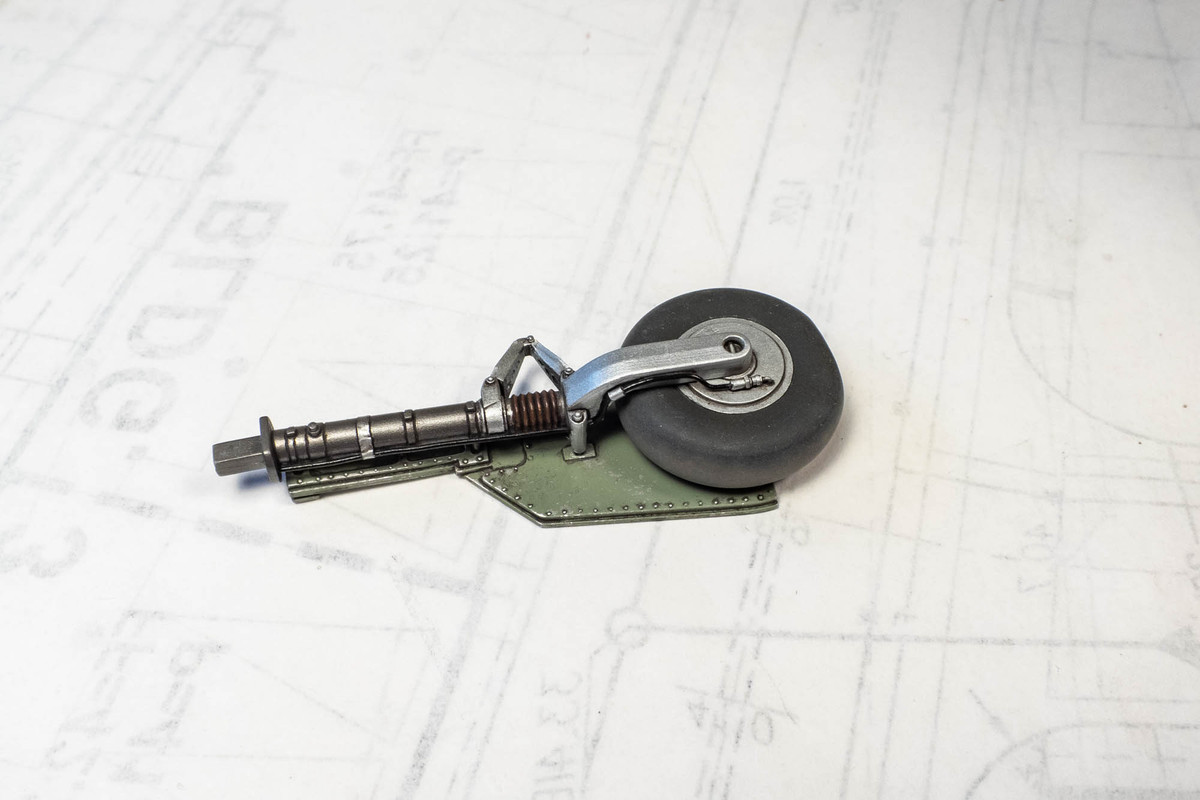
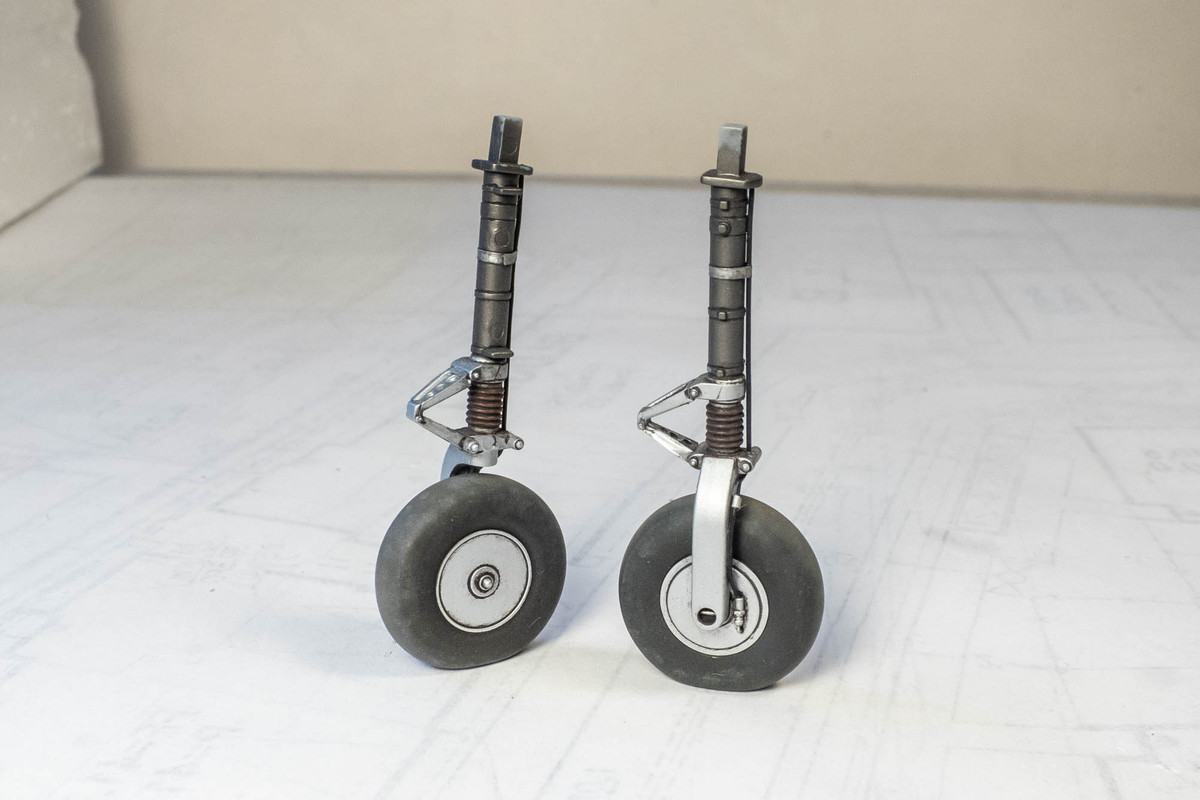
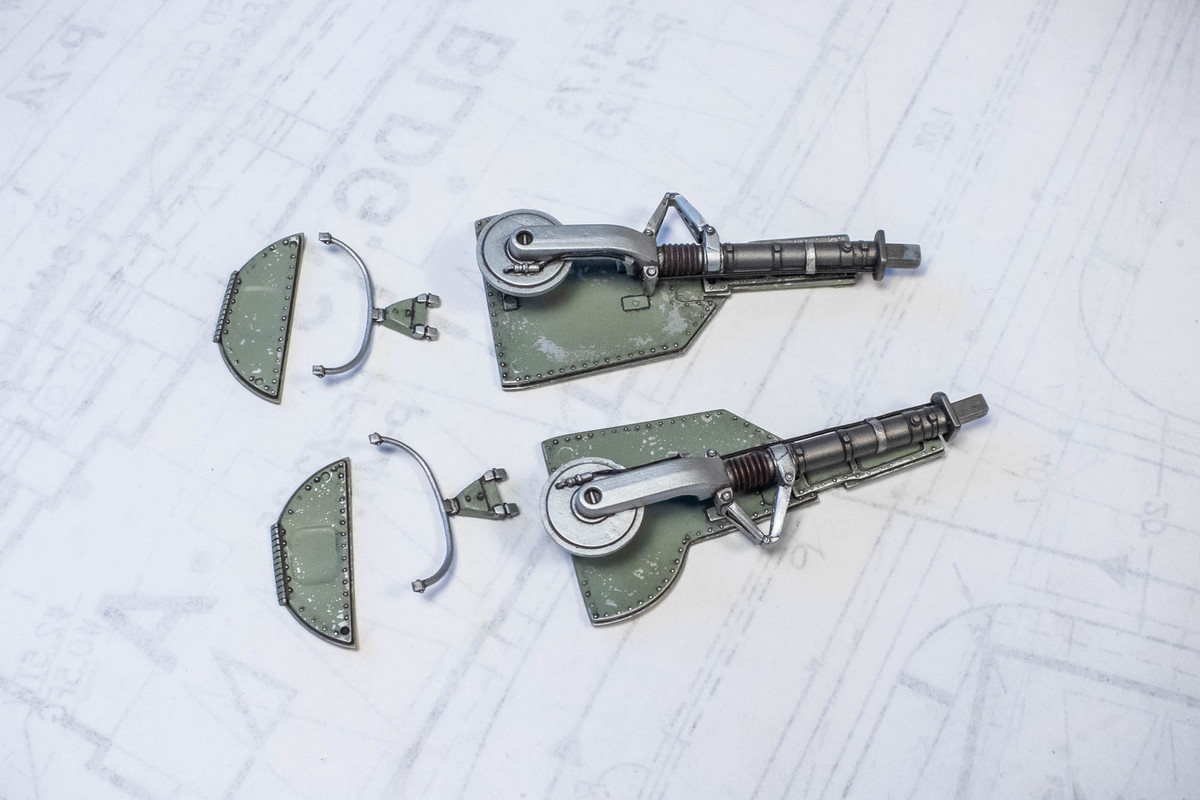
Some work on the landing gear...
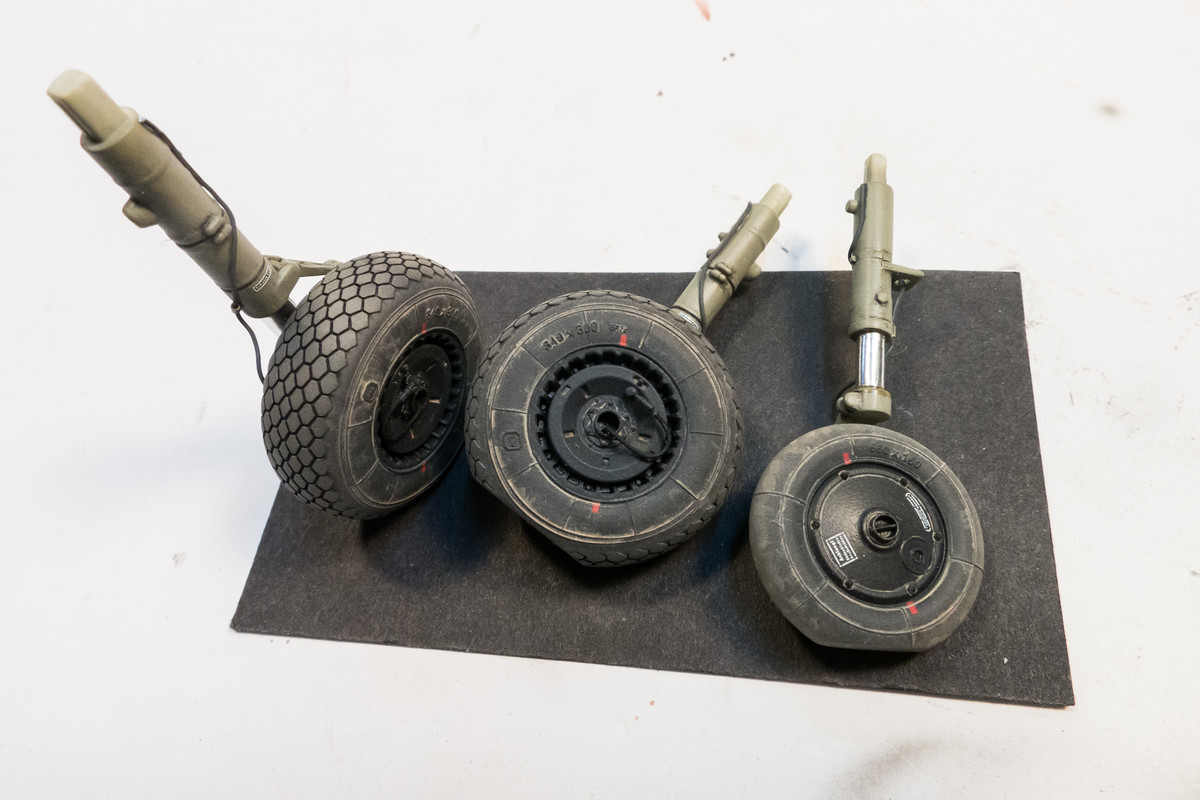
The wheels have been painted. In addition to lightening the color progressively from sidewalls to contact surface, I used a tan wash to stain the tires more... but it looks all but invisible in this photo...
The landing gear legs have been painted. I've applied a dark pastel wash but they are still glossy and need a flat coat.
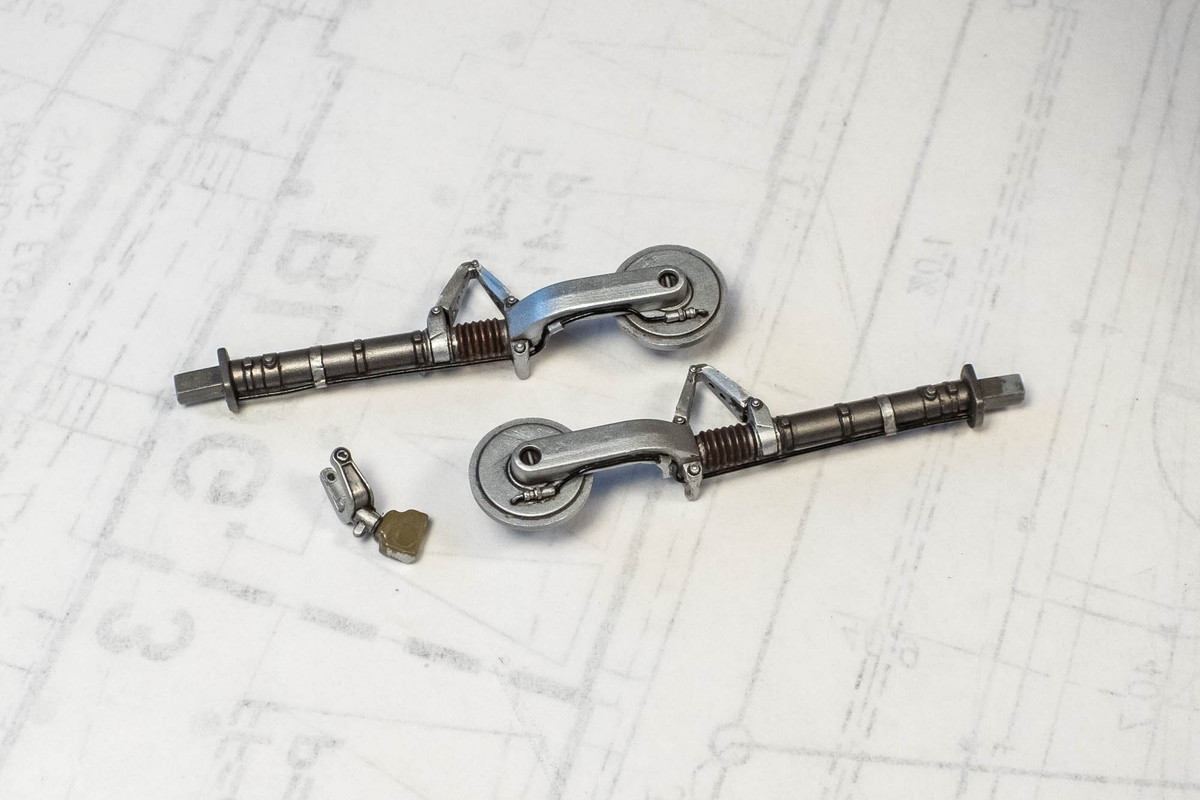
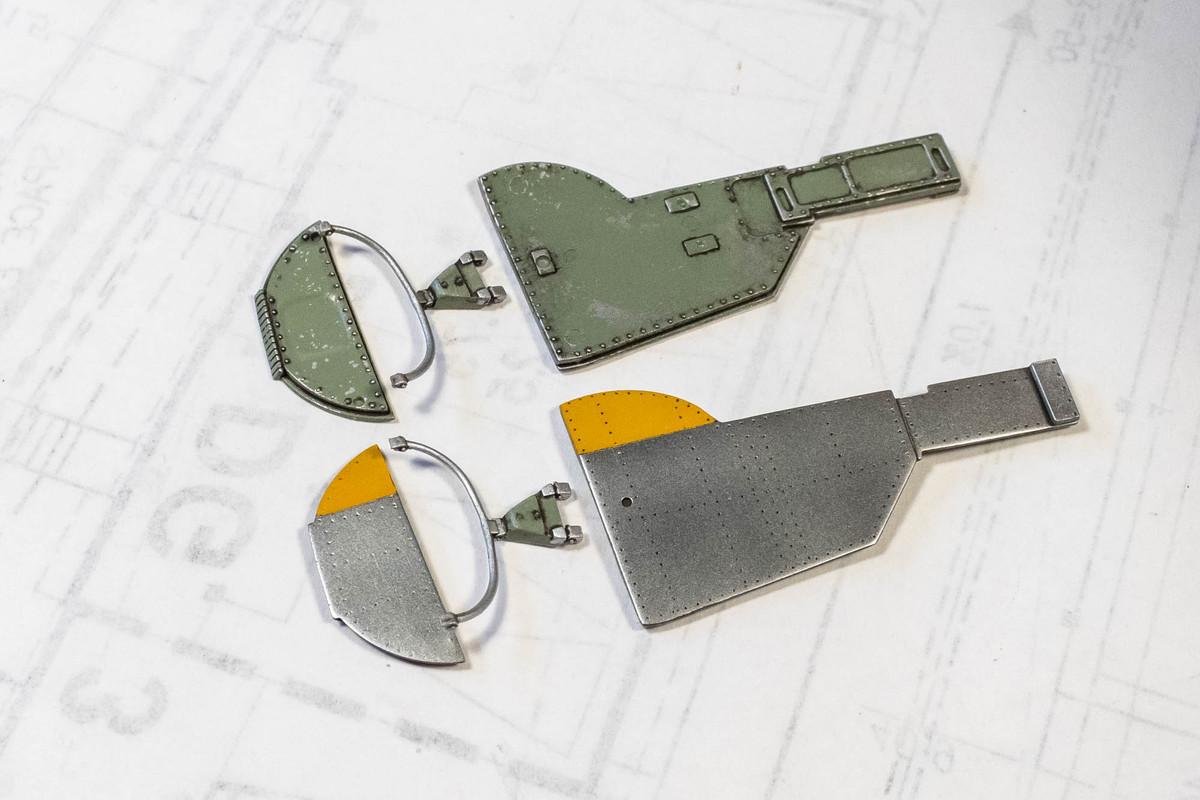
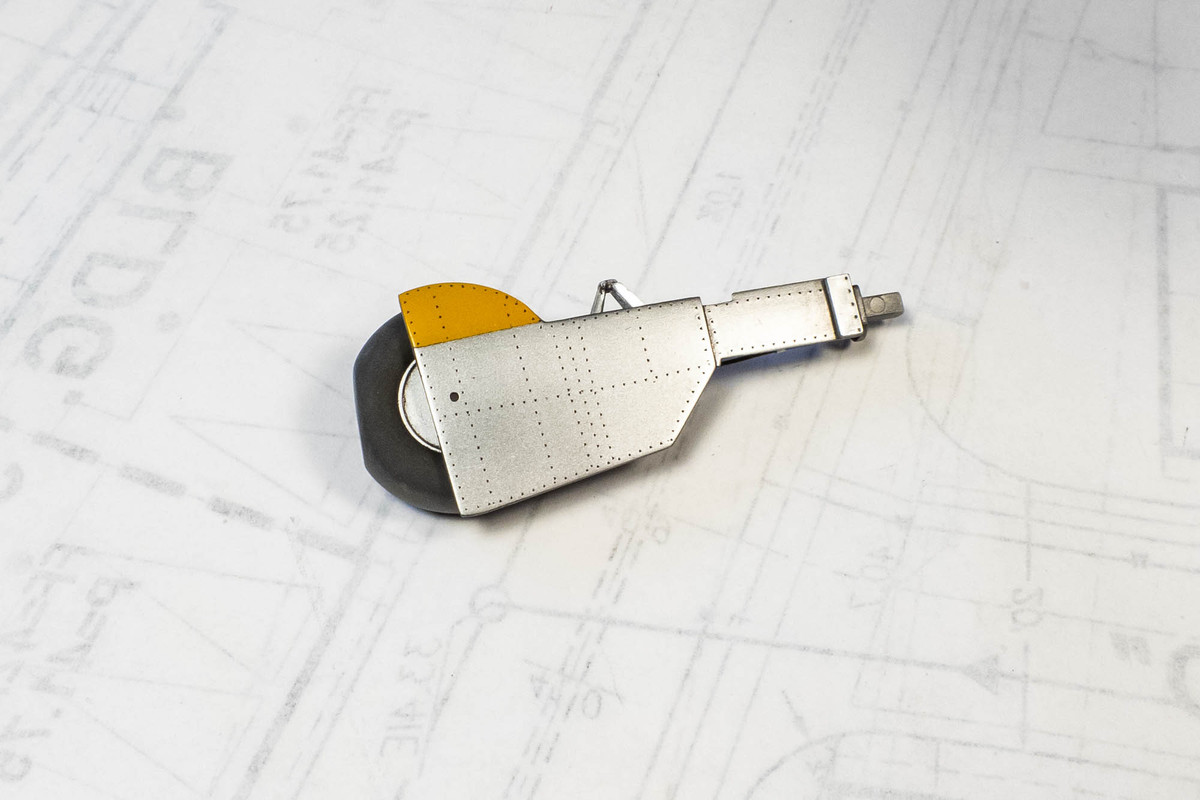
Same deal with the landing gear covers.
The wheels have been painted. In addition to lightening the color progressively from sidewalls to contact surface, I used a tan wash to stain the tires more... but it looks all but invisible in this photo...
The landing gear legs have been painted. I've applied a dark pastel wash but they are still glossy and need a flat coat.
Same deal with the landing gear covers.
John aka JKim
-----------<><
-----------<><
Re: 1//32 Hasegawa Ki-61-1 Tei Hien
The interior sides of the landing gear covers and the legs have been given a flat coat. I've been using Model Master Acryl Flat Clear, which may be out of production now?
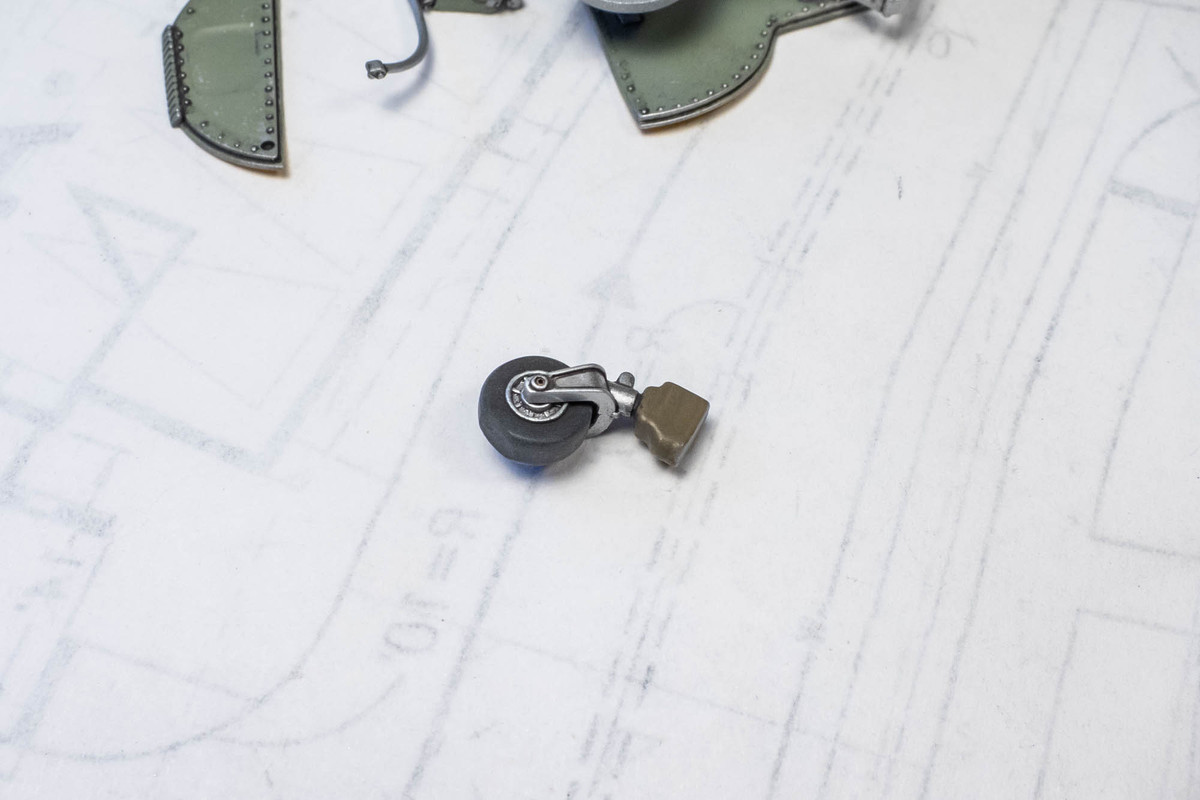
Here is the tail wheel. I've replaced the plastic pins with a removable axle made of brass tubing so that I could insert the wheel after the tail gear halves were glued together. The axle makes the tail wheel rotatable so I can align the flat spot later on.
Just to verify that I matched the inner landing gear covers to the correct side.
John aka JKim
-----------<><
-----------<><
-
Brandons_Iron

- Advanced Member
- Posts: 471
- Joined: Tue Jan 21, 2020 11:18 am
- Location: Eastern Idaho
Re: 1//32 Hasegawa Ki-61-1 Tei Hien
Wow, what a great idea for the tires. I will have to add that to the arsenal. Cool beans. 
BrandonK
If you can't fix it with duct tape, you're not using enough duct tape.
If you can't fix it with duct tape, you're not using enough duct tape.
-
Gary Brantley

- Elite Member
- Posts: 2690
- Joined: Tue Apr 08, 2014 9:40 pm
- Location: Cameron, Texas
Re: 1//32 Hasegawa Ki-61-1 Tei Hien
Looking really great, John! I'm a fan of Model Master flat clear acrylic and am down to my last bottle. Have you considered what you'll use in its stead when it's no longer available?
Re: 1//32 Hasegawa Ki-61-1 Tei Hien
Thank you sir! I wanted a way to impart some discrete edged stains to my tires since the airbrush could only give airbrushed looking effects. So I used the normally avoided issue of pastel washes sometimes staining flat finishes with tide marks as a way a way to do this. I've used this on a few build now...Brandons_Iron wrote: ↑Mon Jul 17, 2023 2:41 pm Wow, what a great idea for the tires. I will have to add that to the arsenal. Cool beans.

Thanks Gary! I have NOT considered this inevitability yet! I think I have two bottles left. I'm gonna keep my eyes and ears open and see if I can find a suitable replacement in that time. I like the MM Acryl because it is compatible with my gloss (Alclad Aqua Gloss). I can actually mix the two to get in-between finishes such as satin. I'll let you know if I find something good and I hope you do the same for me!Gary Brantley wrote: ↑Mon Jul 17, 2023 3:02 pm Looking really great, John! I'm a fan of Model Master flat clear acrylic and am down to my last bottle. Have you considered what you'll use in its stead when it's no longer available?
John aka JKim
-----------<><
-----------<><