Re: Maddog Manufacturing Opening for 2026
Posted: Tue Jun 09, 2026 3:52 am
Thank you Stuart! You're just in time for another tour!
I know it's only been a short time and not too many people have taken the last tour, but I managed to get so much more done, I'm ready to start another one. All who wish to join me, please board the trams and get ready for another busy tour.
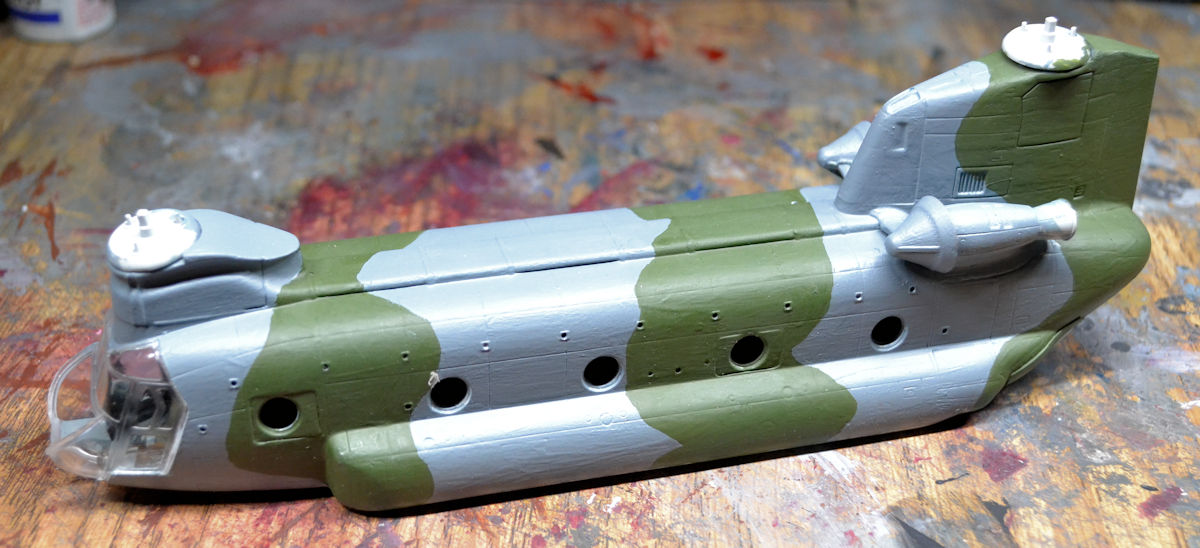
Starting once again in the Hangar, we have the Italian CH-47 Chinook getting the canopy on and some additional touch up on the paint in this first bay:
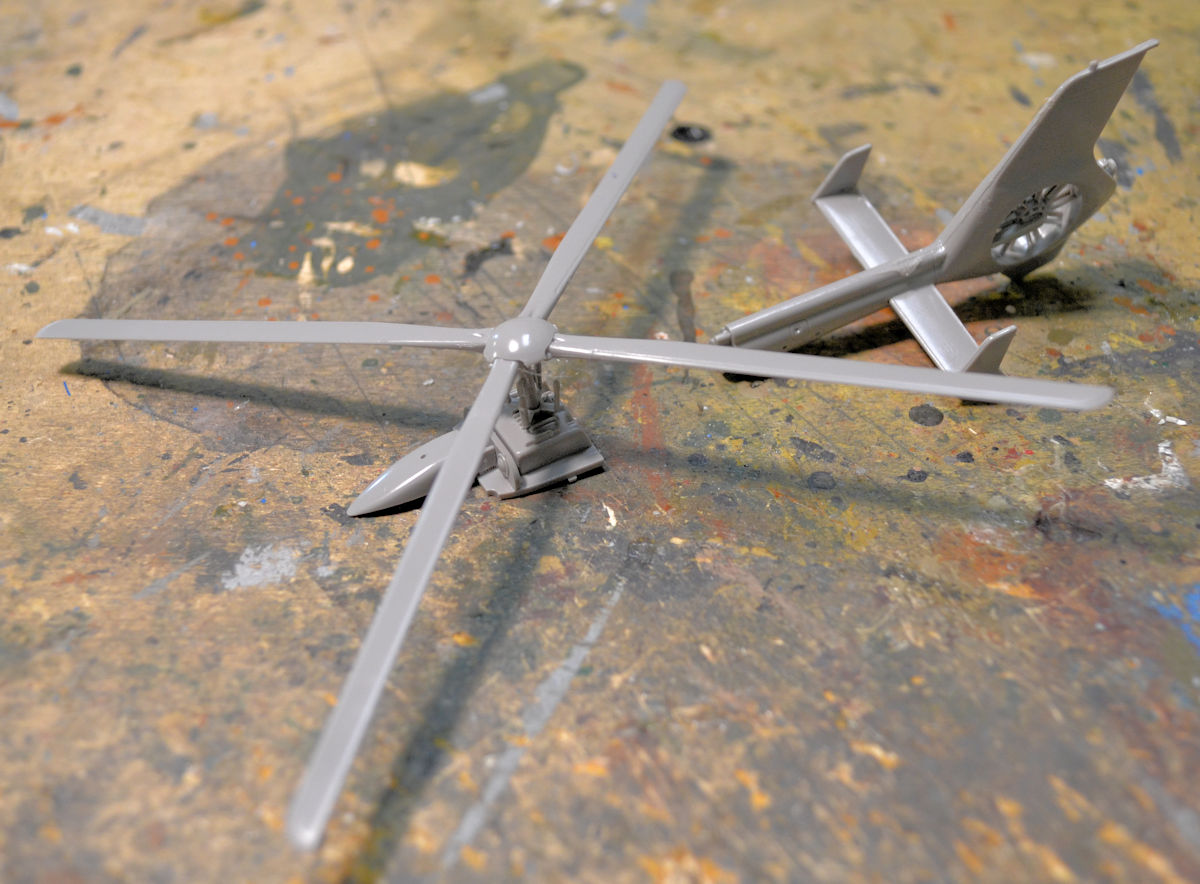
In these next bays, we have a few freshly started projects going, starting with this Iraqi Eurocopter in this next bay. I finished the interior, but the pic didn't turn out, but these shots of the tail and the main rotor did:
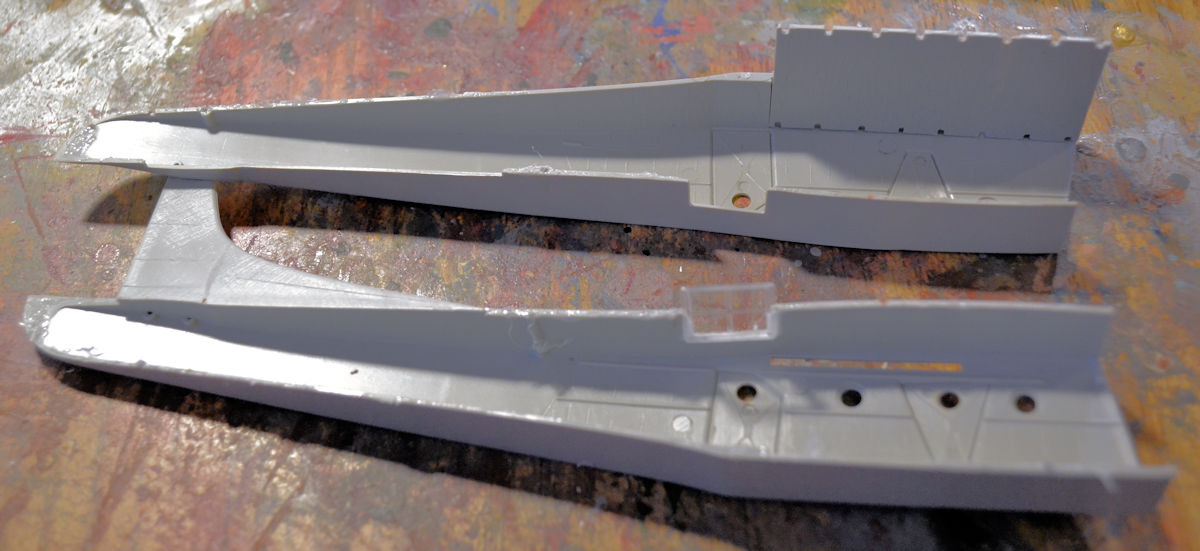
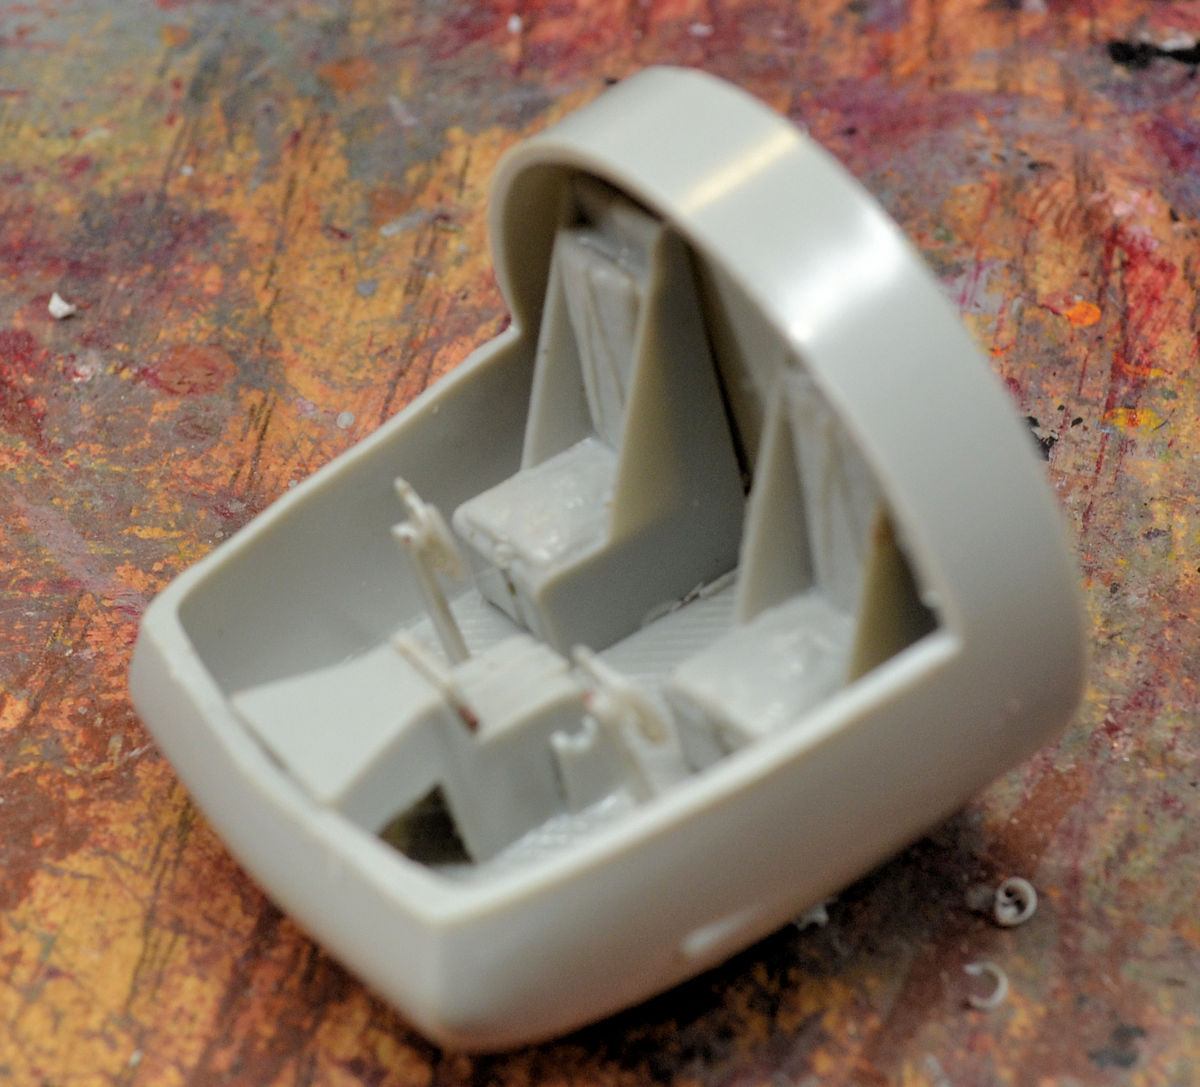
In the next bay, we started a US Army Waco glider, starting with the fuselage with some interior. I didn't do much in the interior because it will barely be seen through the tiny windows:
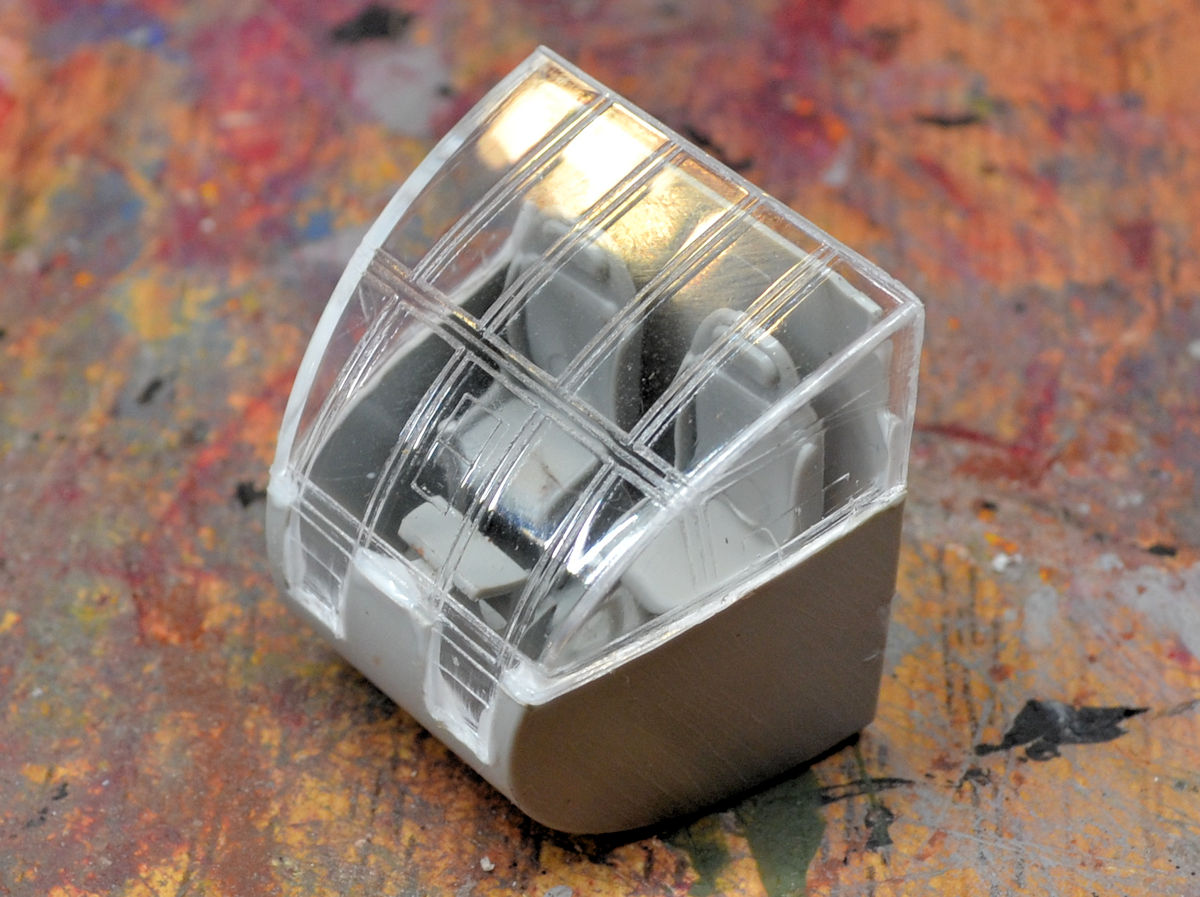
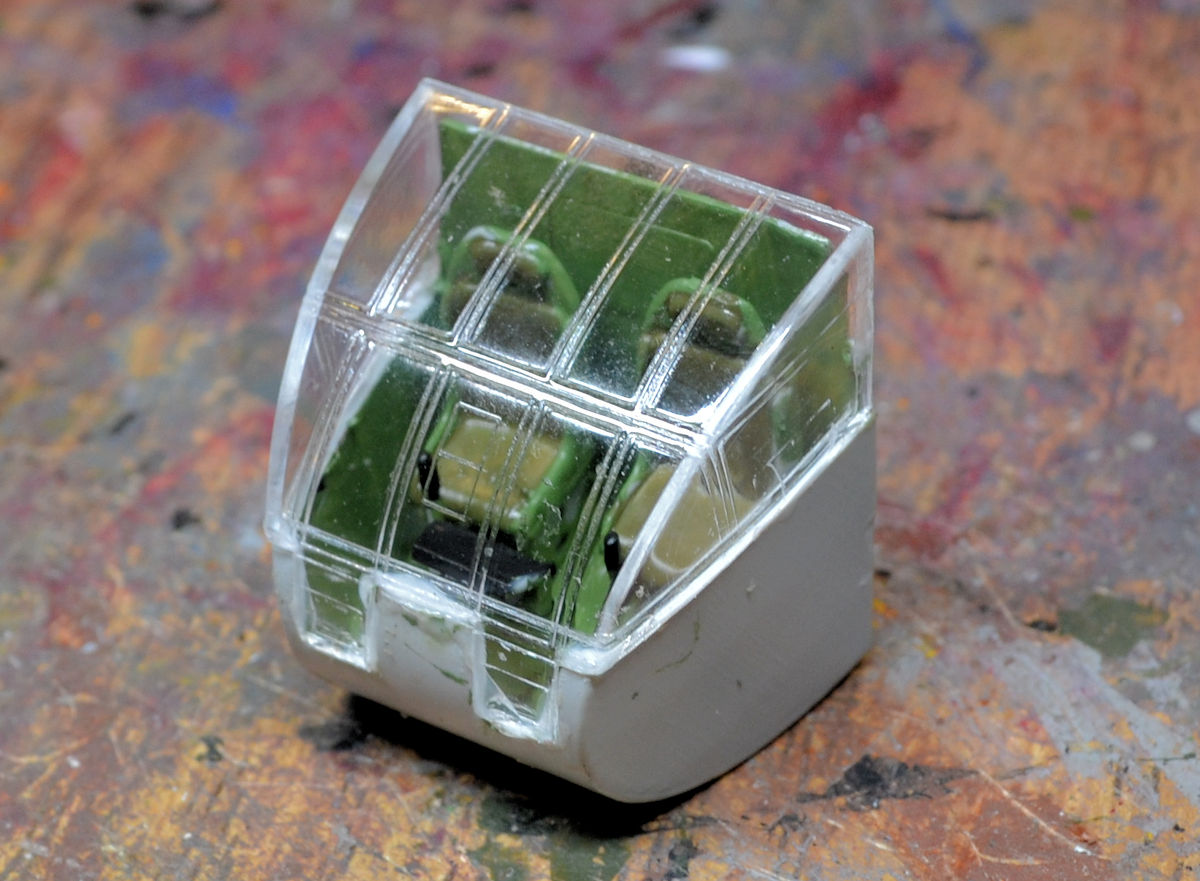
Later the cockpit was done so I also decided to dry-fit the canopy to see how well it will fit. Pretty good so far:
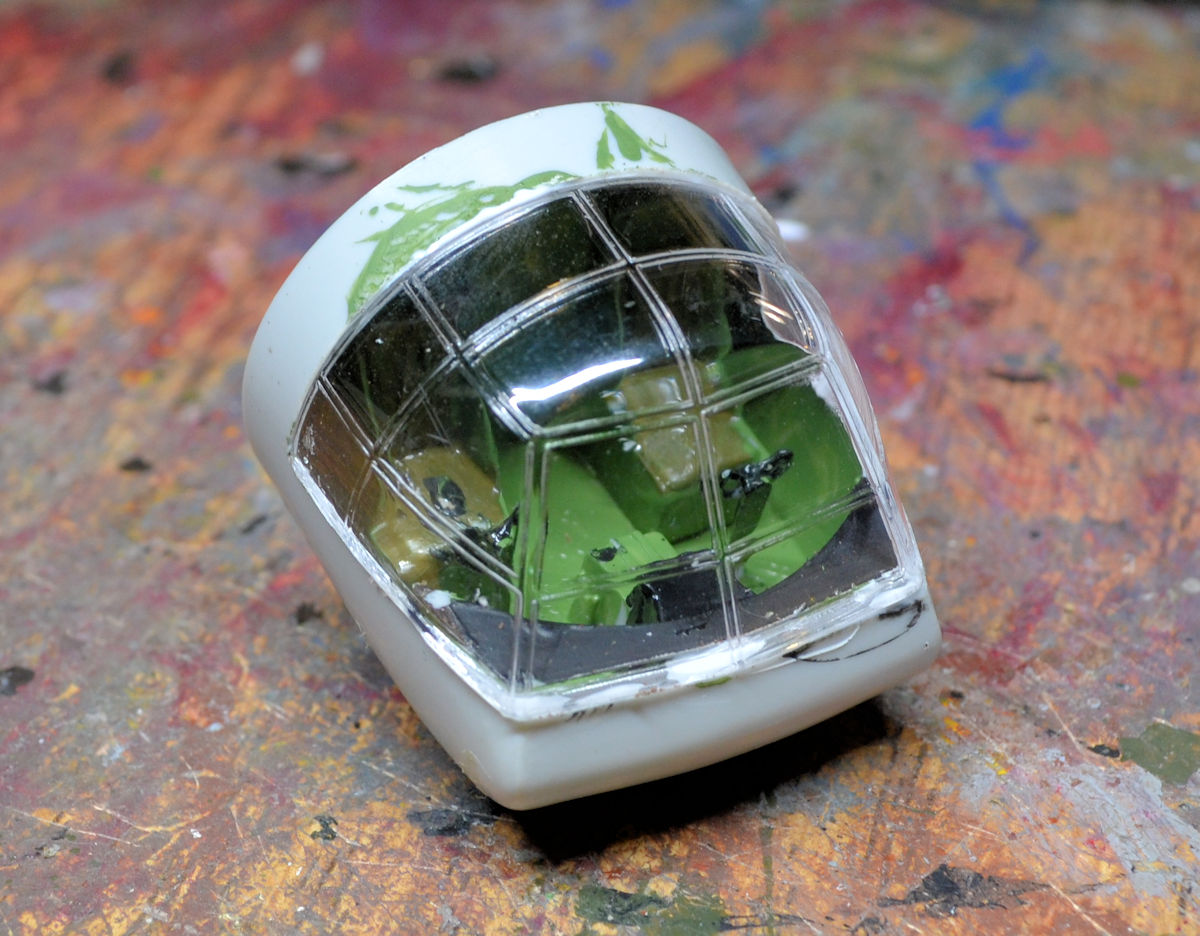
Later the cockpit was painted up and the canopy glued in place:
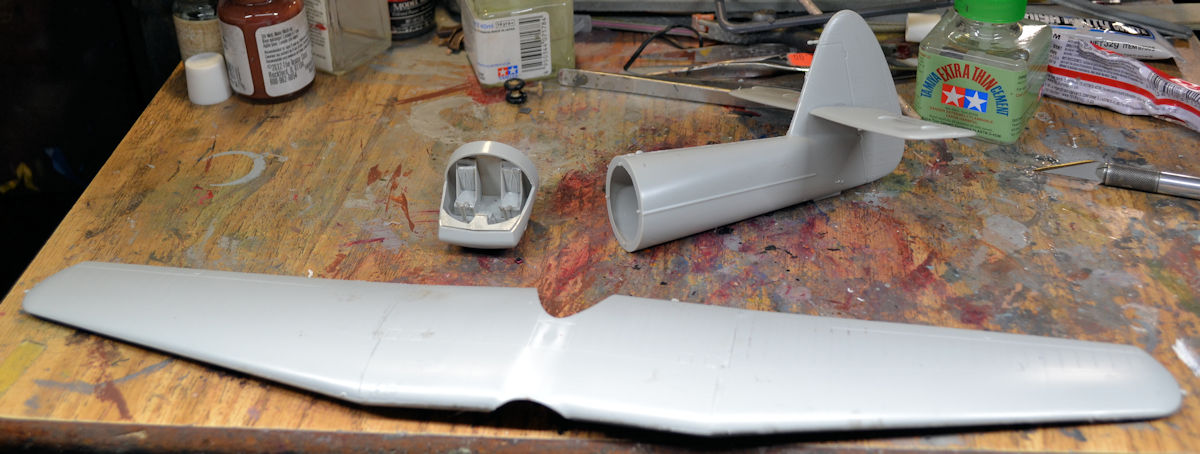
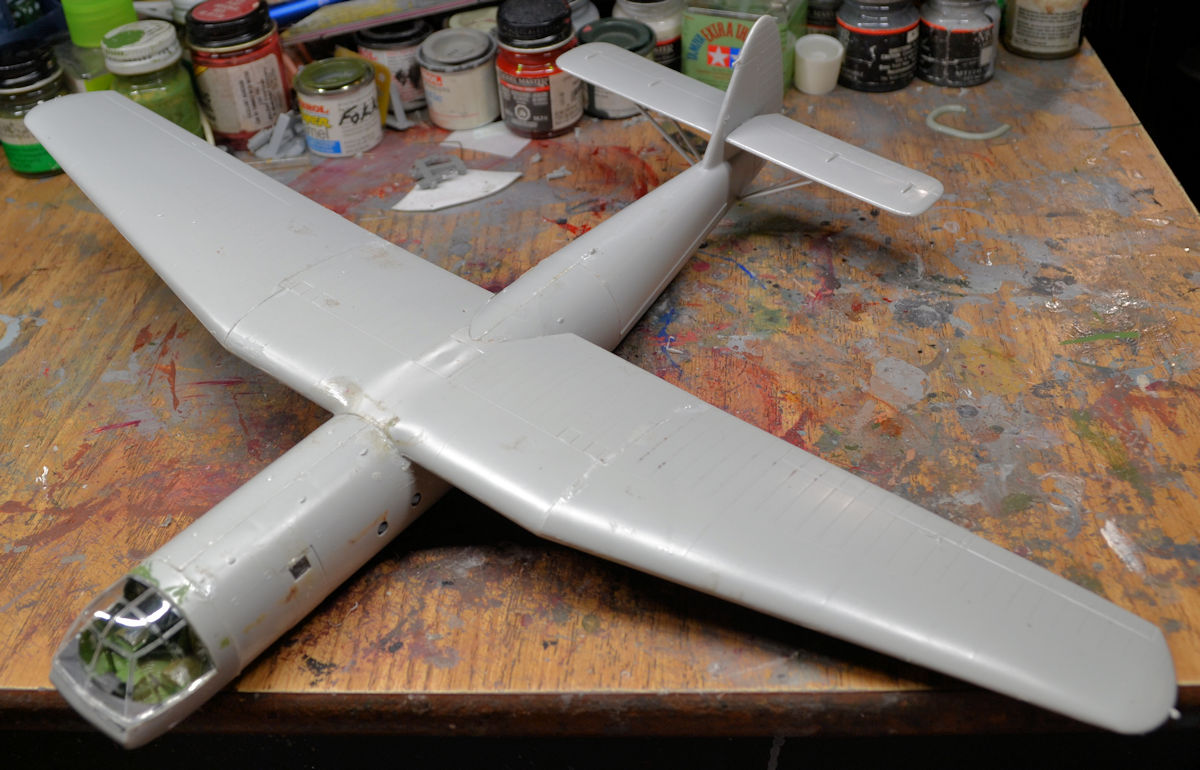
Finally, everything was assembled except landing gear to make it ready for paint:

In the last bay here, I started a British Horsa Glider as well since if I have a Waco, I should have a Horsa too. With these last two completed, I'll have gliders from all four major combatants in Europe during WWII. First of course was the cockpit:
Picture's not the best, but you get the idea. Later that was painted and the canopy installed:
Before that, I had also assembled the wings and tail sections too:
Finally, everything was put together to prepare for paint:
That concludes the Hangar portion of our tour, now on to the Shipyards...
Here in the Shipyards, this first slip had more progress done on the USS Springfield, getting paint and final detail parts on:
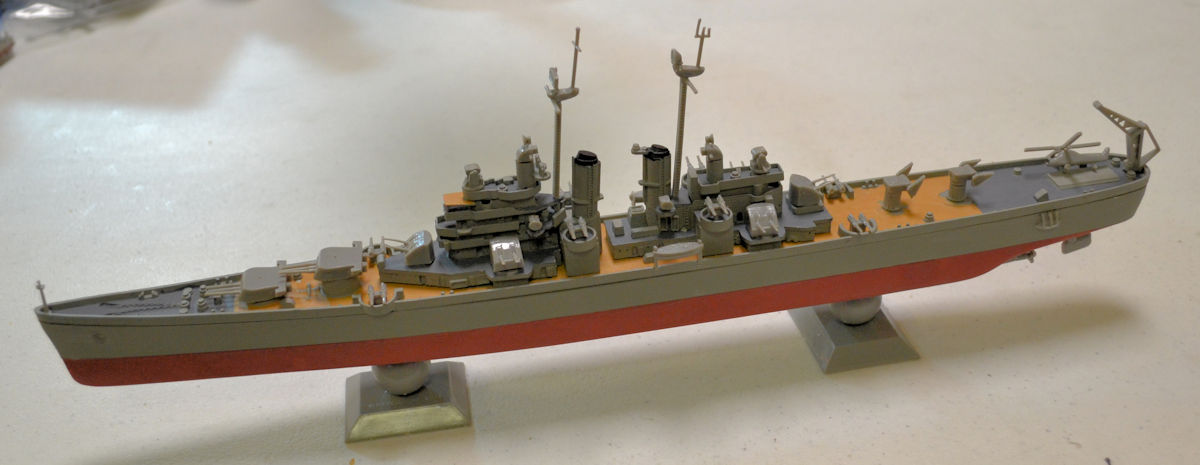
Of course, some additional painting will be needed, but she's getting close to launch
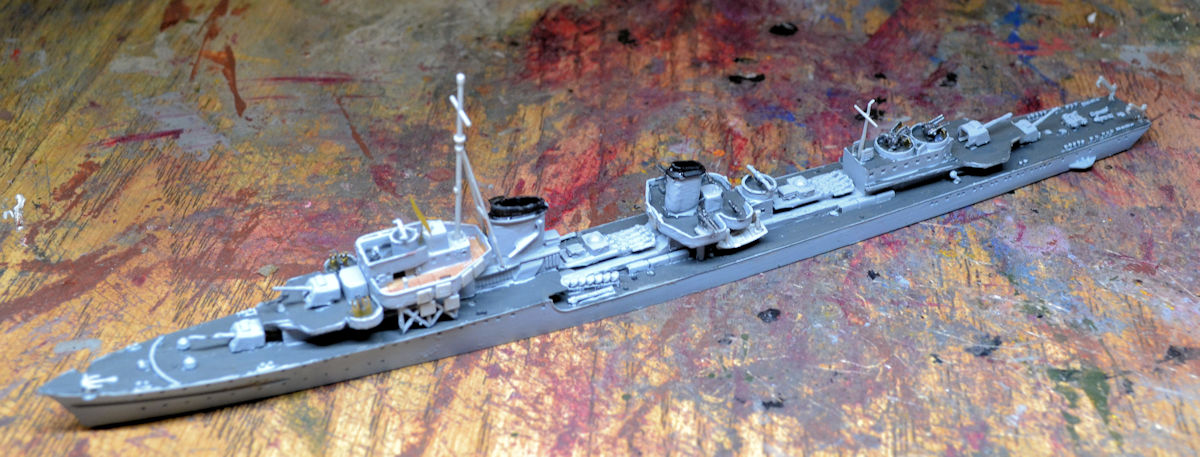
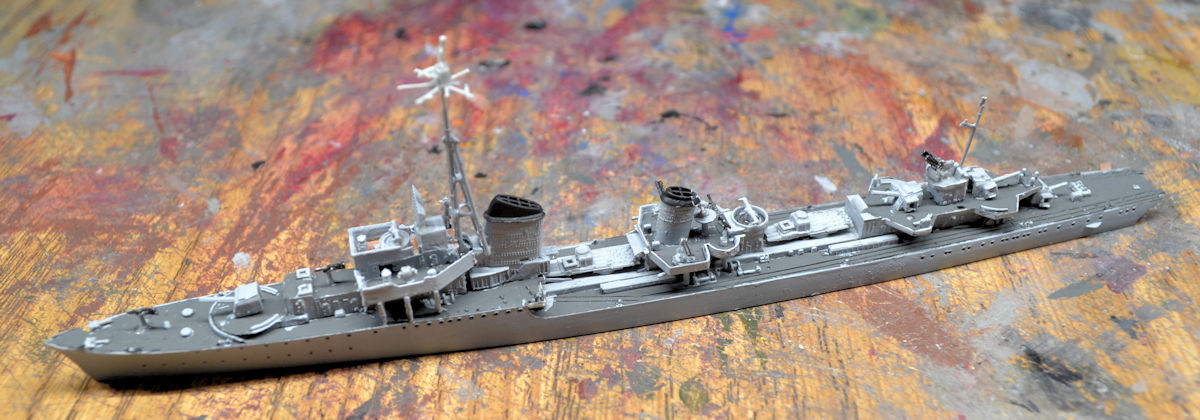
In the next few slips, we have all our German destroyers under construction. I found another one I didn't know I had, the German Z-7 so I laid the keel for that and started building it up:
Later came paint, more detail parts and even some photo-etch:
That photo etch was a ridiculous exercise in frustration! It's far to thin and delicate to keep straight and I barely even got it to stay on the model! Nevertheless, I added some more, and touched up some additional parts and got this closer to being done:
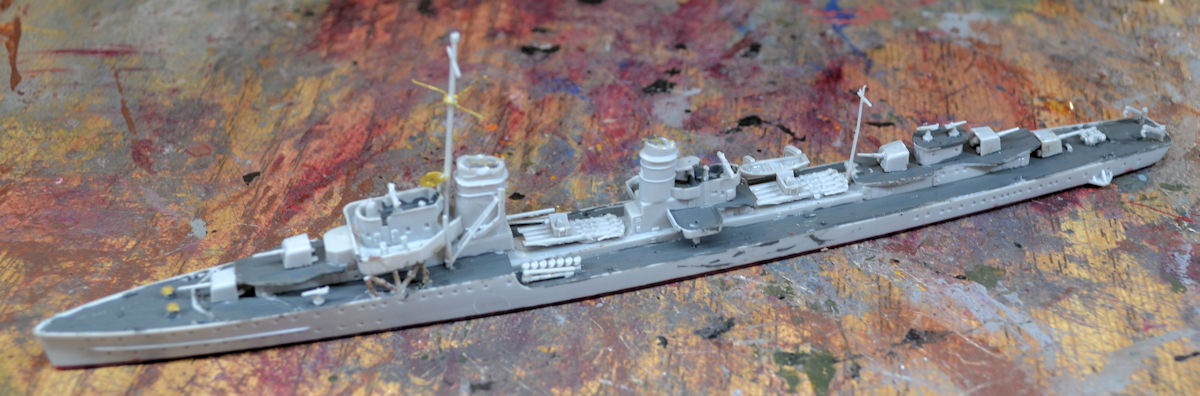
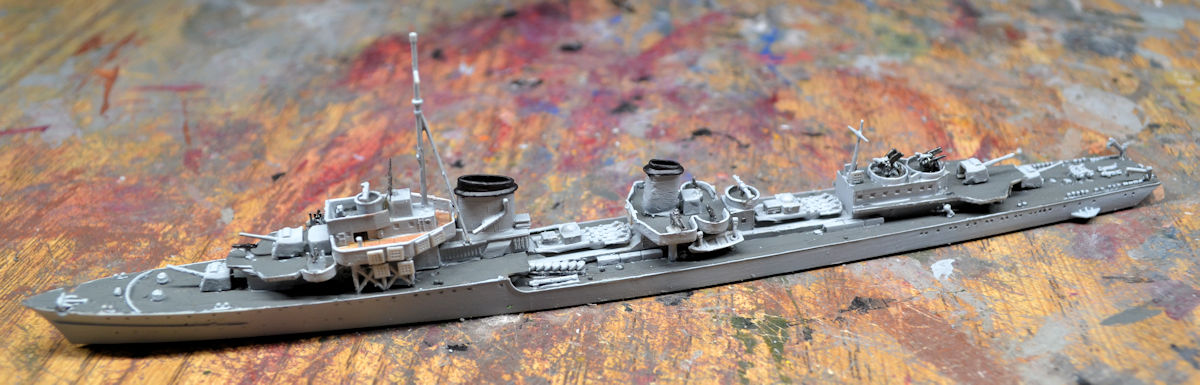
The next slip has the German Z-28 which got more paint and some details:
Antenna masts and final details went on next, all that's left is additional touch up paint:
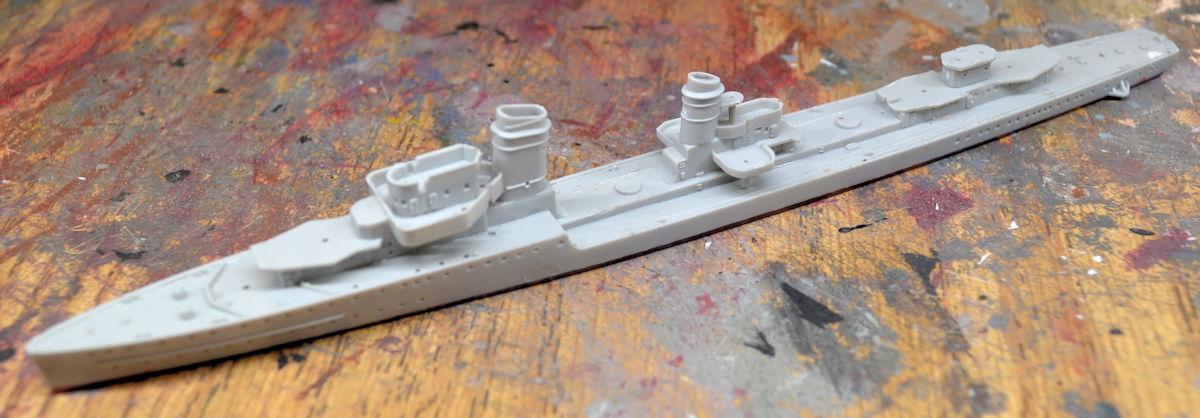
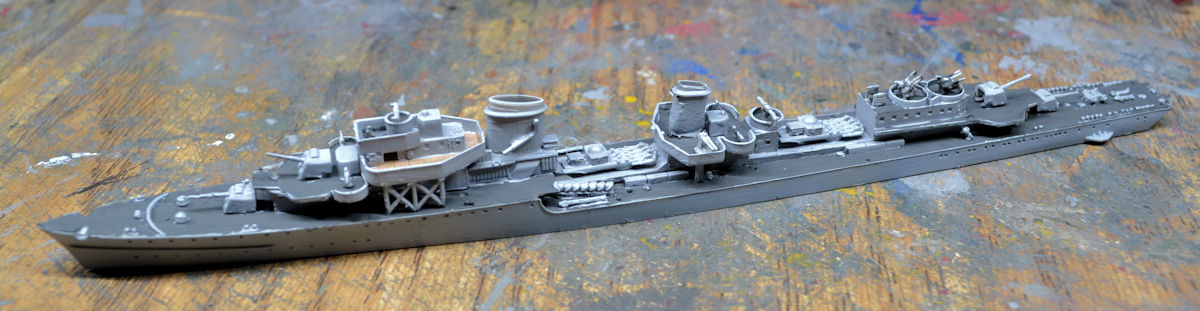
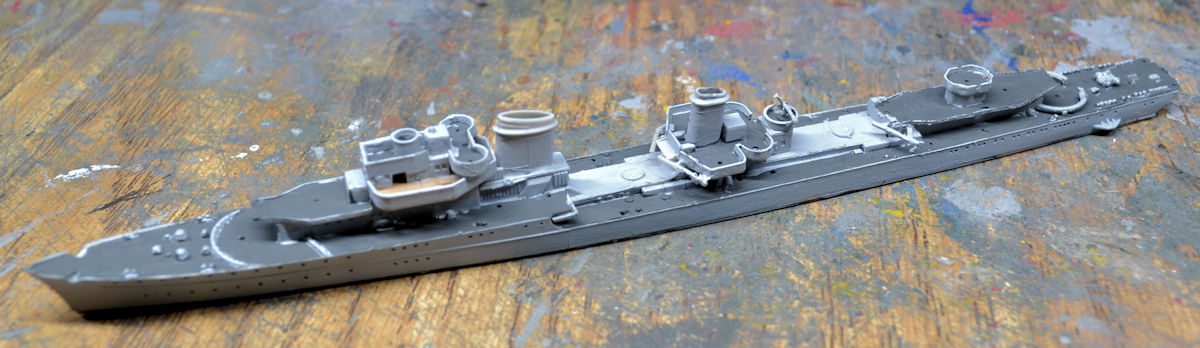
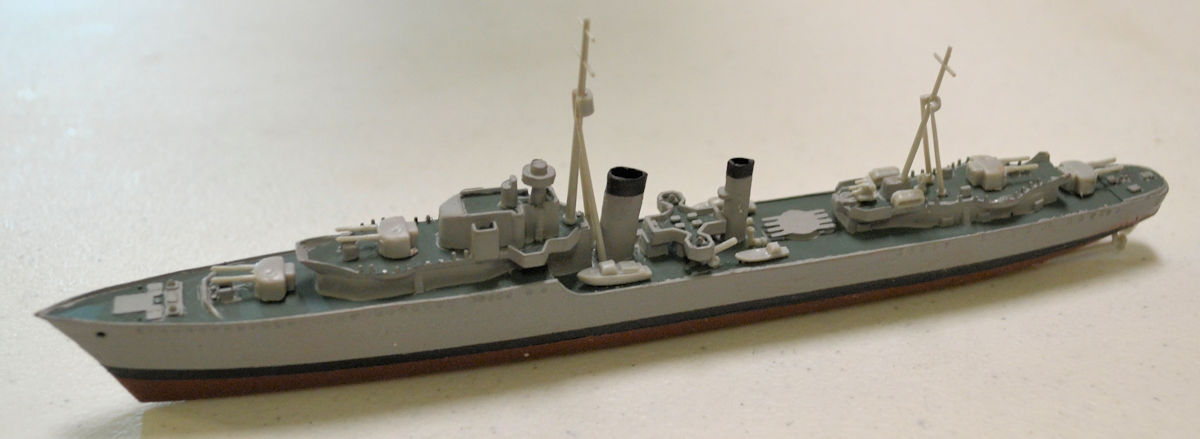
The next slip has the German Z-31, getting it's first coat of paint before additional parts go on:
Later all her weaponry, detail parts and masts went on and got painted for the most part:
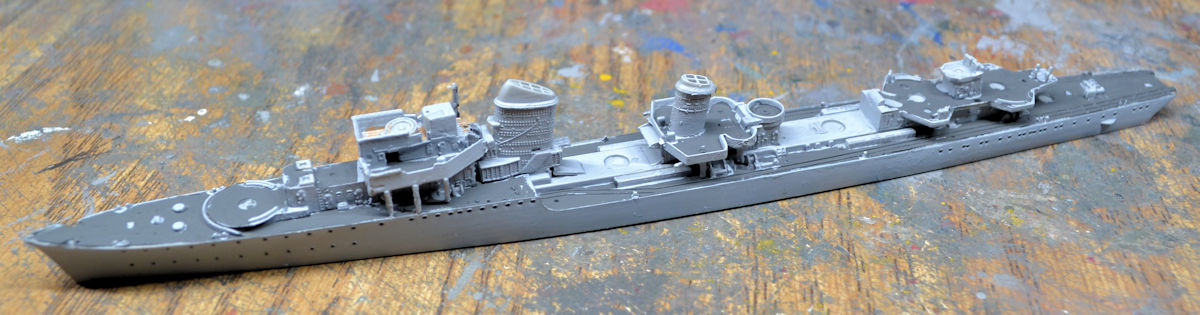
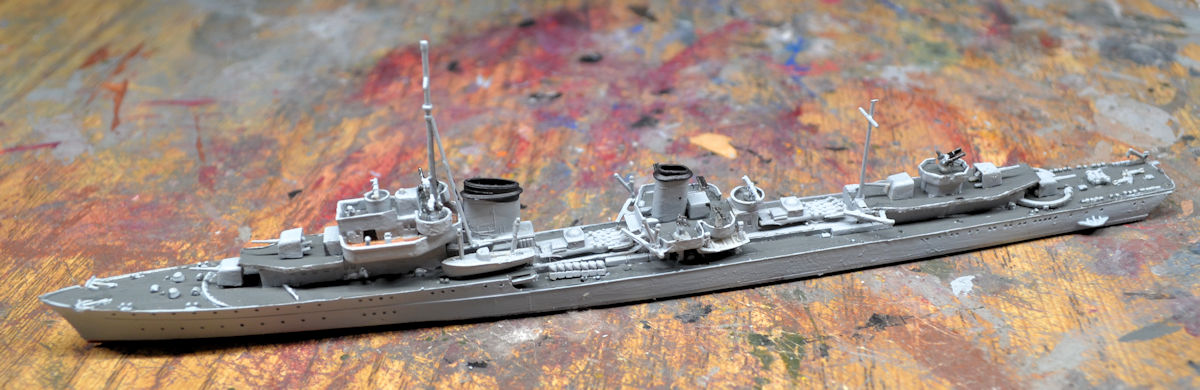
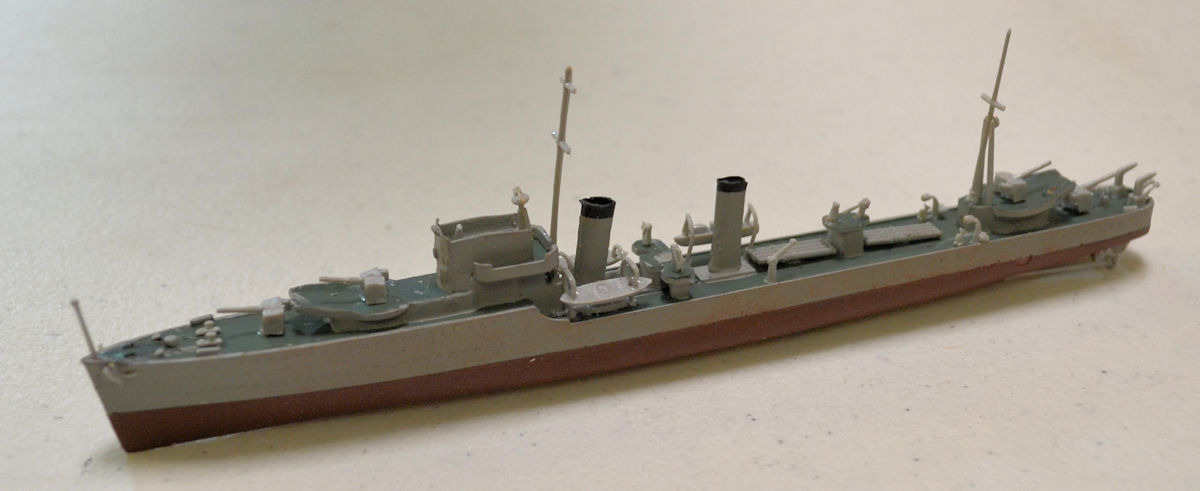
Finally in this next slip is the German Z-43 getting it;s first coat of paint before details were added:
Later the details were added and some additional painting done. Like the others, this one is getting close:
Now we move onto the next slips that have my British destroyers in progress. First up, the HMS Cambletown getting painted and details added:
Followed by the HMS Hotspur in the next slip getting the same:
And in the next slip, the HMS Cossack got the same treatment:
These Airfix kits are pretty basic but they were the only opportunity to get these ships back in the day. I'm loving this getting them finished!
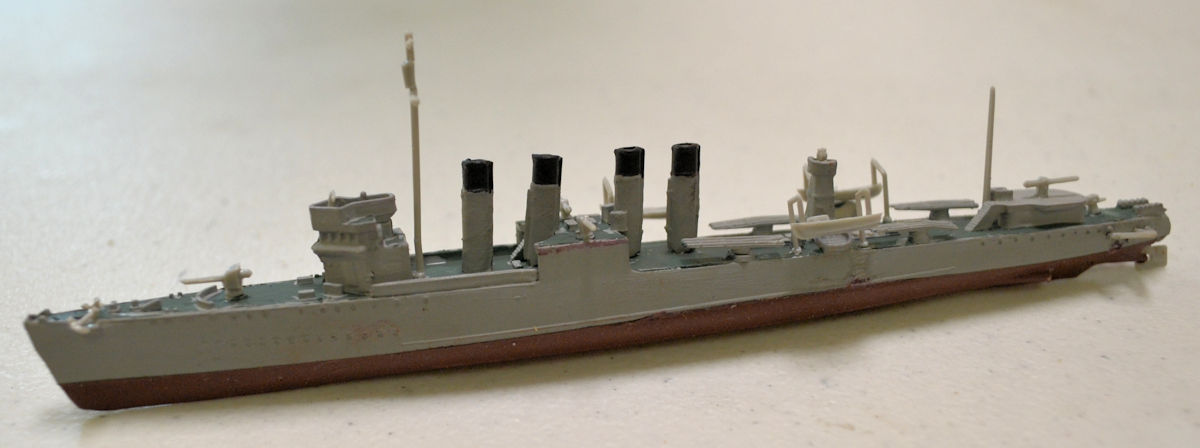
Finally in this last slip, I started this tiny Japanese MSDF ship that I found in the stash. I found it interesting in that the box art has the LST 4151 in the background that I'd previously finished! It went together very fast:
That concludes the tour of the Shipyards, now on to the Motor Pool.
Here in the Motor Pool things have picked up a bit, with a few new projects started while working on previously started models.
In the first bay here we have the German KF-51 Panther getting it's roadwheels installed:
The turret was then assembled and later added to the hull to see how it looks so far:
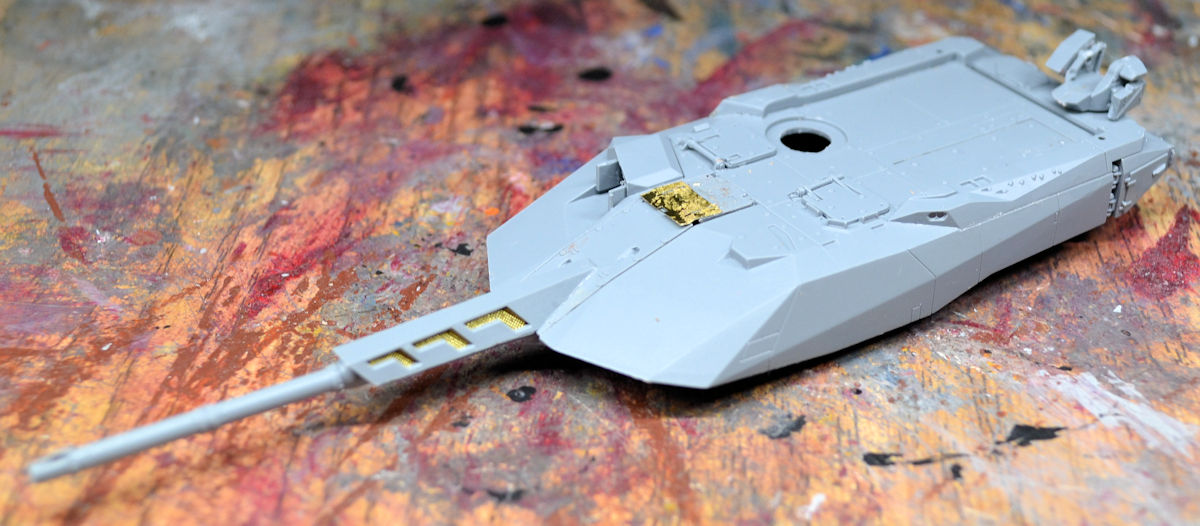
The open holes were where some 3-D printed parts were supposed to go but I'd lost them, until I opened another kit and found them inside there where I thought they belonged since it had 3-D printed parts too. They got installed next:
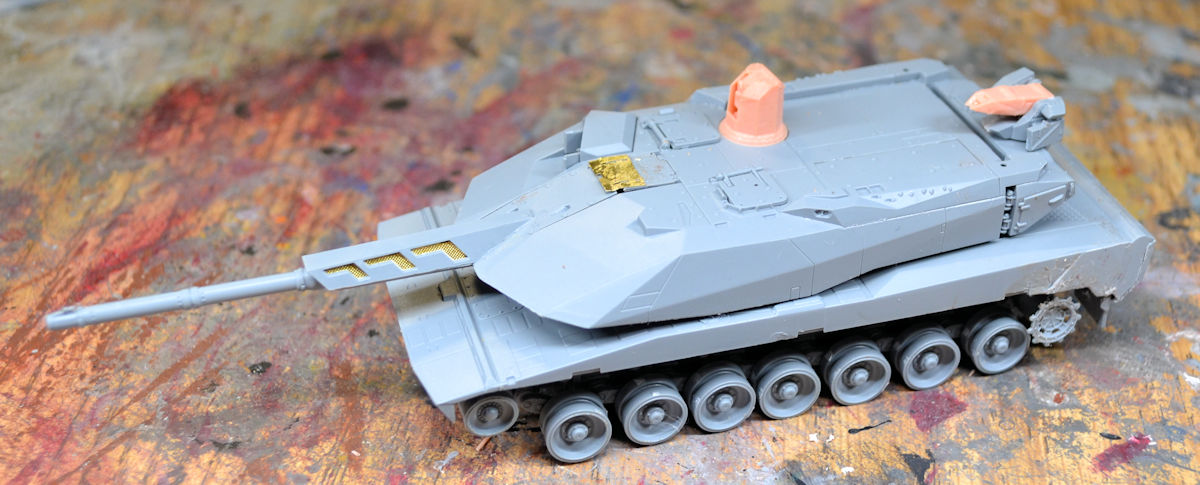
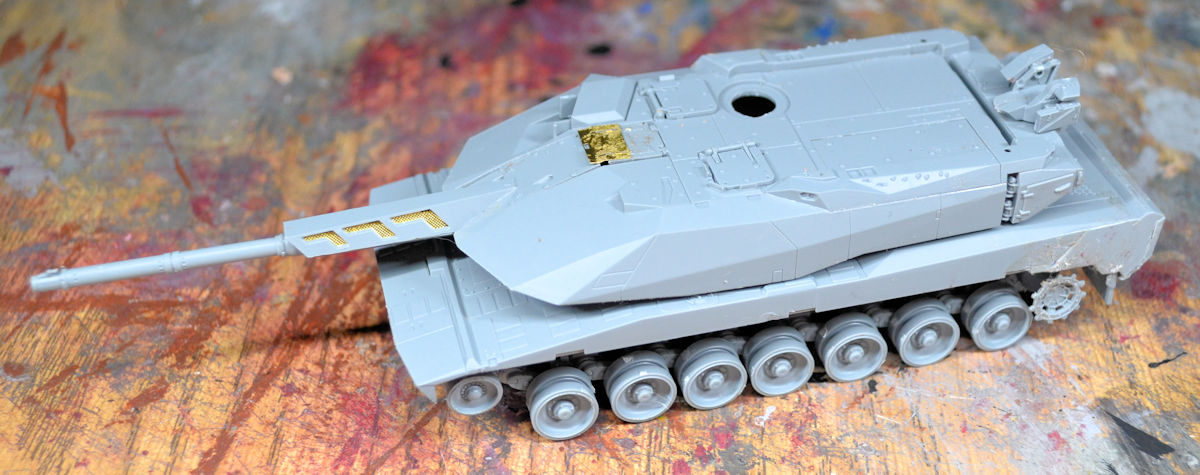
Next the tracks went on and base paint started:
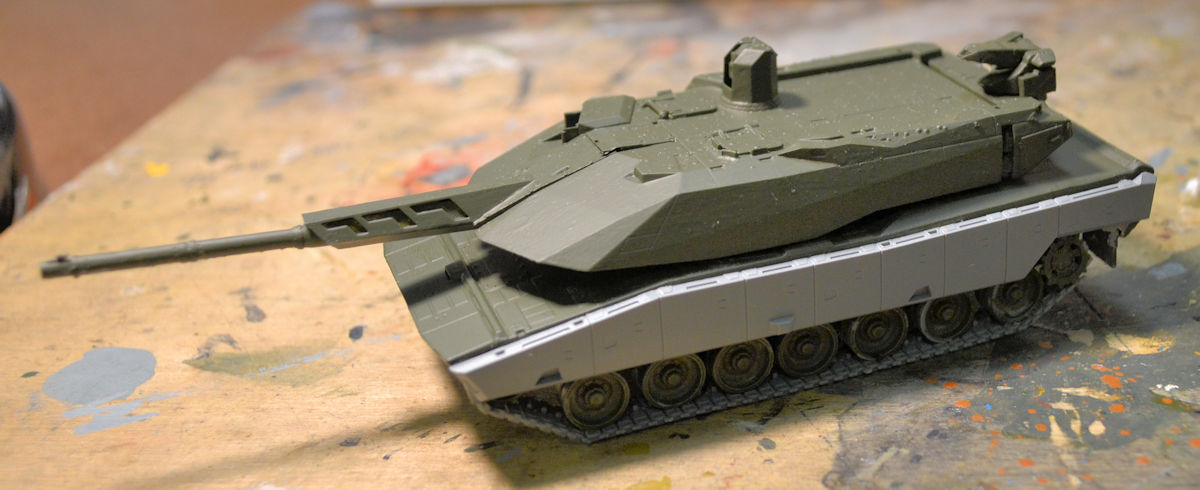
This will be in the standard German three-tone green-brown-black pattern. No way am I doing that digital pattern! I don't even like how it looks!
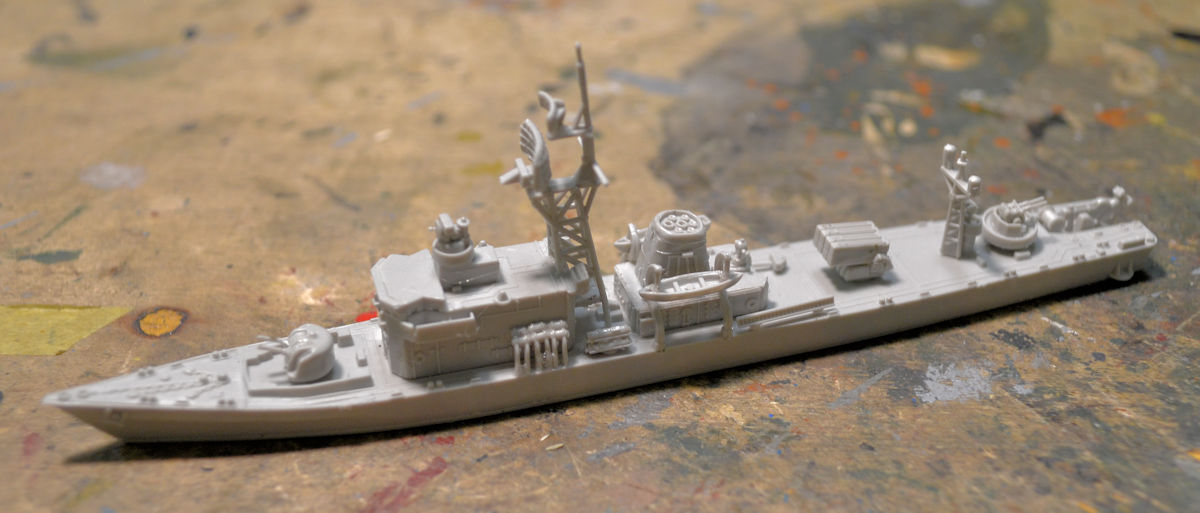
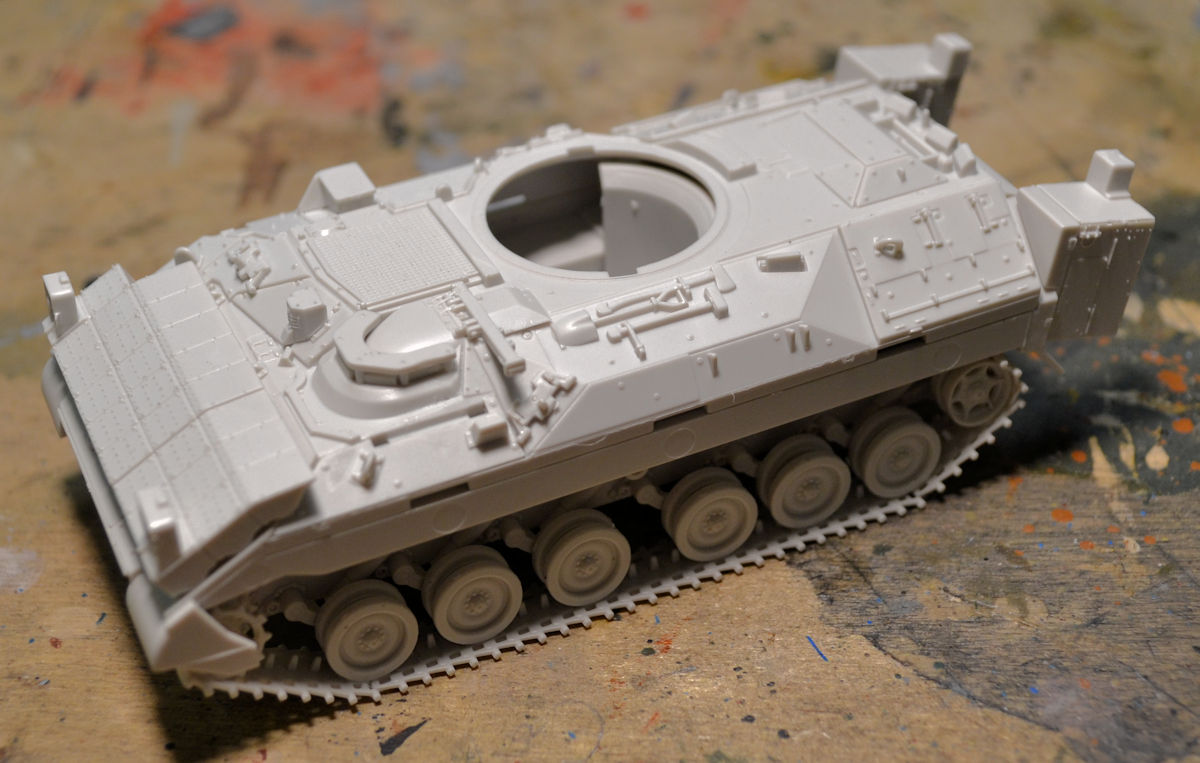
Moving on to the next bay, we got started on a US Army Bradley with BUSK armor on it. This is an amazing kit that went together very well. It even has an interior:
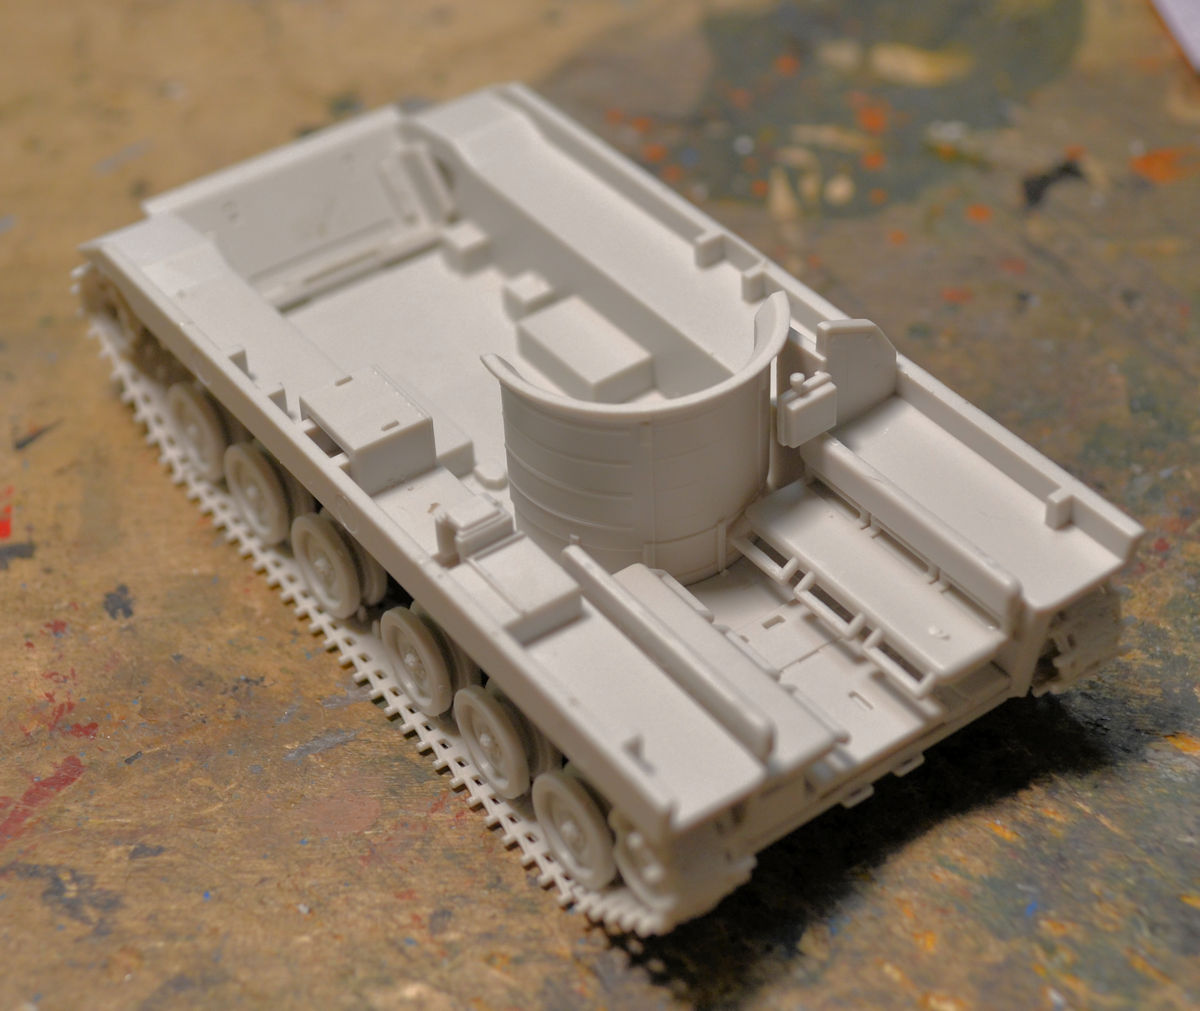
Since the rear hatch can be dropped, I'll be painting that up. Until then, I got to work on the upper hull, adding all the detail parts. It's just dry-fit on the lower hull right now:
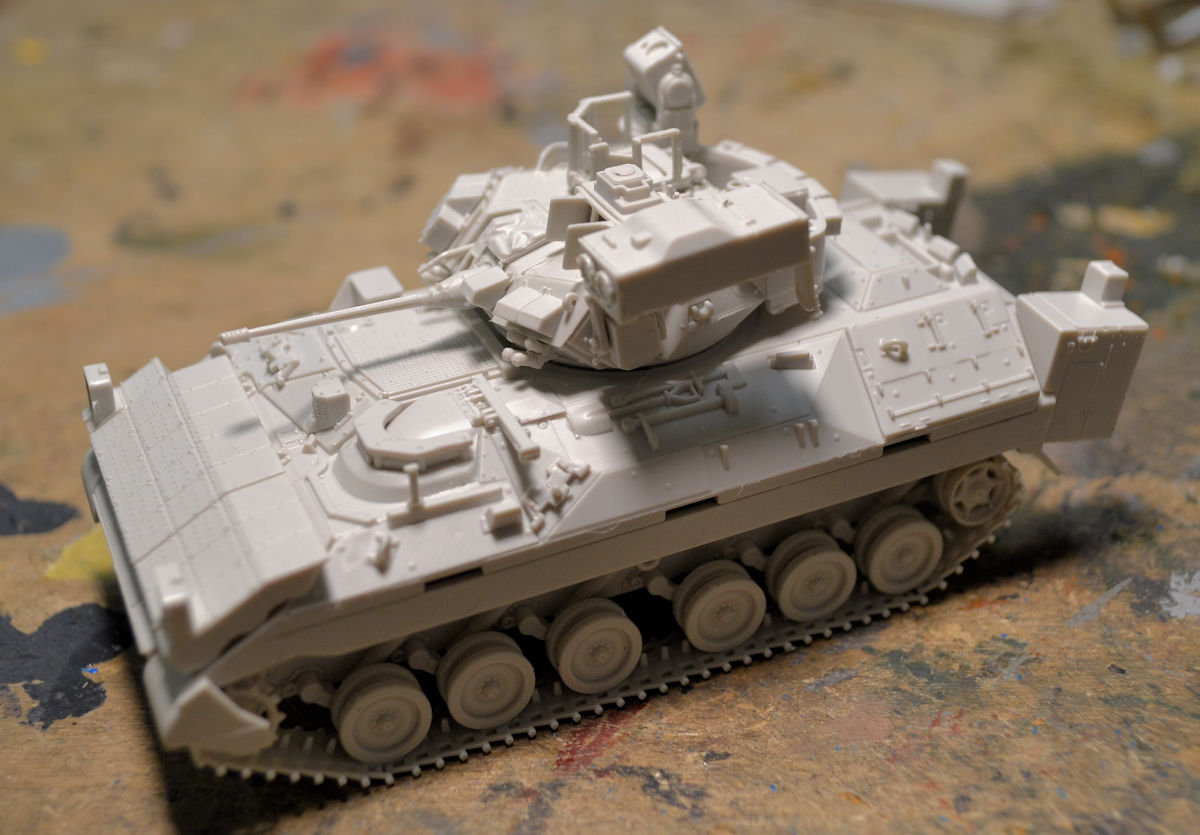
The turret came next; my apologies for the poor photo. Still working out the kinks on my new camera:

Everything is looking great so far. Once the interior is painted, this is going to finish up fast:
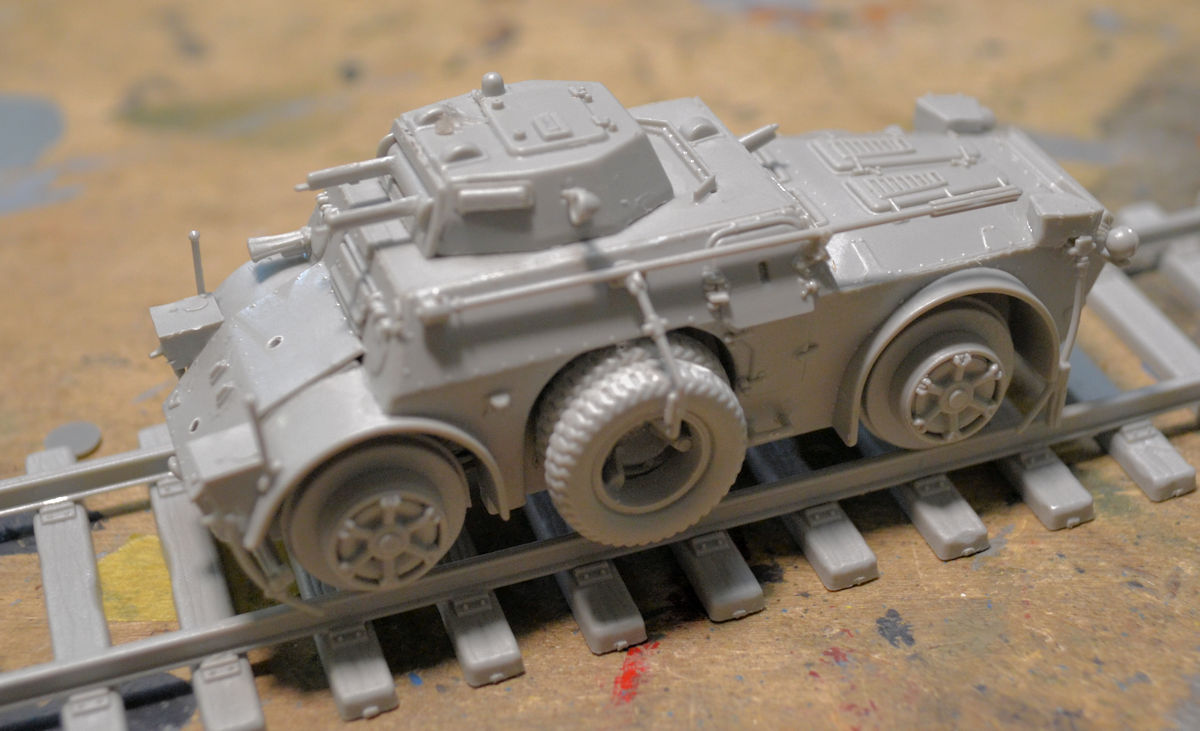
I found an old Italeri kit that I didn't know I had, it's an Italian AB-40 that was converted to ride the rails. Basic assembly went fast:
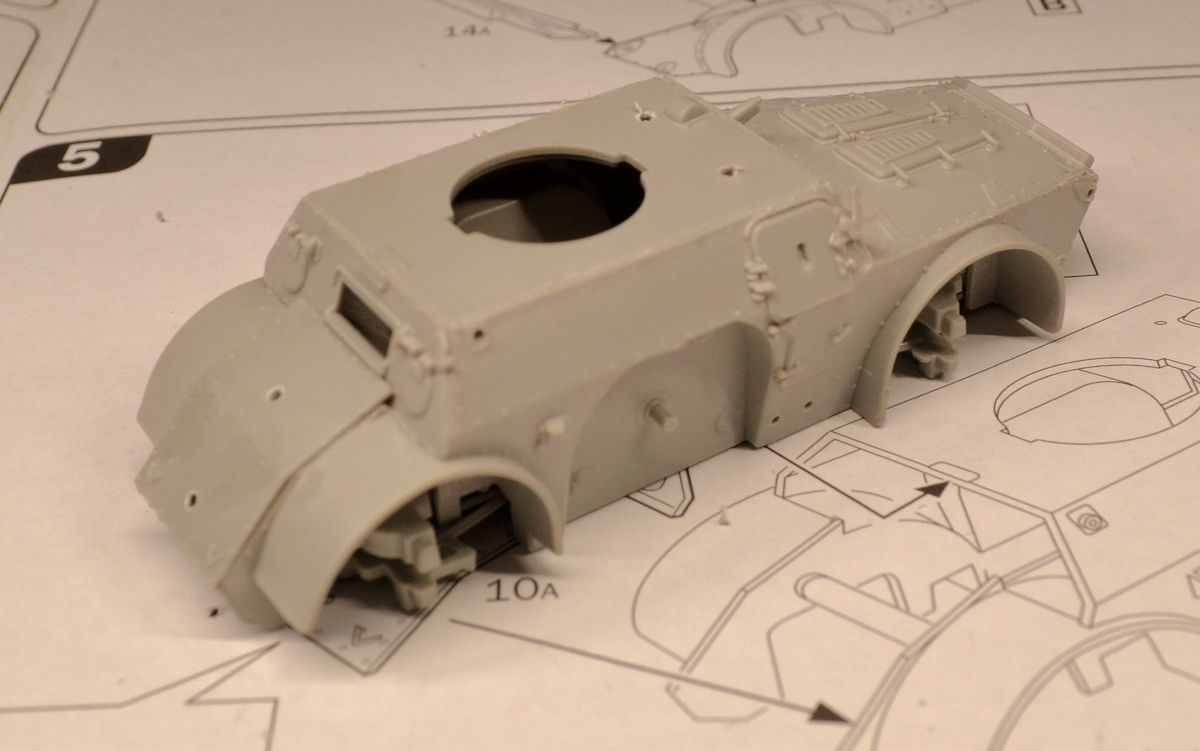
Later all the detail parts were added. This beastie is ready for paint:
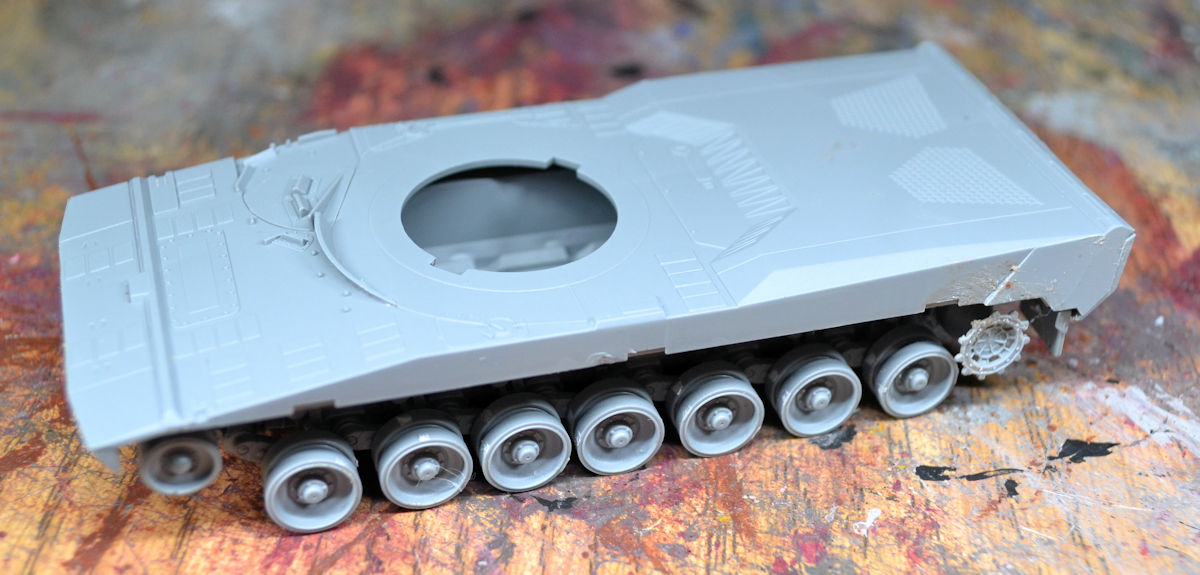
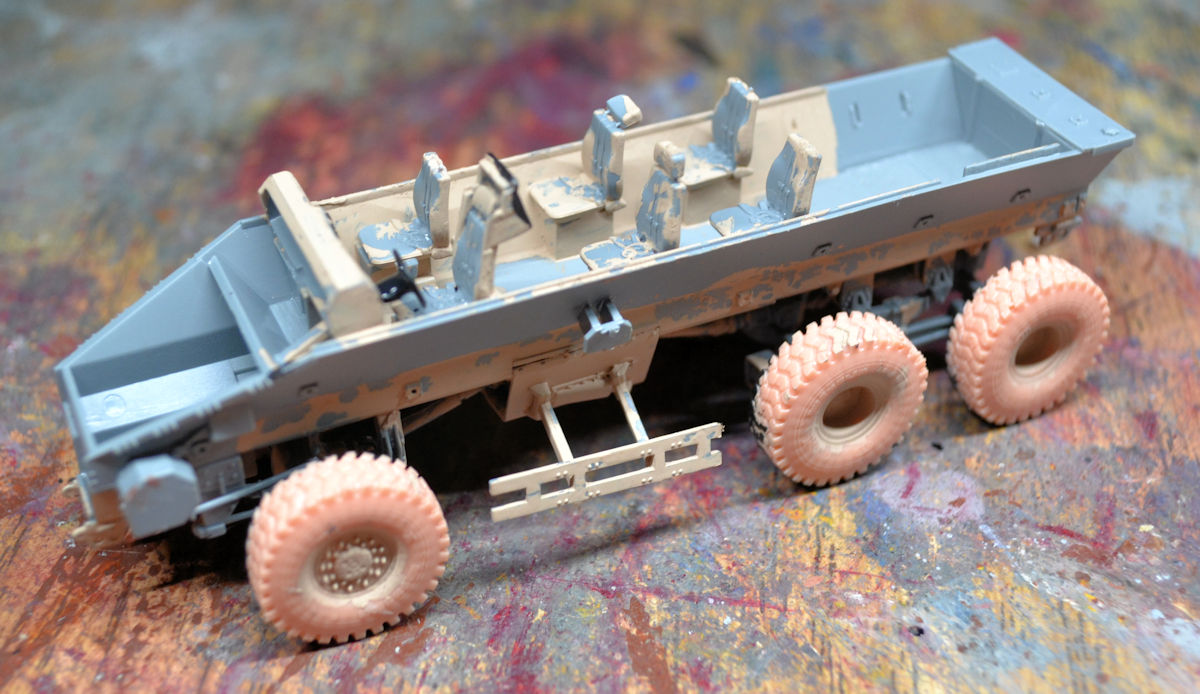
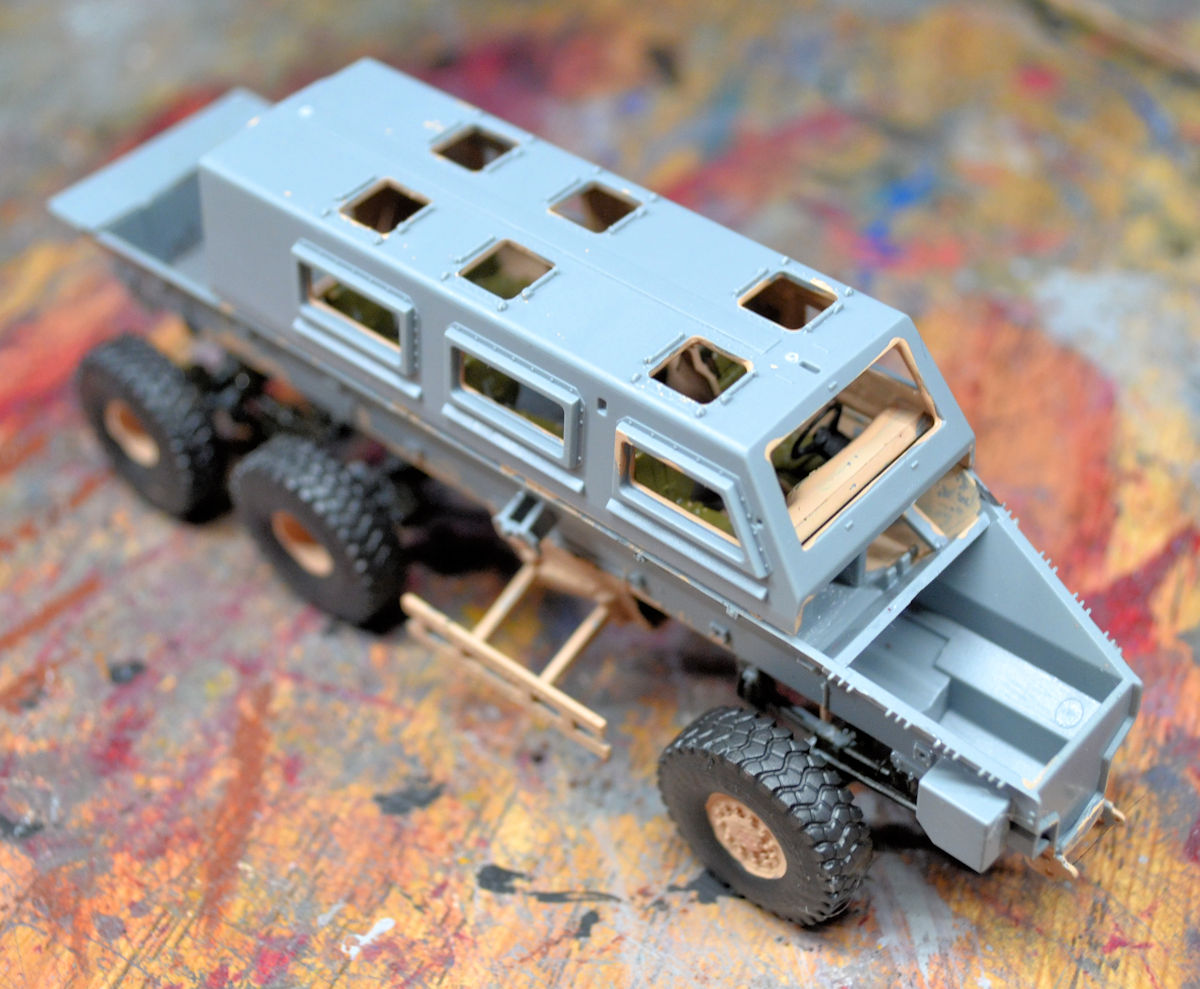
Last but not least, we have the US Army Buffalo A1 MPCV that I started. This was where the 3-D printed parts were for the Panther, since this also has 3-D printed parts. I had to question the kit makers; some of the printed parts were not necessary to print they could just as easily have been molded. I was also frustrated by the fact that they did not mold backup parts for the 3-D printed ones. You lose or break one beyond repair and you have to do without. Anyway, on to the progress, I got the basic interior, chassis and wheels done:
I then started painting the interior:
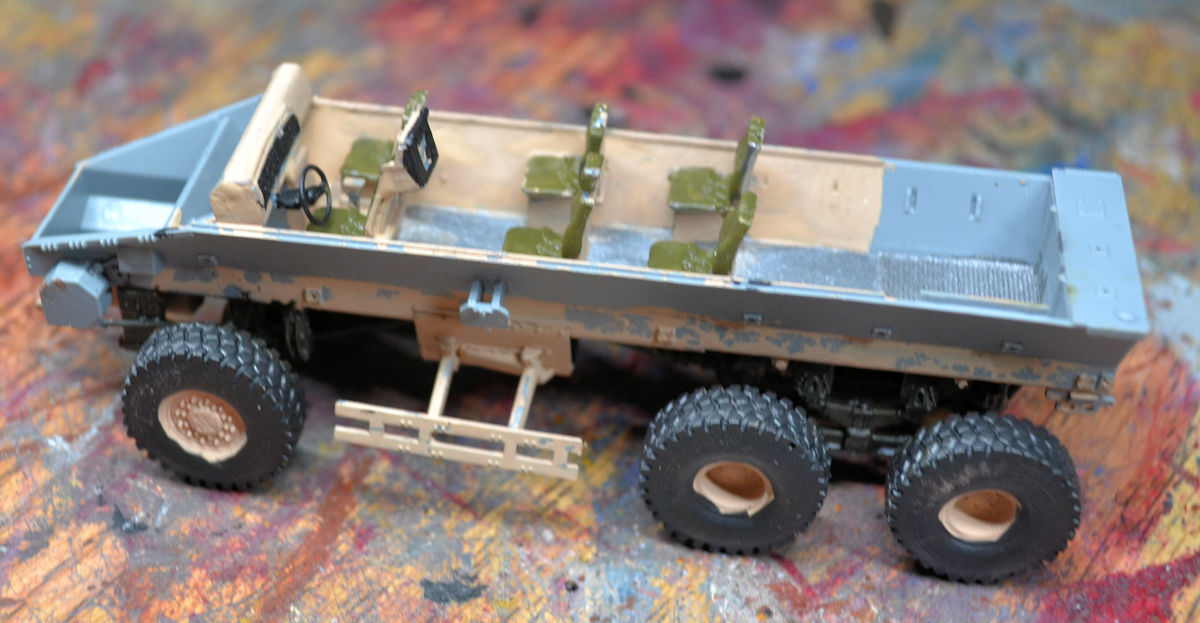
It looks a bit crude here, I'll be touching it up but not much will be seen though the windows anyway as you can see here with the top dry-fit into place:
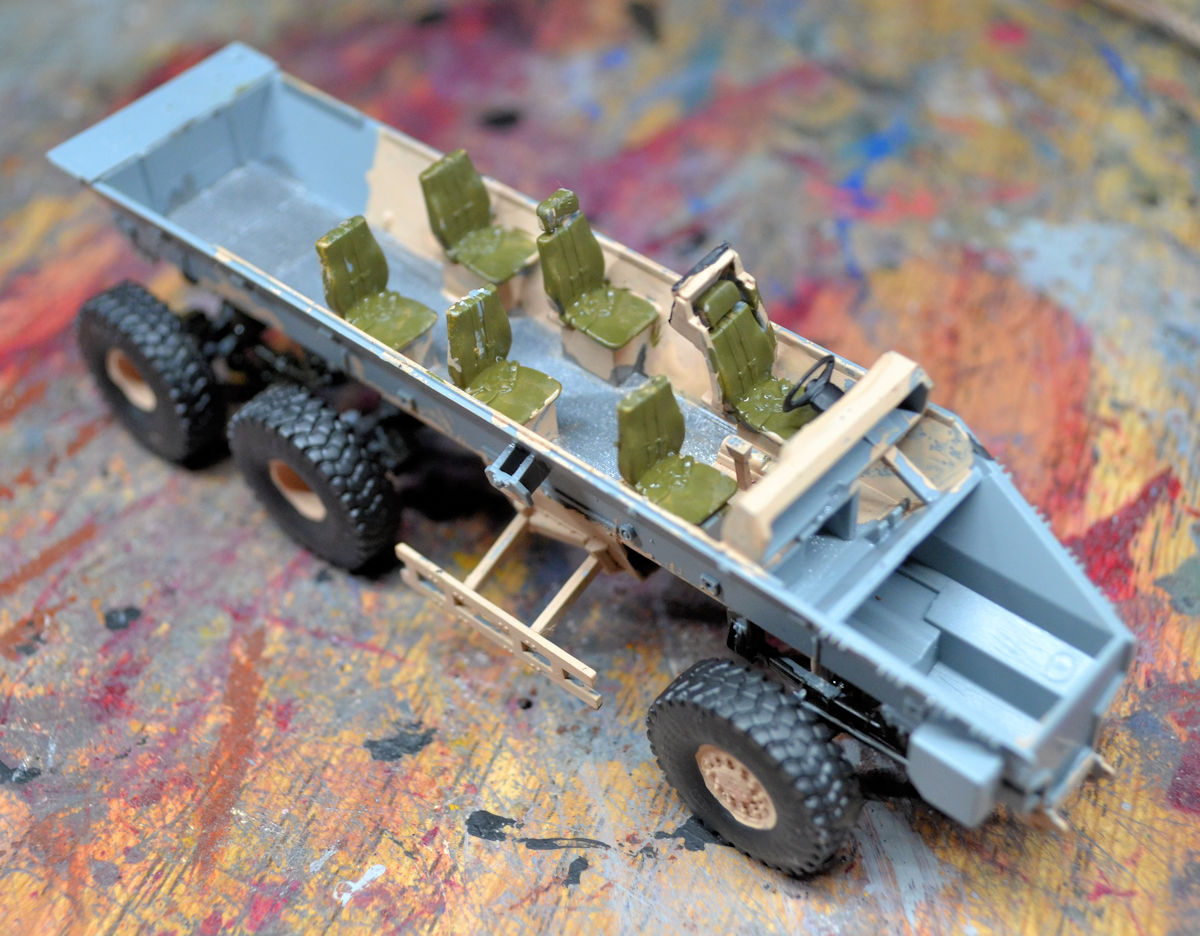
Additional detail parts and some more painting were done next:
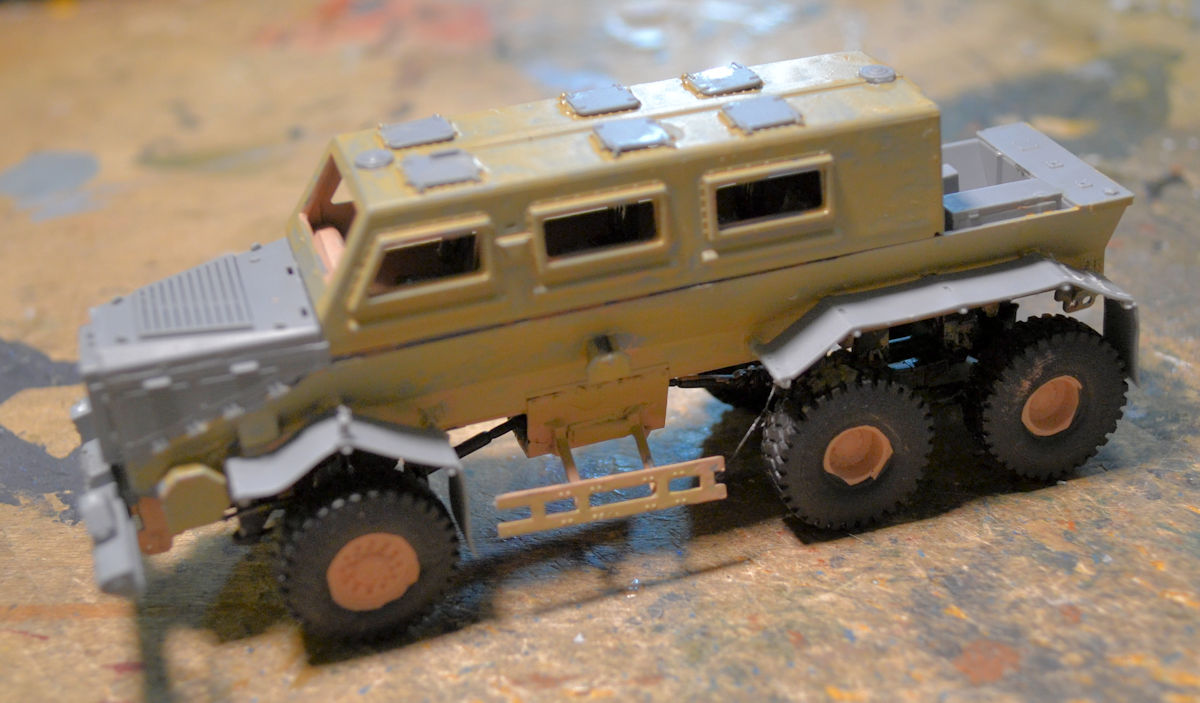
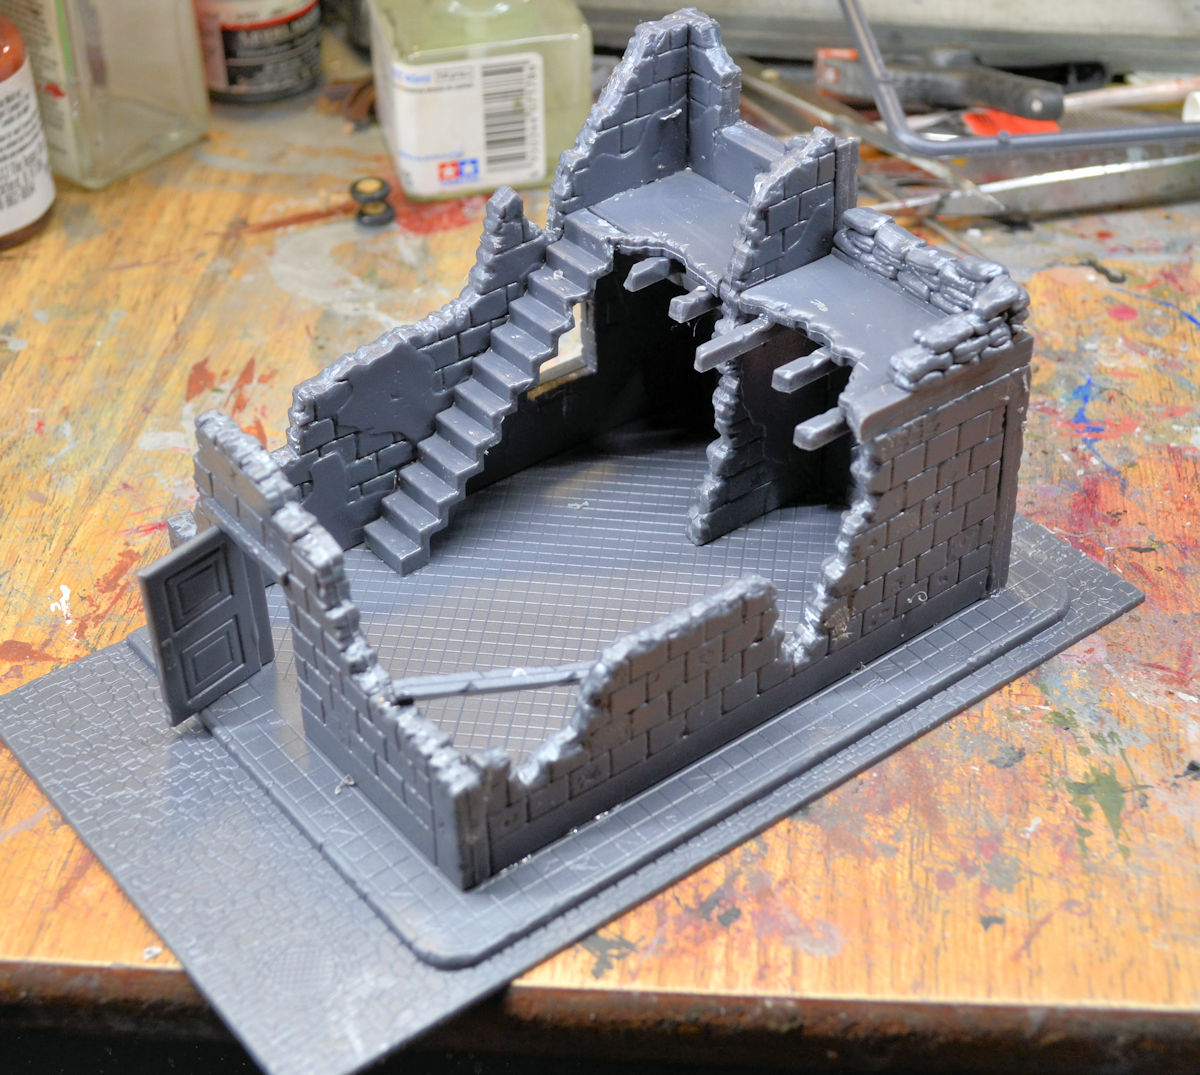
It's sure looking pretty interesting. I'm hoping to get more done soon. Meanwhile, in the back area, were the buildings are all worked on, we have a new one I started since the box was all torn up. It's a bombed out house that's currently ready for paint:
I hope you enjoyed the tour, I appreciate all those who stop in to see everything. Thank you all and remember comments are always welcome!
I know it's only been a short time and not too many people have taken the last tour, but I managed to get so much more done, I'm ready to start another one. All who wish to join me, please board the trams and get ready for another busy tour.
Starting once again in the Hangar, we have the Italian CH-47 Chinook getting the canopy on and some additional touch up on the paint in this first bay:
In these next bays, we have a few freshly started projects going, starting with this Iraqi Eurocopter in this next bay. I finished the interior, but the pic didn't turn out, but these shots of the tail and the main rotor did:
In the next bay, we started a US Army Waco glider, starting with the fuselage with some interior. I didn't do much in the interior because it will barely be seen through the tiny windows:
Later the cockpit was done so I also decided to dry-fit the canopy to see how well it will fit. Pretty good so far:
Later the cockpit was painted up and the canopy glued in place:
Finally, everything was assembled except landing gear to make it ready for paint:
In the last bay here, I started a British Horsa Glider as well since if I have a Waco, I should have a Horsa too. With these last two completed, I'll have gliders from all four major combatants in Europe during WWII. First of course was the cockpit:
Picture's not the best, but you get the idea. Later that was painted and the canopy installed:
Before that, I had also assembled the wings and tail sections too:
Finally, everything was put together to prepare for paint:
That concludes the Hangar portion of our tour, now on to the Shipyards...
Here in the Shipyards, this first slip had more progress done on the USS Springfield, getting paint and final detail parts on:
Of course, some additional painting will be needed, but she's getting close to launch
In the next few slips, we have all our German destroyers under construction. I found another one I didn't know I had, the German Z-7 so I laid the keel for that and started building it up:
Later came paint, more detail parts and even some photo-etch:
That photo etch was a ridiculous exercise in frustration! It's far to thin and delicate to keep straight and I barely even got it to stay on the model! Nevertheless, I added some more, and touched up some additional parts and got this closer to being done:
The next slip has the German Z-28 which got more paint and some details:
Antenna masts and final details went on next, all that's left is additional touch up paint:
The next slip has the German Z-31, getting it's first coat of paint before additional parts go on:
Later all her weaponry, detail parts and masts went on and got painted for the most part:
Finally in this next slip is the German Z-43 getting it;s first coat of paint before details were added:
Later the details were added and some additional painting done. Like the others, this one is getting close:
Now we move onto the next slips that have my British destroyers in progress. First up, the HMS Cambletown getting painted and details added:
Followed by the HMS Hotspur in the next slip getting the same:
And in the next slip, the HMS Cossack got the same treatment:
These Airfix kits are pretty basic but they were the only opportunity to get these ships back in the day. I'm loving this getting them finished!
Finally in this last slip, I started this tiny Japanese MSDF ship that I found in the stash. I found it interesting in that the box art has the LST 4151 in the background that I'd previously finished! It went together very fast:
That concludes the tour of the Shipyards, now on to the Motor Pool.
Here in the Motor Pool things have picked up a bit, with a few new projects started while working on previously started models.
In the first bay here we have the German KF-51 Panther getting it's roadwheels installed:
The turret was then assembled and later added to the hull to see how it looks so far:
The open holes were where some 3-D printed parts were supposed to go but I'd lost them, until I opened another kit and found them inside there where I thought they belonged since it had 3-D printed parts too. They got installed next:
Next the tracks went on and base paint started:
This will be in the standard German three-tone green-brown-black pattern. No way am I doing that digital pattern! I don't even like how it looks!
Moving on to the next bay, we got started on a US Army Bradley with BUSK armor on it. This is an amazing kit that went together very well. It even has an interior:
Since the rear hatch can be dropped, I'll be painting that up. Until then, I got to work on the upper hull, adding all the detail parts. It's just dry-fit on the lower hull right now:
The turret came next; my apologies for the poor photo. Still working out the kinks on my new camera:
Everything is looking great so far. Once the interior is painted, this is going to finish up fast:
I found an old Italeri kit that I didn't know I had, it's an Italian AB-40 that was converted to ride the rails. Basic assembly went fast:
Later all the detail parts were added. This beastie is ready for paint:
Last but not least, we have the US Army Buffalo A1 MPCV that I started. This was where the 3-D printed parts were for the Panther, since this also has 3-D printed parts. I had to question the kit makers; some of the printed parts were not necessary to print they could just as easily have been molded. I was also frustrated by the fact that they did not mold backup parts for the 3-D printed ones. You lose or break one beyond repair and you have to do without. Anyway, on to the progress, I got the basic interior, chassis and wheels done:
I then started painting the interior:
It looks a bit crude here, I'll be touching it up but not much will be seen though the windows anyway as you can see here with the top dry-fit into place:
Additional detail parts and some more painting were done next:
It's sure looking pretty interesting. I'm hoping to get more done soon. Meanwhile, in the back area, were the buildings are all worked on, we have a new one I started since the box was all torn up. It's a bombed out house that's currently ready for paint:
I hope you enjoyed the tour, I appreciate all those who stop in to see everything. Thank you all and remember comments are always welcome!