Well, it's been awhile, mostly because of all the time spent with my display hosting visitors who came to see it. Now that things have settled down a bit, it's time for another tour. We've been quite busy during this time with a lot of new projects as well as come continuing work on others.
All aboard the trams, our first stop is the Hangar....
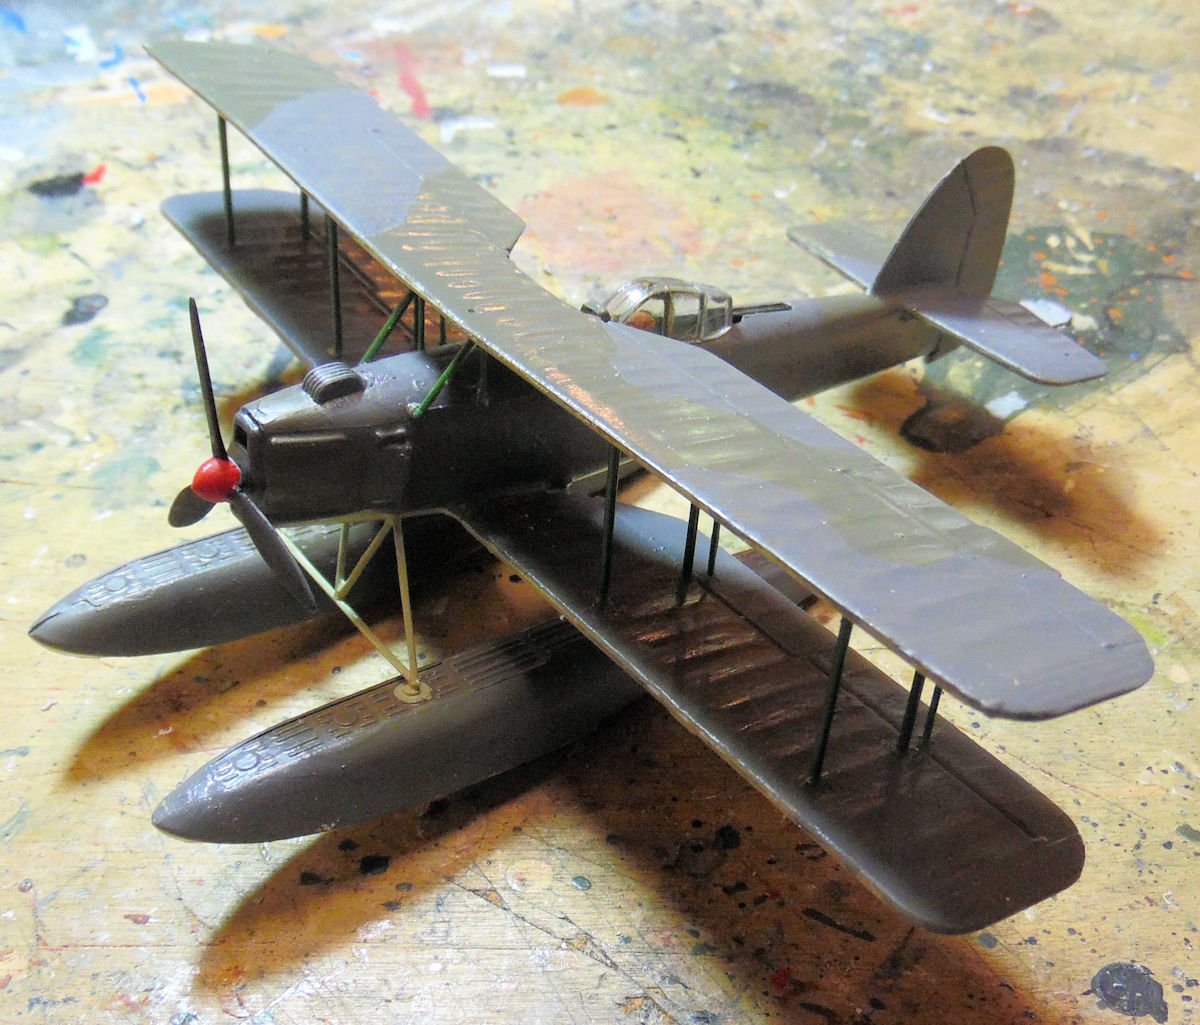
Here in the Hangar, we've been busy with a lot of projects. In this first bay is one of the continuing projects, the Matchbox 1/72 scale Fairey Seafox. The last time we saw her was before the upper wing went on. Now it's on and the clear parts have been installed as well:
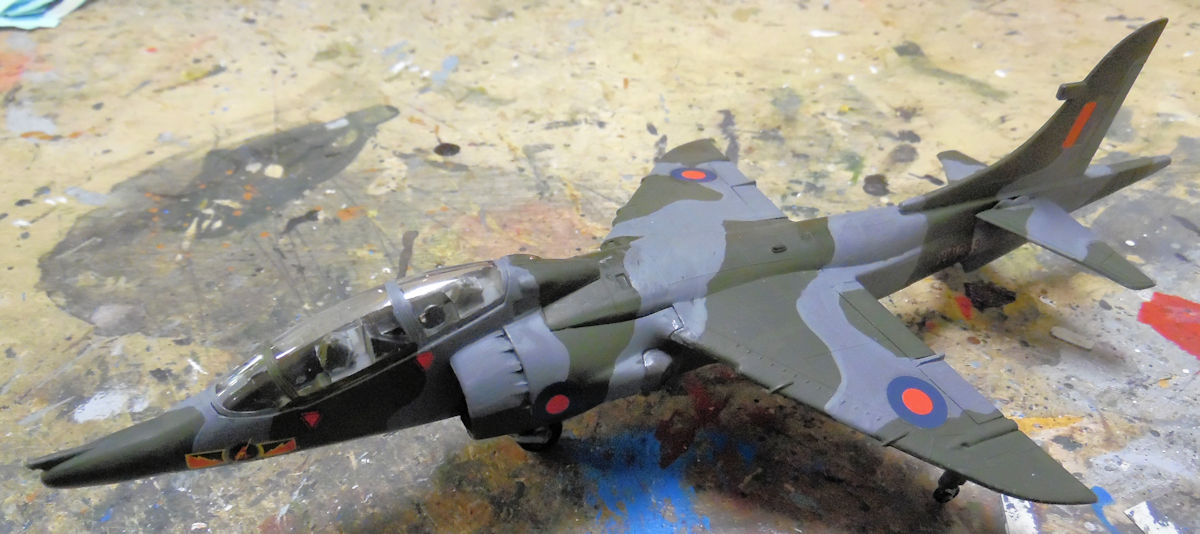
In the next bay another British aircraft in progress; the Harrier jet, got the decals applied:
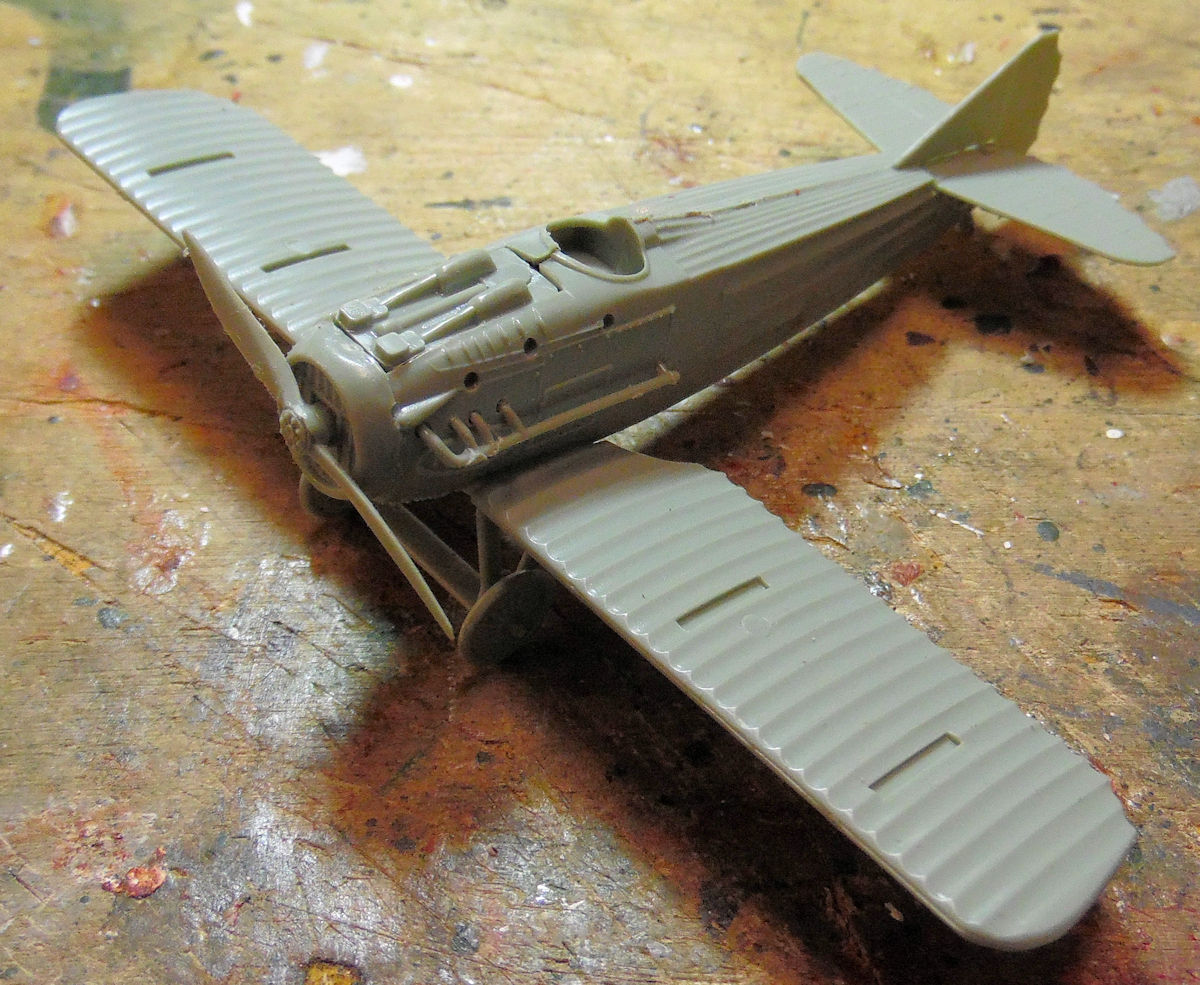
All the rest of the bays have new projects that were started recently. First up in this next bay is a French Spad XIII that I found in the stash while cleaning up. It's so small and simple, I just had to get it started. First I built it up to the top wing as usual:
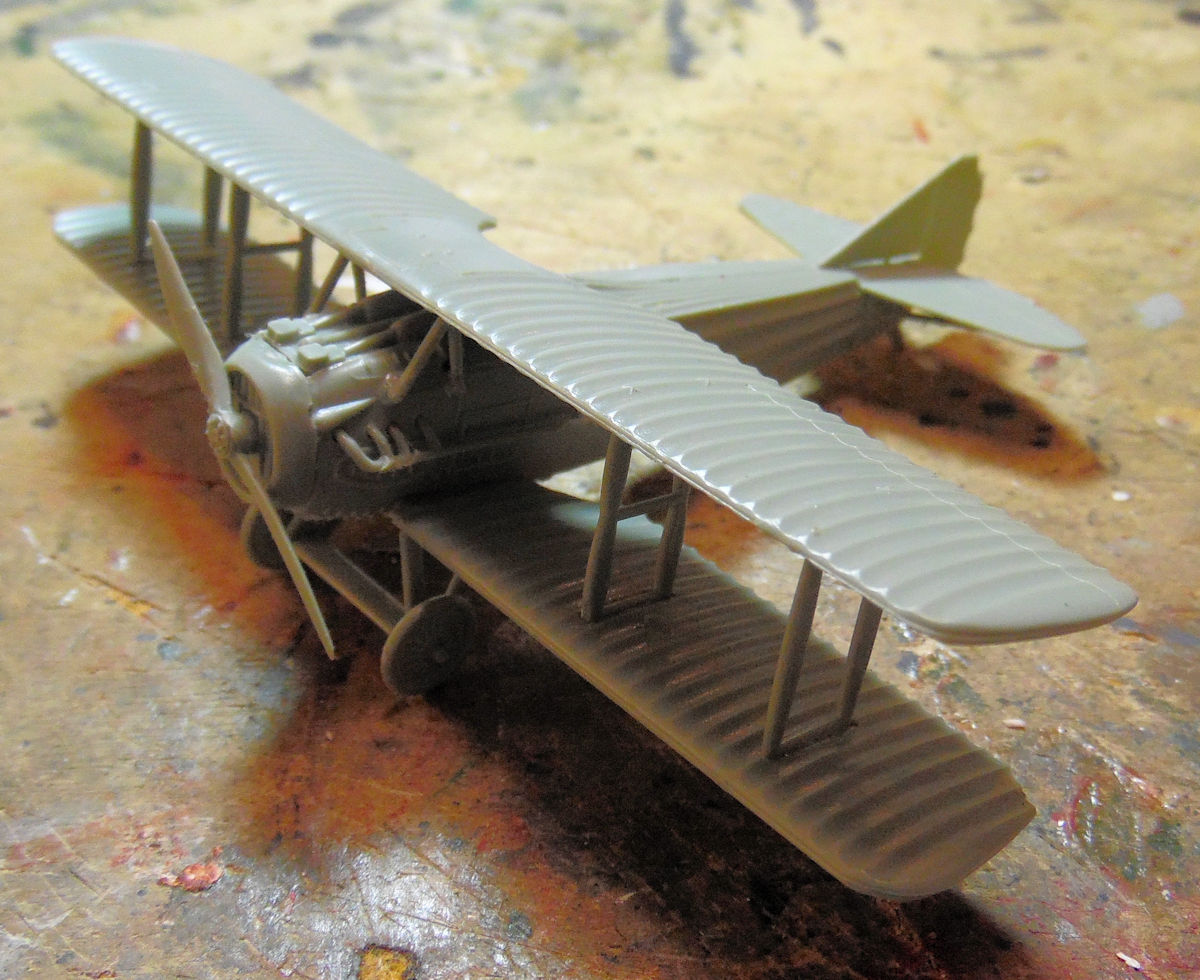
After a bit, I added the top wing to it. Now to figure out it's camouflage pattern:
In the next bay is another French aircraft, albeit from the United States. It's the Revell B-26 Marauder in 1/72 scale. I have two of them so I decided to build them both and make one French and the other USAAF, since the kits provided decals for both. Here is the French one so far:
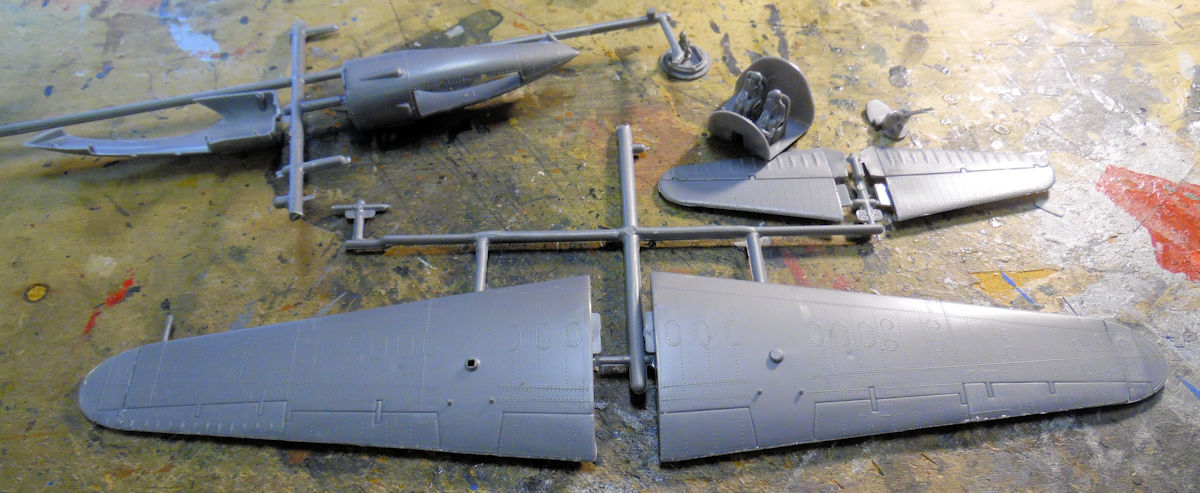
As you can see from the upper left, I won't be getting much further on this until I find the other half of the one nacelle. I can build around it until then.
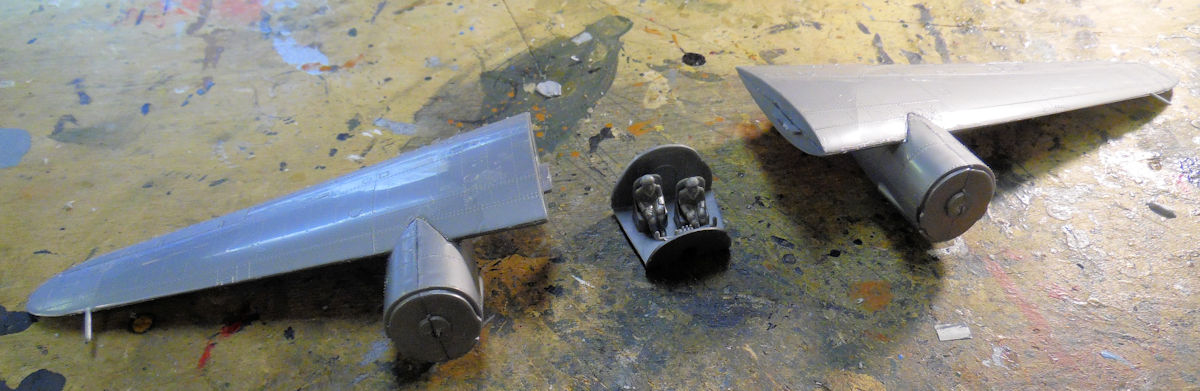
Meanwhile in this next bay we have the US B-26 Marauder. The cockpit is built, the wings are assembled and everything else that was done on the French plane is done here too. Here's a shot of the cockpit and wings together:
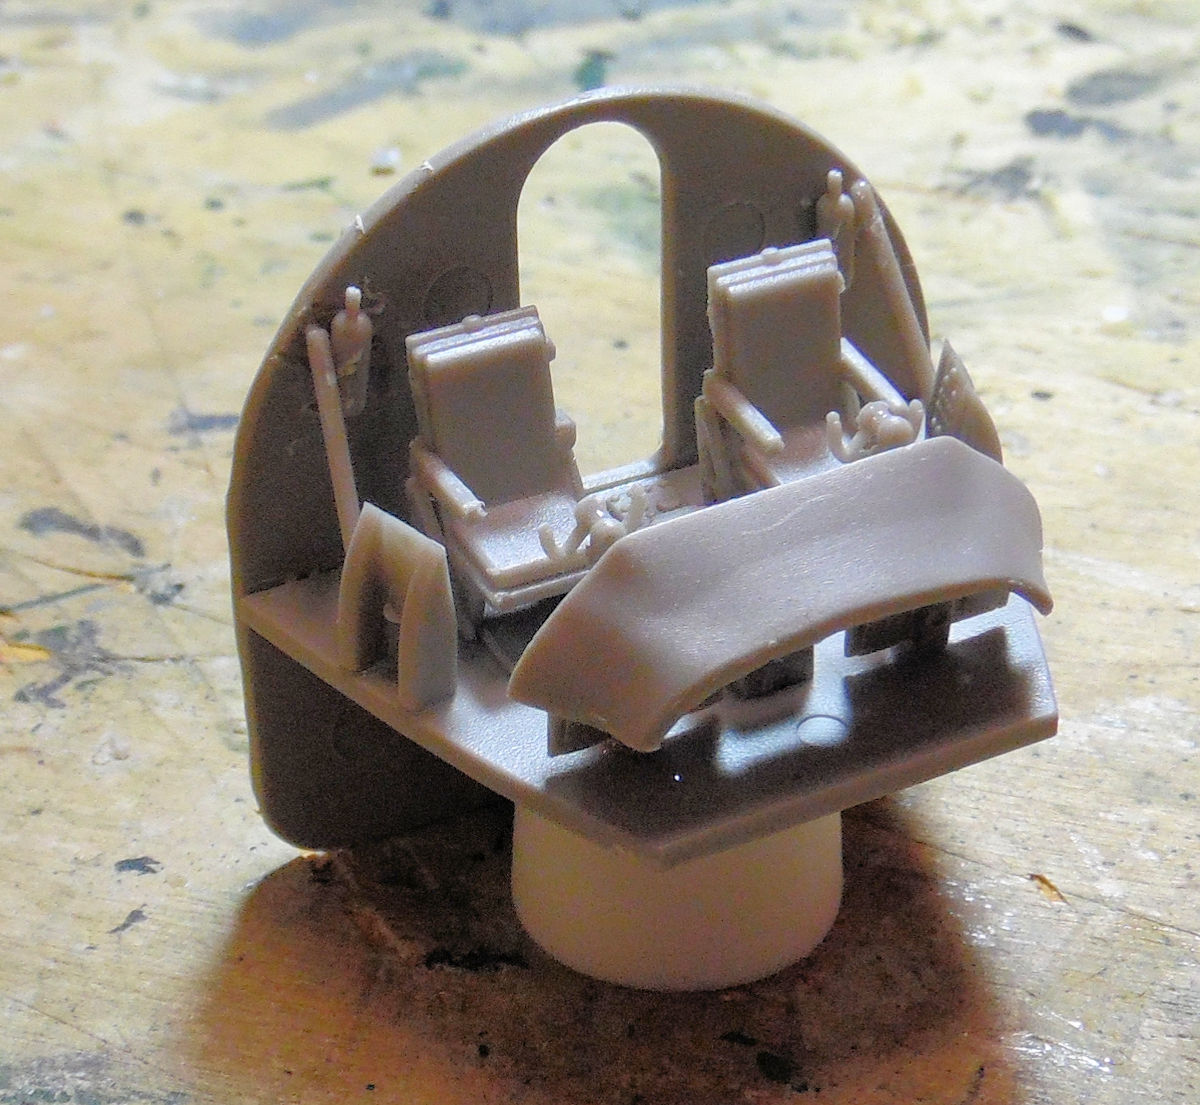
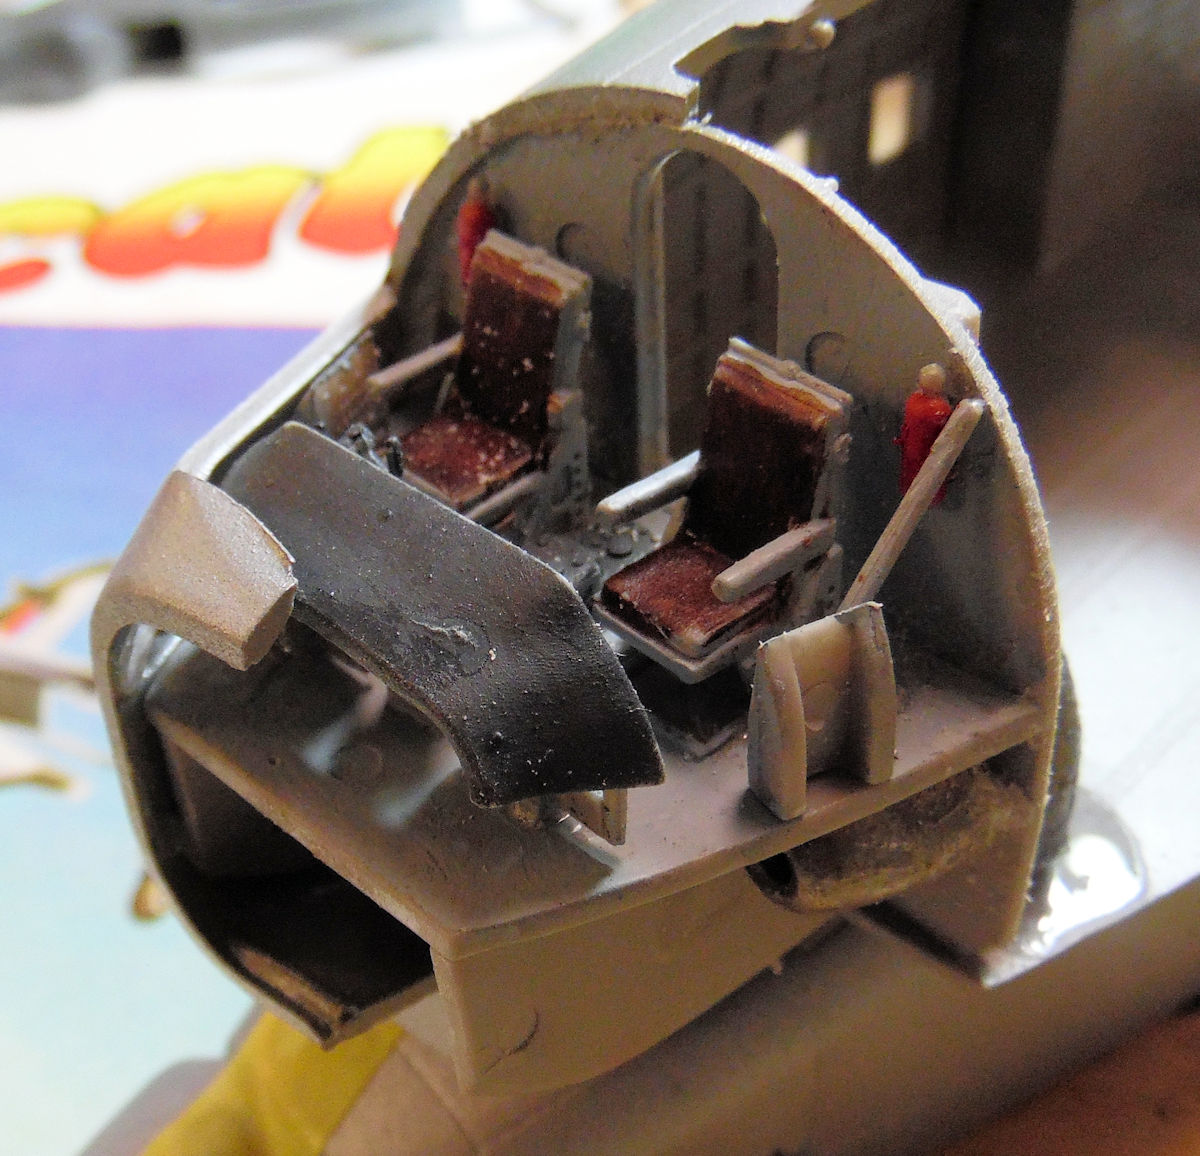
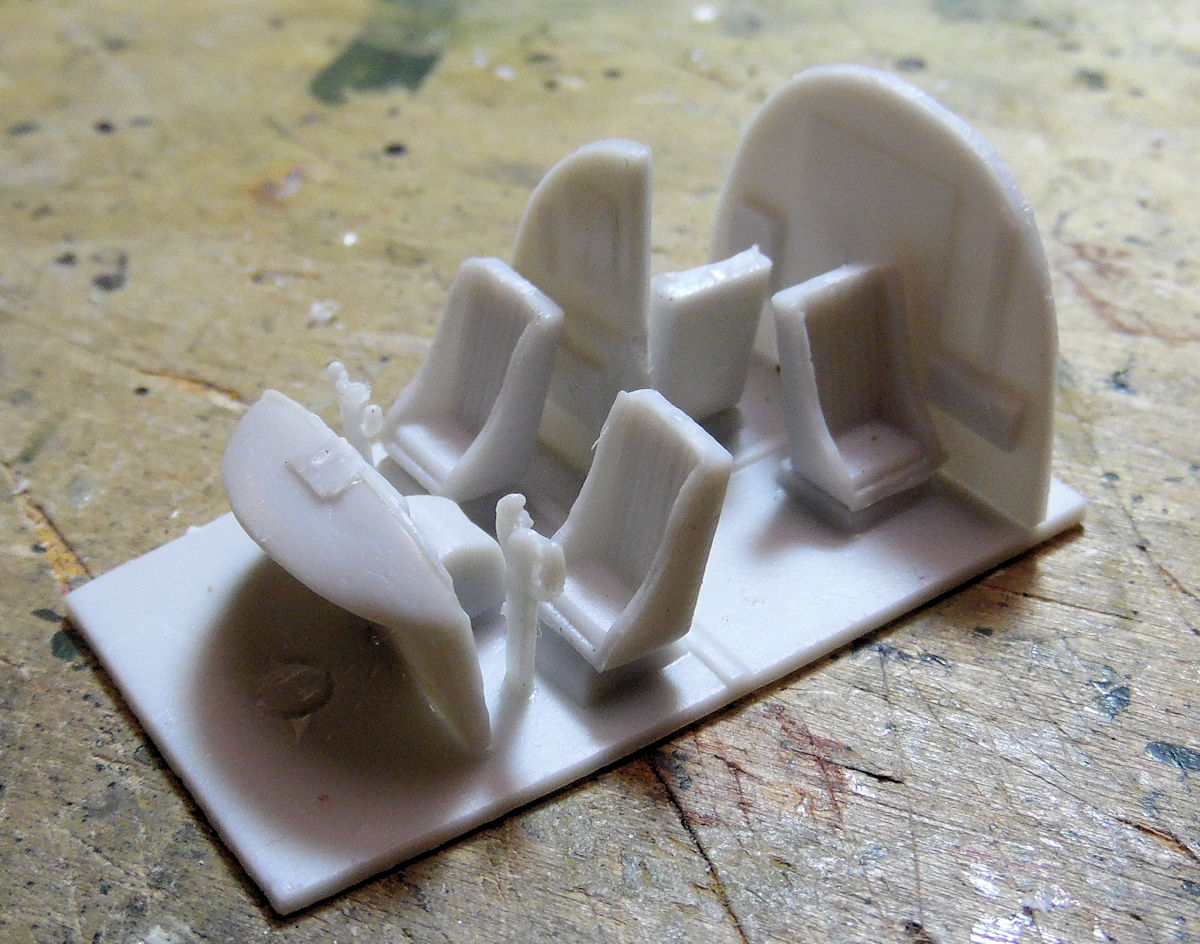
In this next bay is a commemoration build for John Eaton; this is a 1/72 scale Roden C-123 Provider that I saw in his stash and since I had one too; I started it for this. First the basic cockpit was assembled, with the rear cockpit wall following:
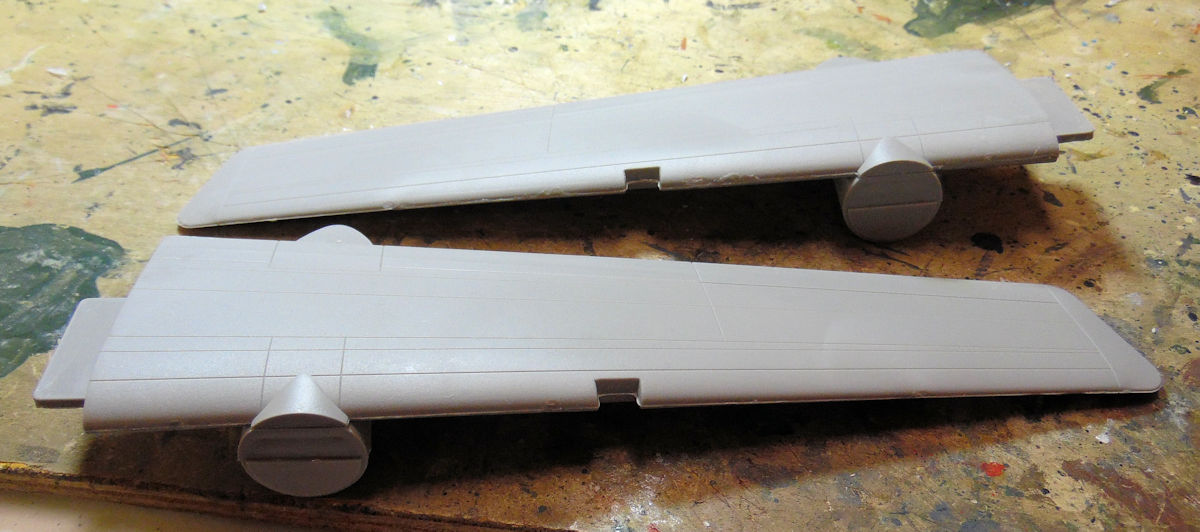
Next the wings were built:
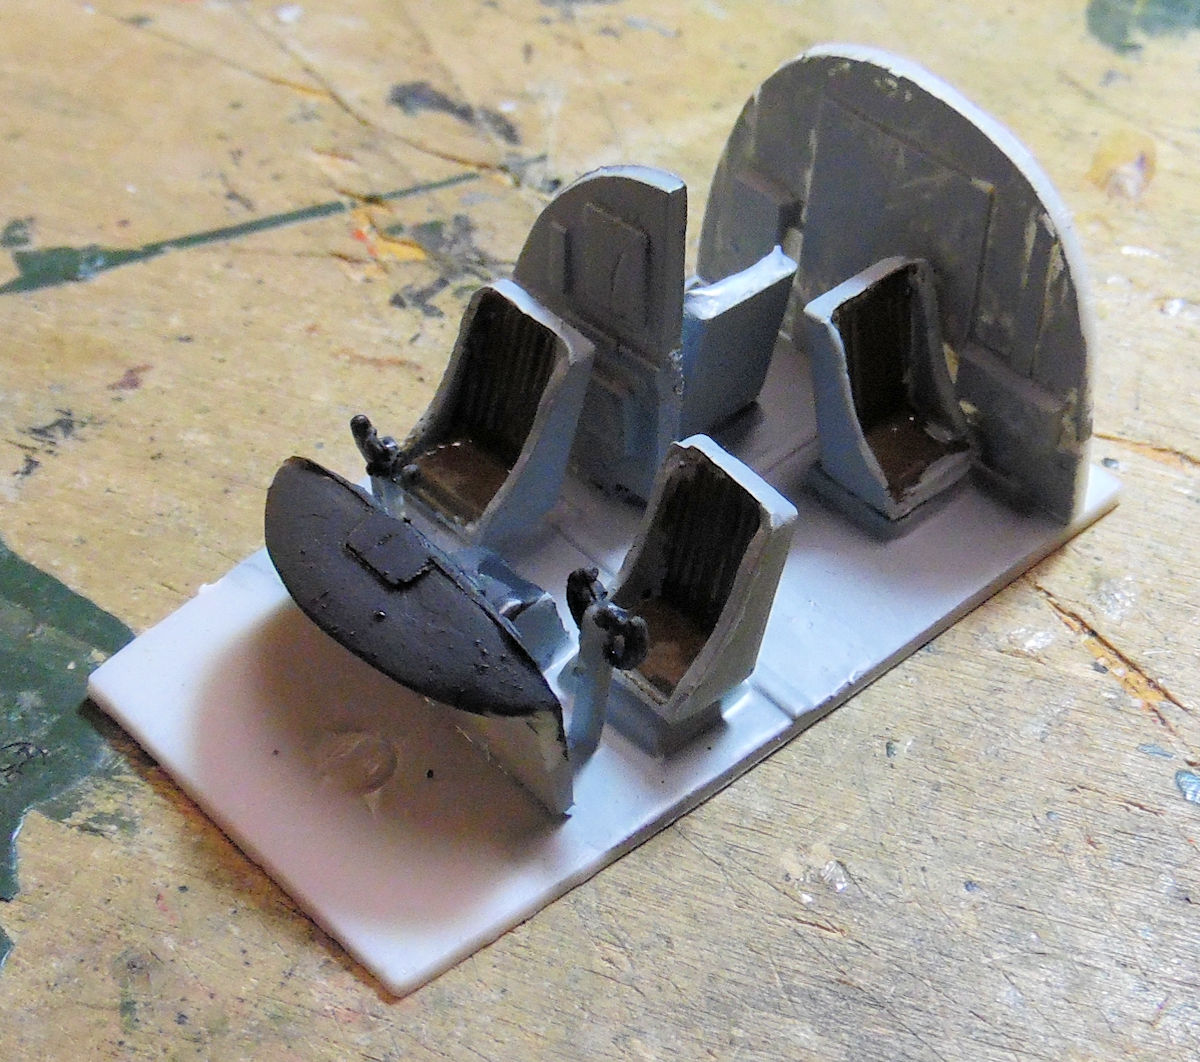
The cockpit was then painted and added to one side of the fuselage after I'd painted a bare metal silver on the fuselage halves, along with what I thought was adequate weight in the nose:
It wasn't adequate as I found out when I taped everything together, dry-fit the wings and tested it. So, additional weight was added to the front of this plane:
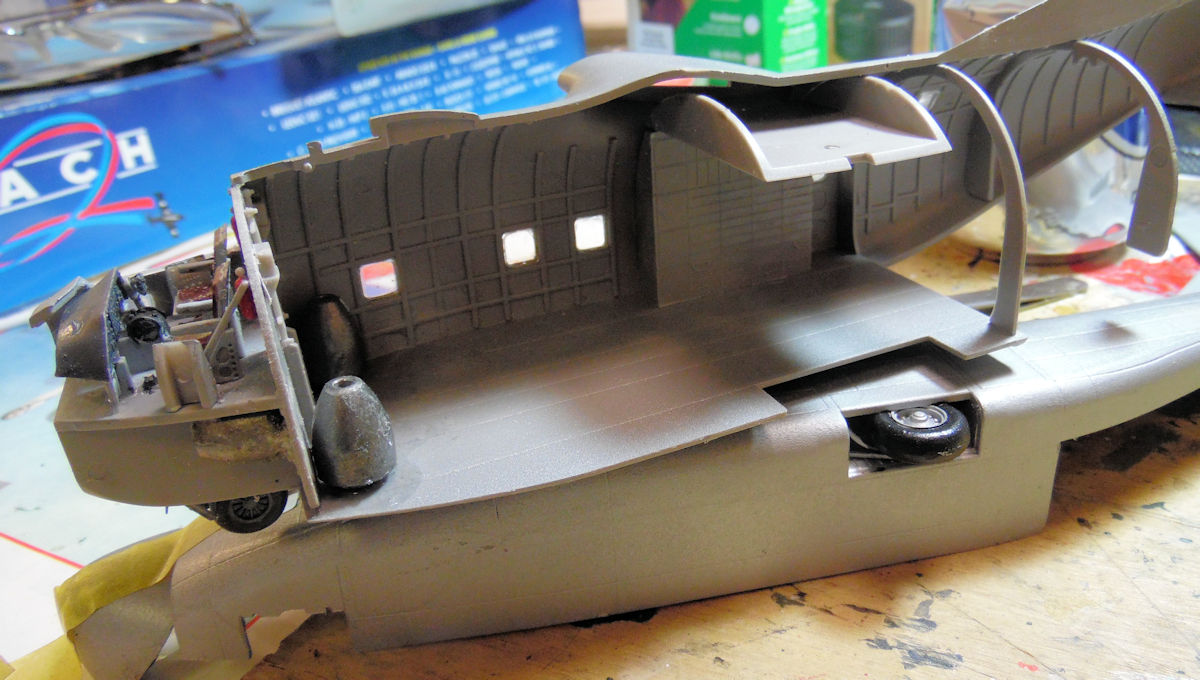
Once that was confirmed to be enough, I closed up the fuselage and glued on the nose:
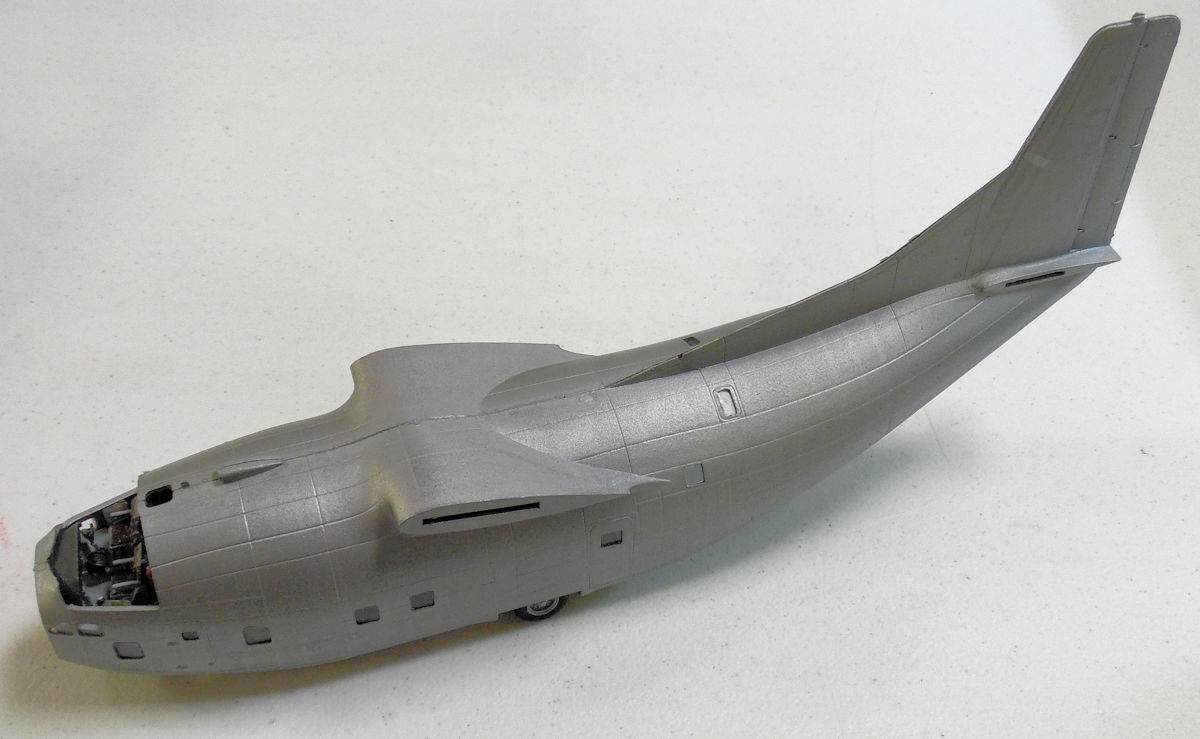
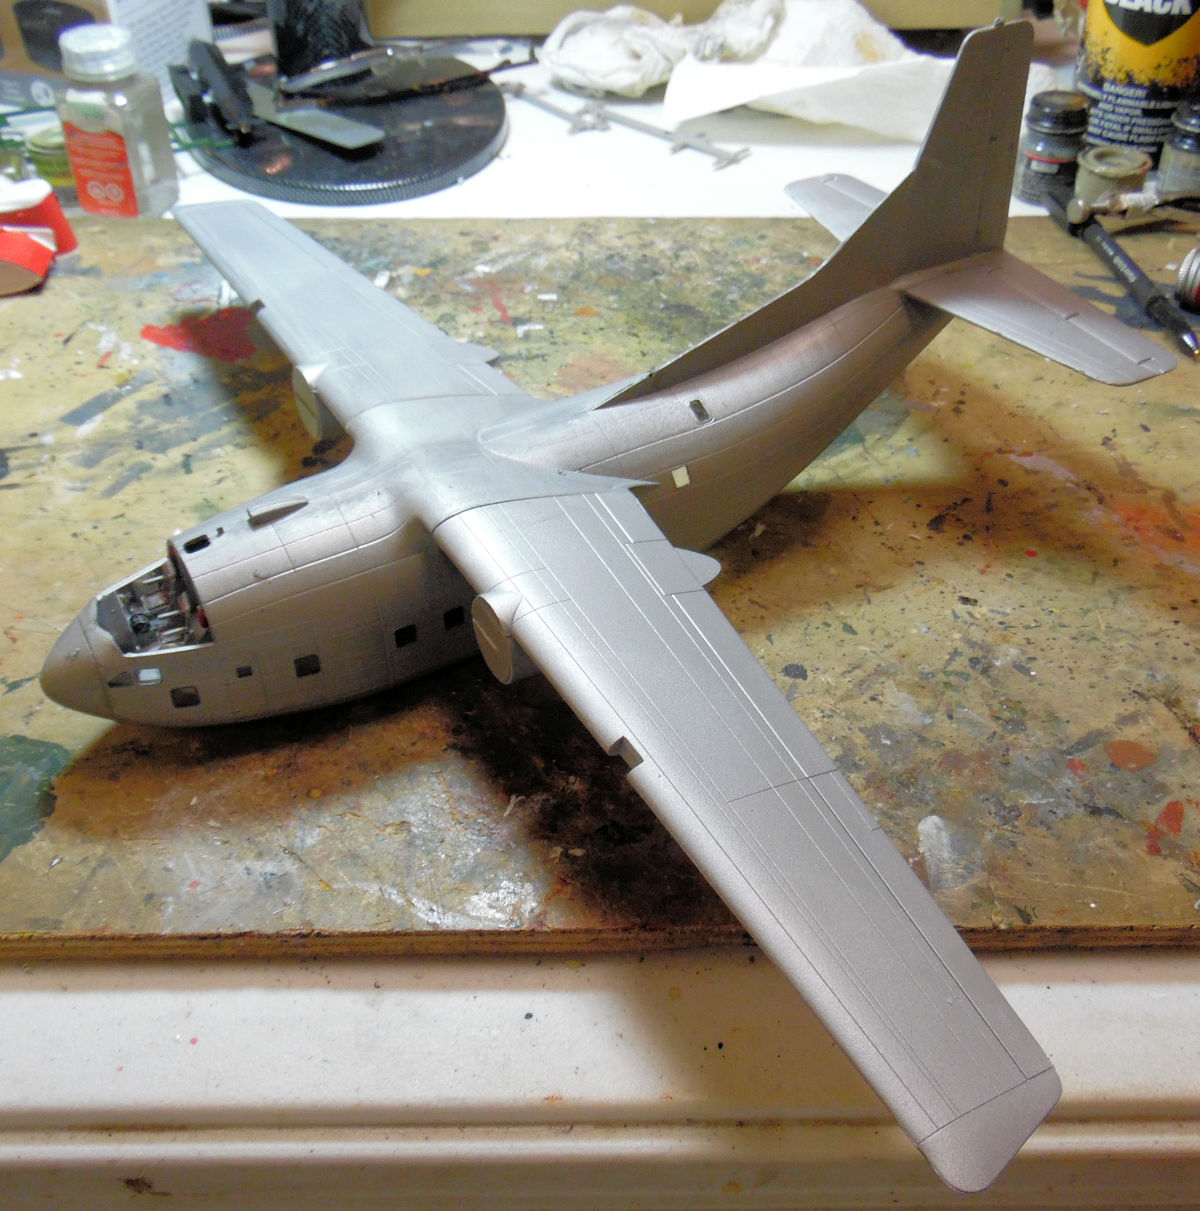
Just for fun, I also glued on the tail feathers and re-dry fit the wings to see how this was gonna turn out. This is a big bird!
That's where I'm at with that one so we'll head to the next bay to see the 1/72 scale Mach 2 US Navy PBM-3 Mariner. First up is the cockpit as always:
This was then painted after it dried:
Yeah, it's kinda rough, but not much of it will be seen when it's closed inside the fuselage...
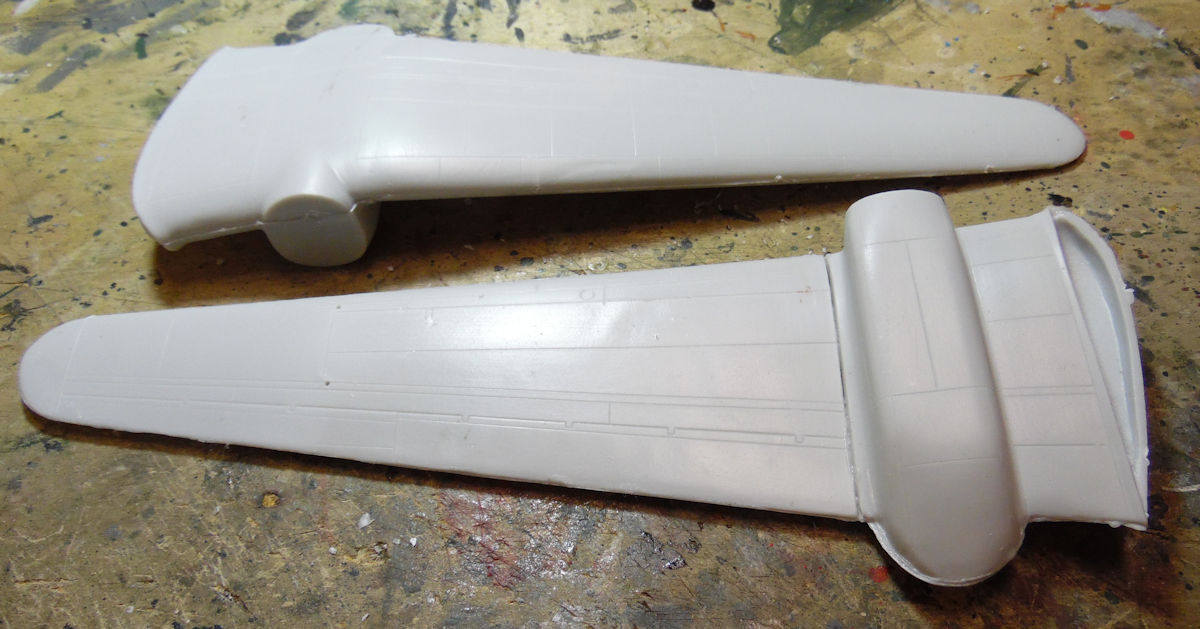
Before we got to that, I got the wings assembled:
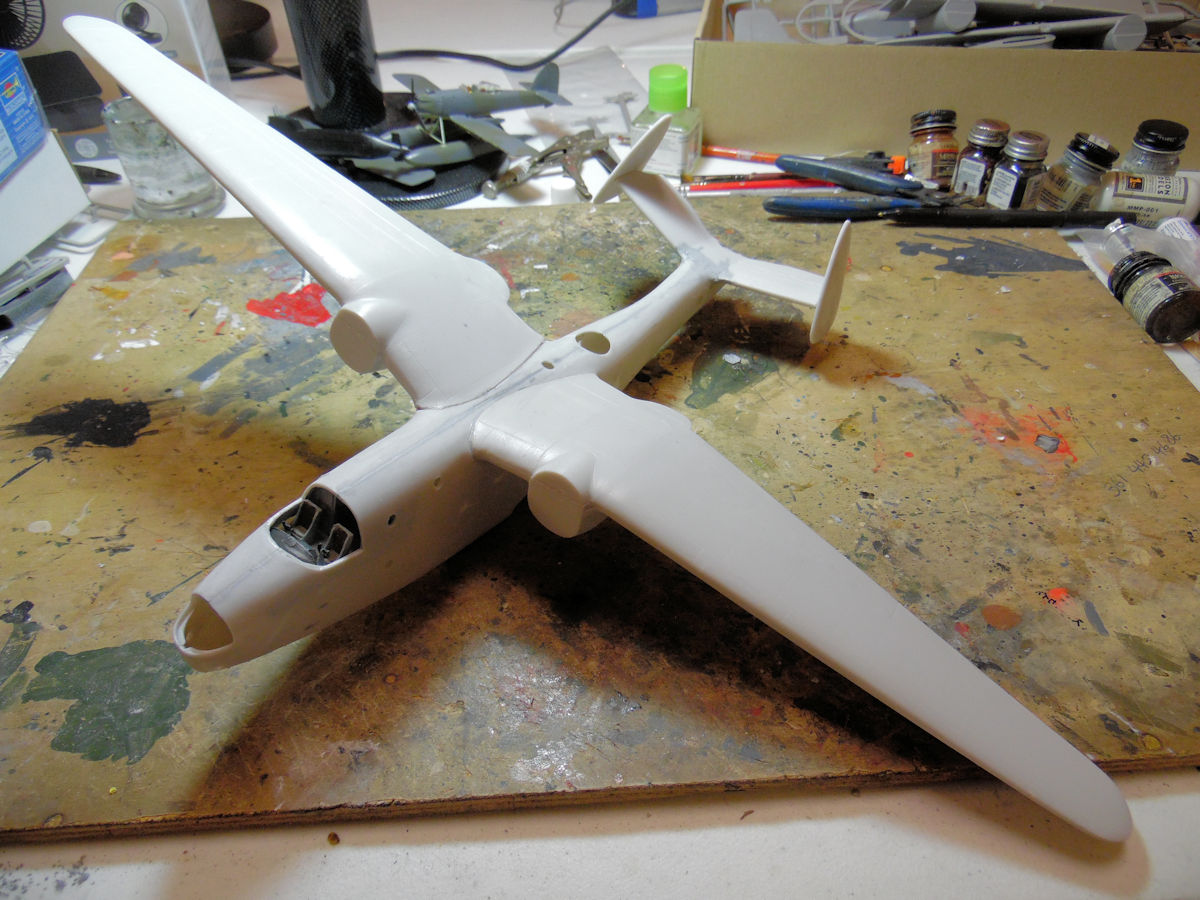
Afterward, everything got closed up inside and the wings and tail were glued on:
That completes the tour of the Hangar, now on to the Shipyards....
Here in the Shipyards, a lot has been going on. Again, some new projects and some continuing ones as well. We'll start in this first slip with the British HMS Astute getting all marked up:
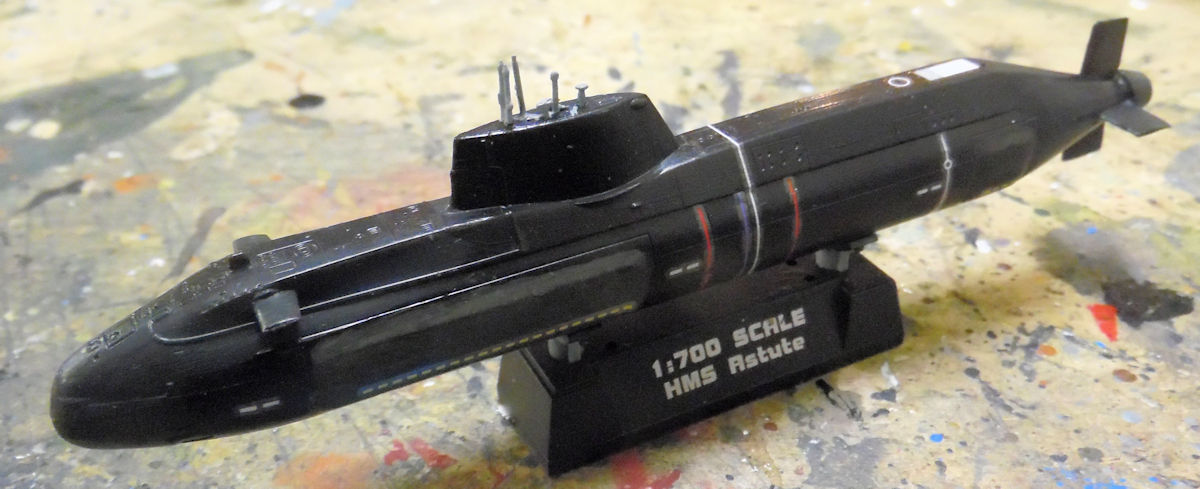
That one is almost ready for launch, just a few more systems checks...
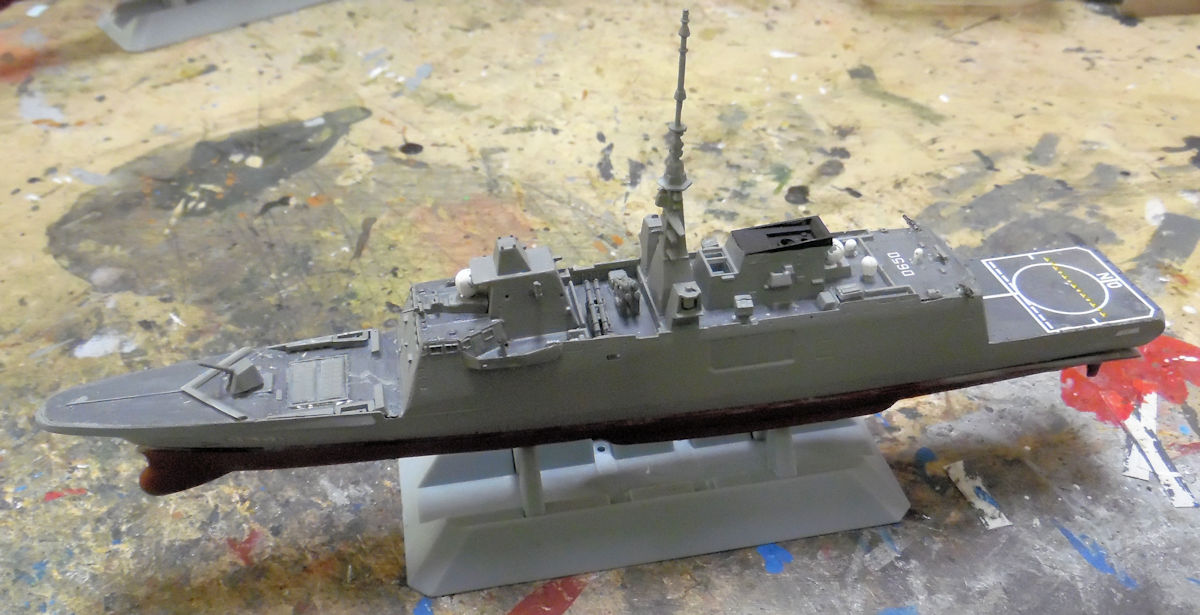
In the next slip, we have the French frigates Aquitane and Normandie also all decked out in new deck markings, pennant numbers and names:
Aquitane:
and Normandie:
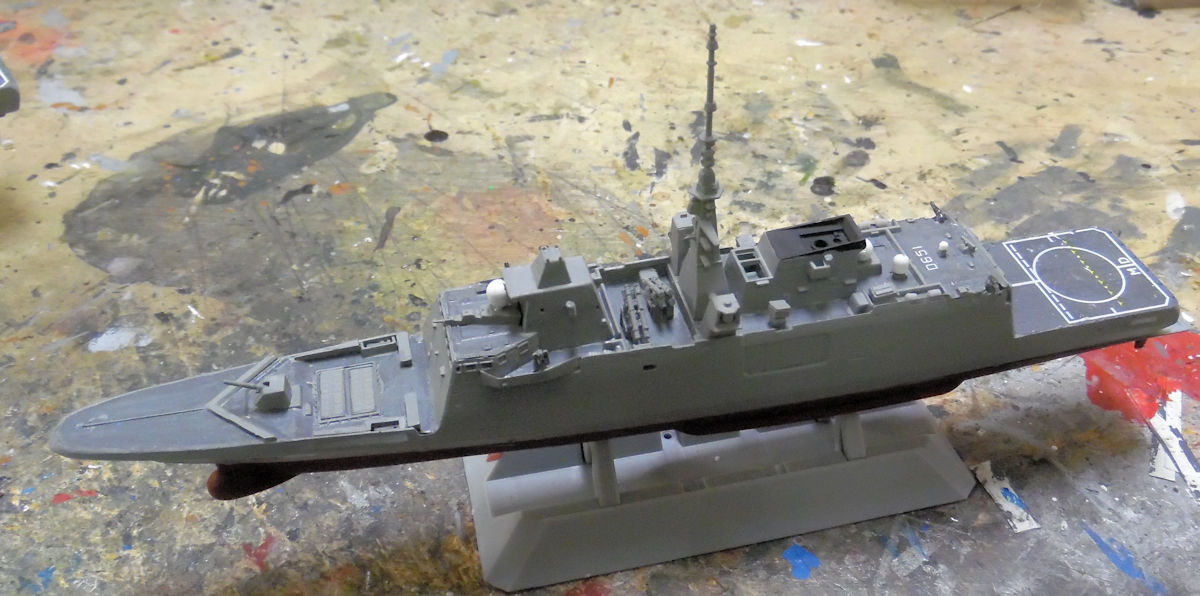
These too are almost ready for launch...
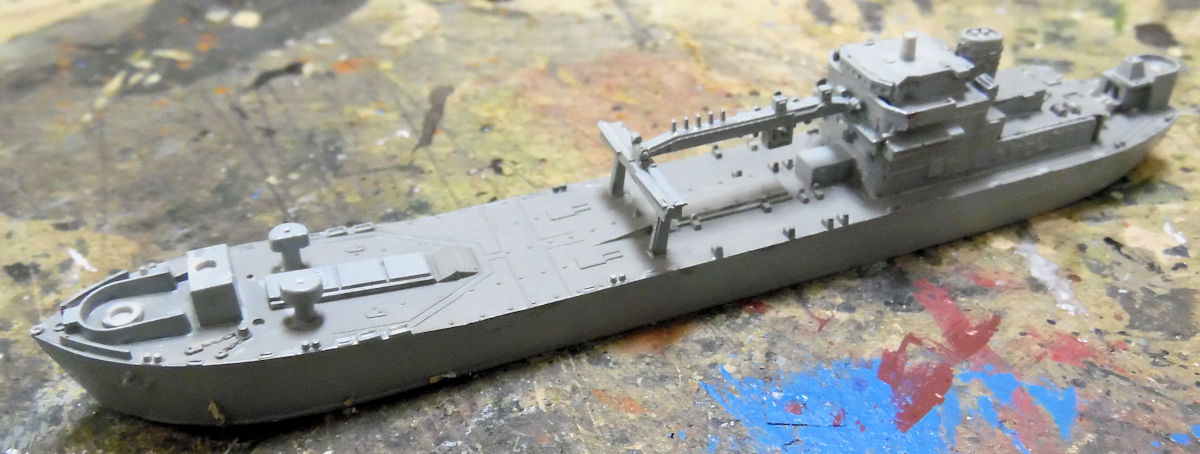
In this next slip, we started another kit that was found in the stash and looked to be fast and easy. It was, as you can see here:
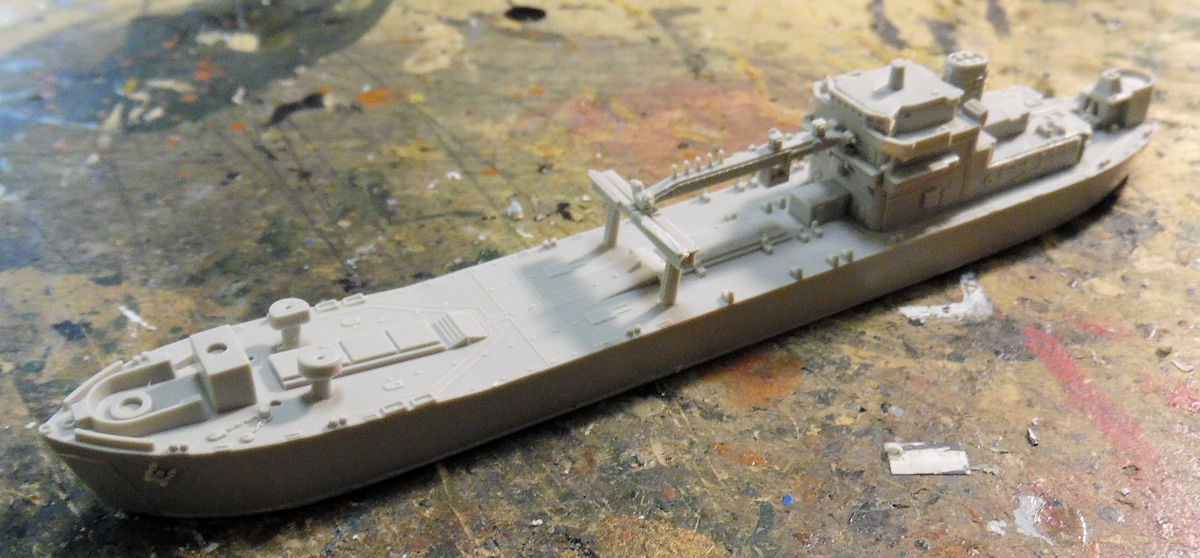
Later, this got paint, although it doesn't show well here in this shot:
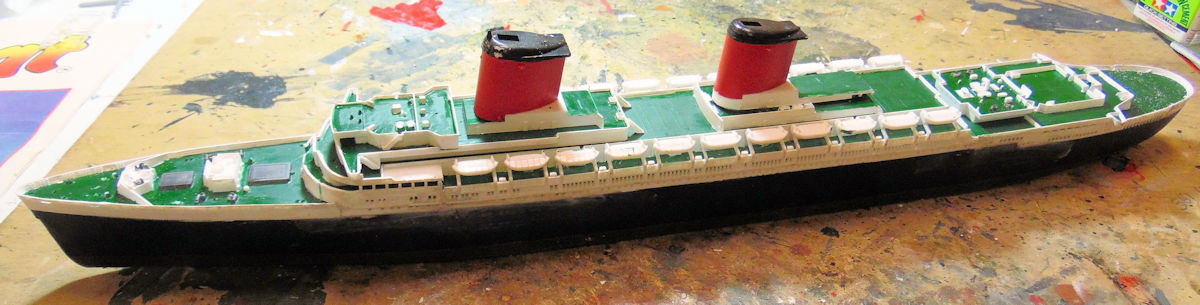
Next up in the following slip is another fast and easy ship. I was having such a blast building this that I got this far already. This is the old Revell 1/500 scale SS United States already built and painted up so far:
Finally in this last slip, we are back to the HMS Queen Elizabeth, where the pri-fly island was built up:
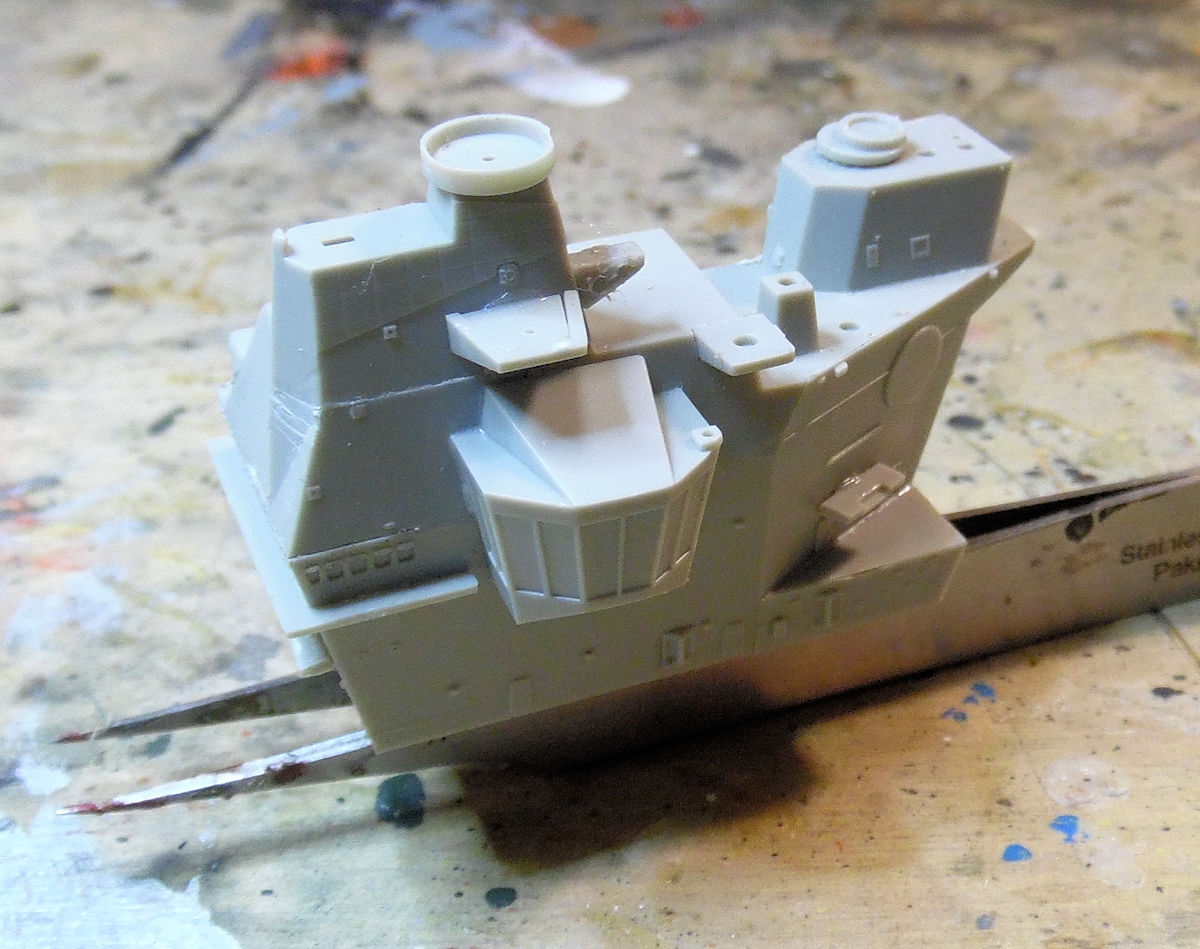
This was then test fit to the deck:

Almost looks like a US supercarrier.... LOL!
The main island was then built up and also test fit on the deck:
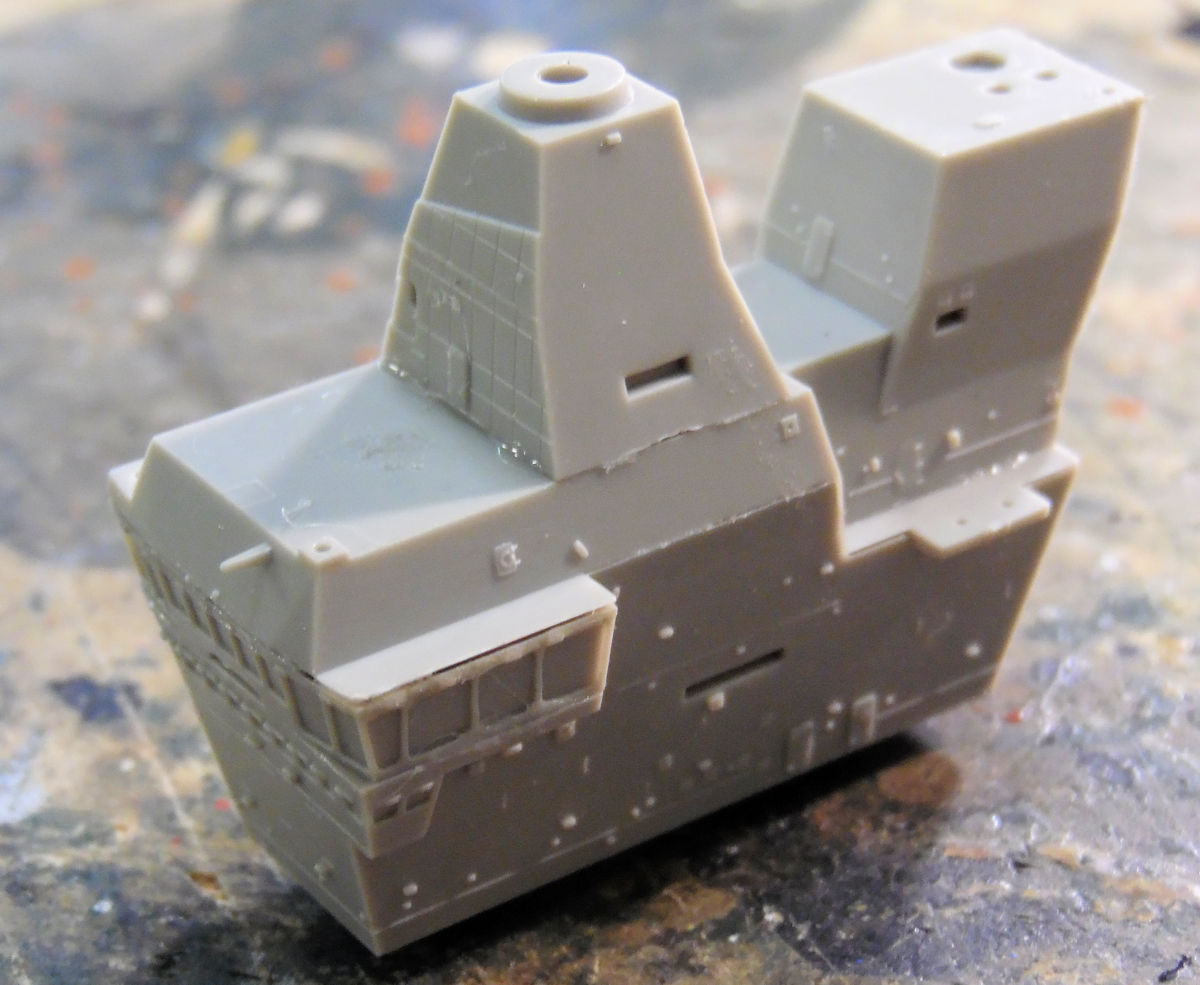
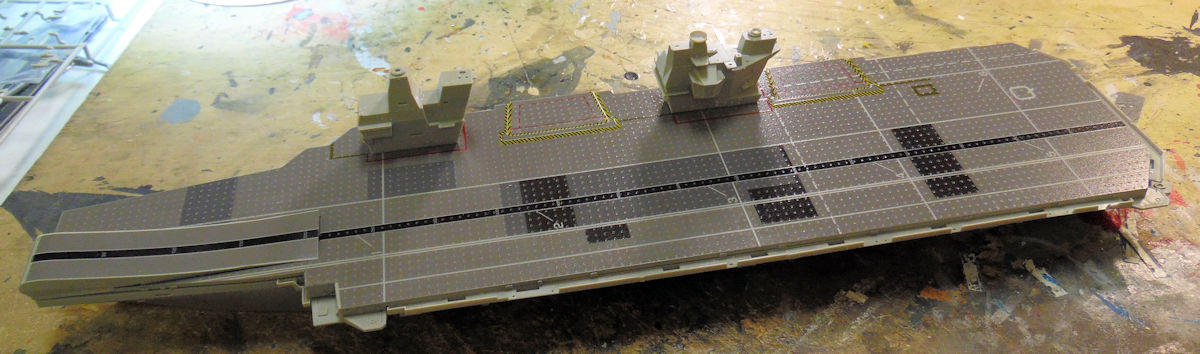
There's more to do on the main island, and then this ship can be painted up. Until then, this is all I got done on it so far.
The Motor Pool is still on hiatus but things are tooling up to start production soon, so by the next tour, we should see something from there soon.
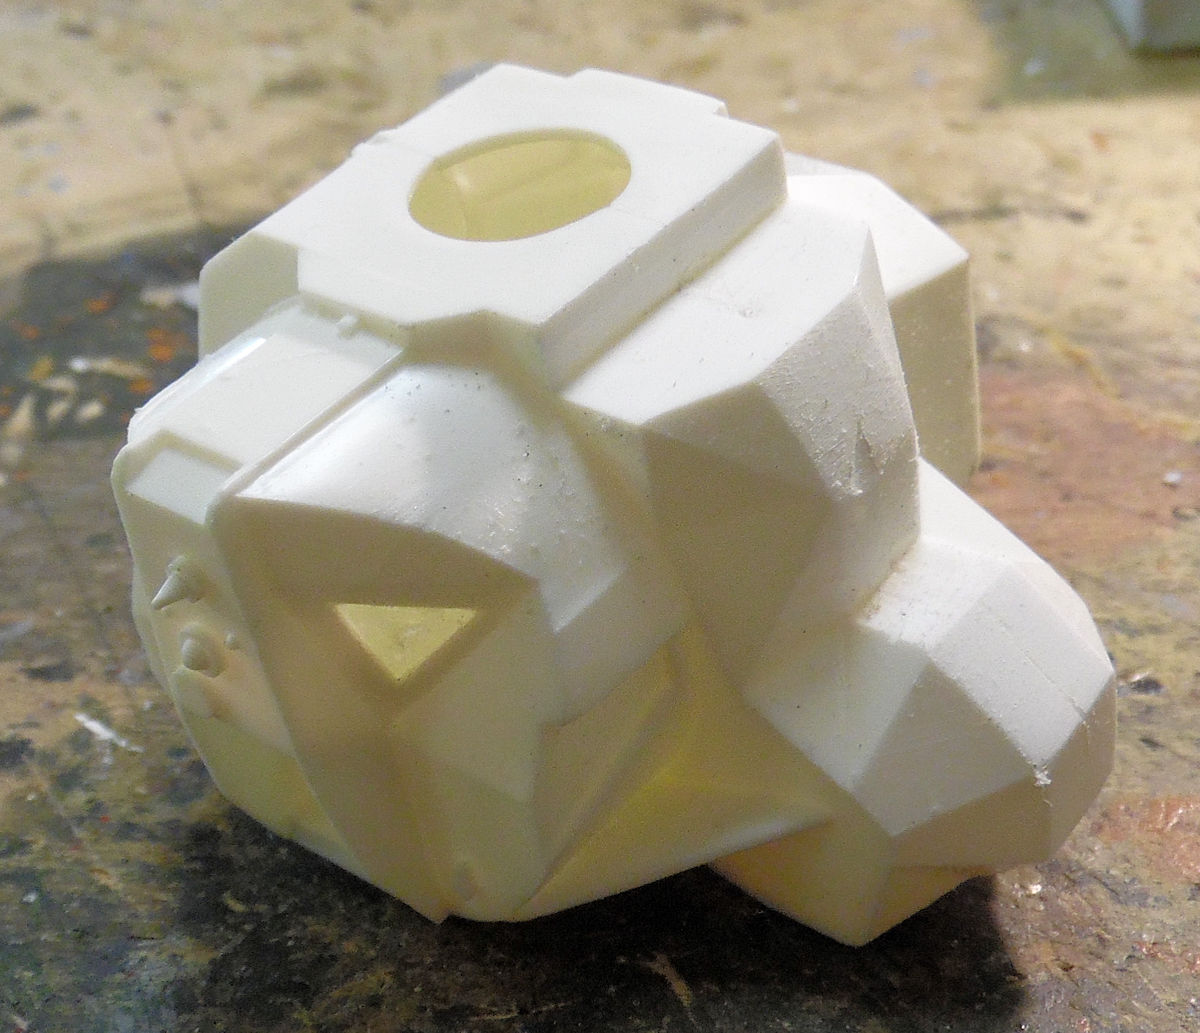
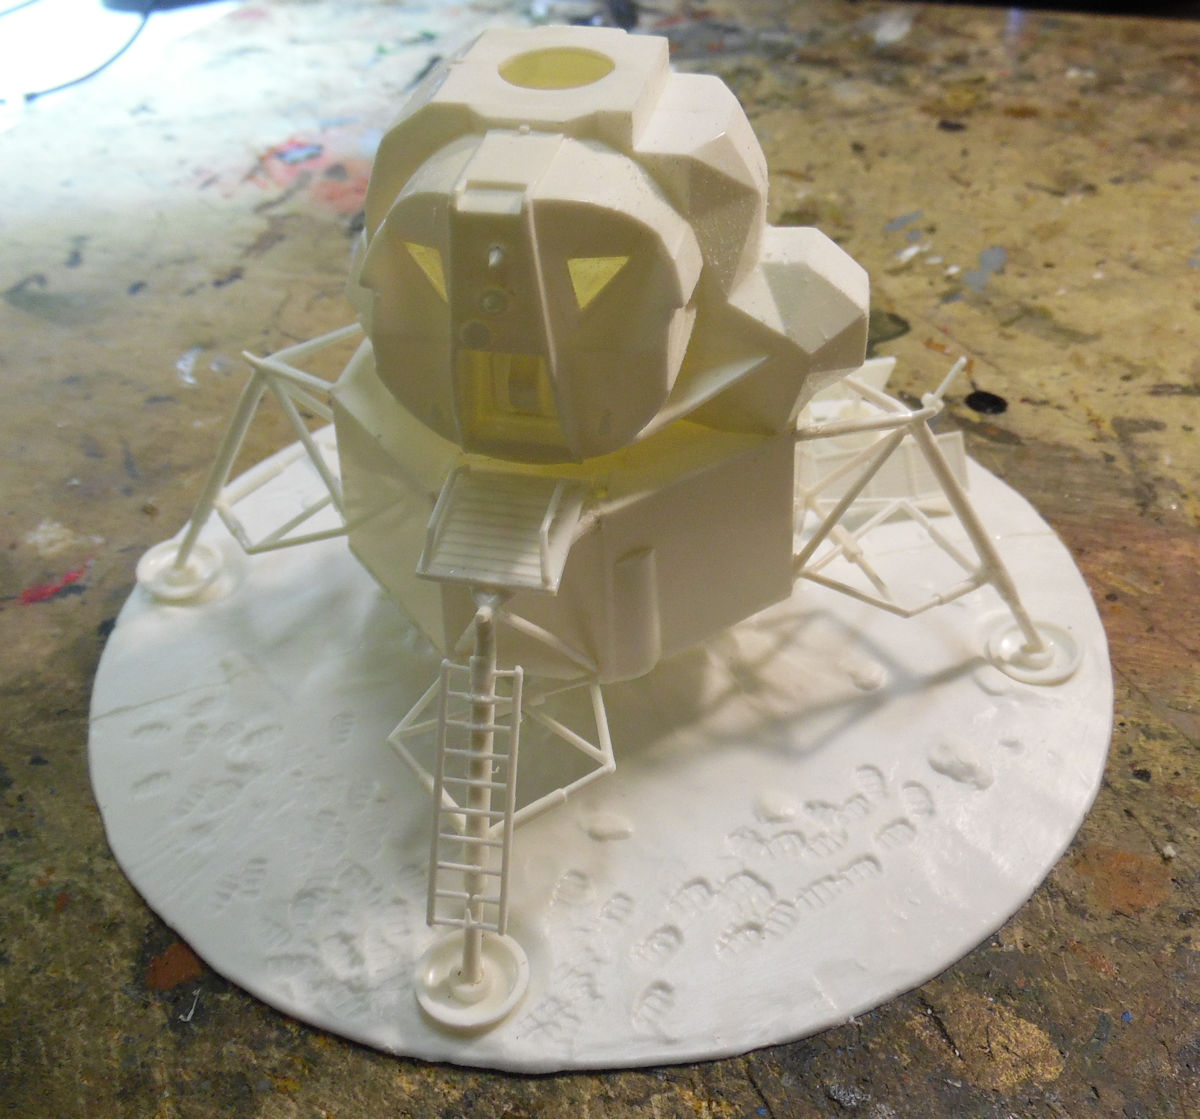
Meanwhile, in the Space Port, we started up and old Airfix Lunar Lander in 1/72 scale, staring with the lower part:
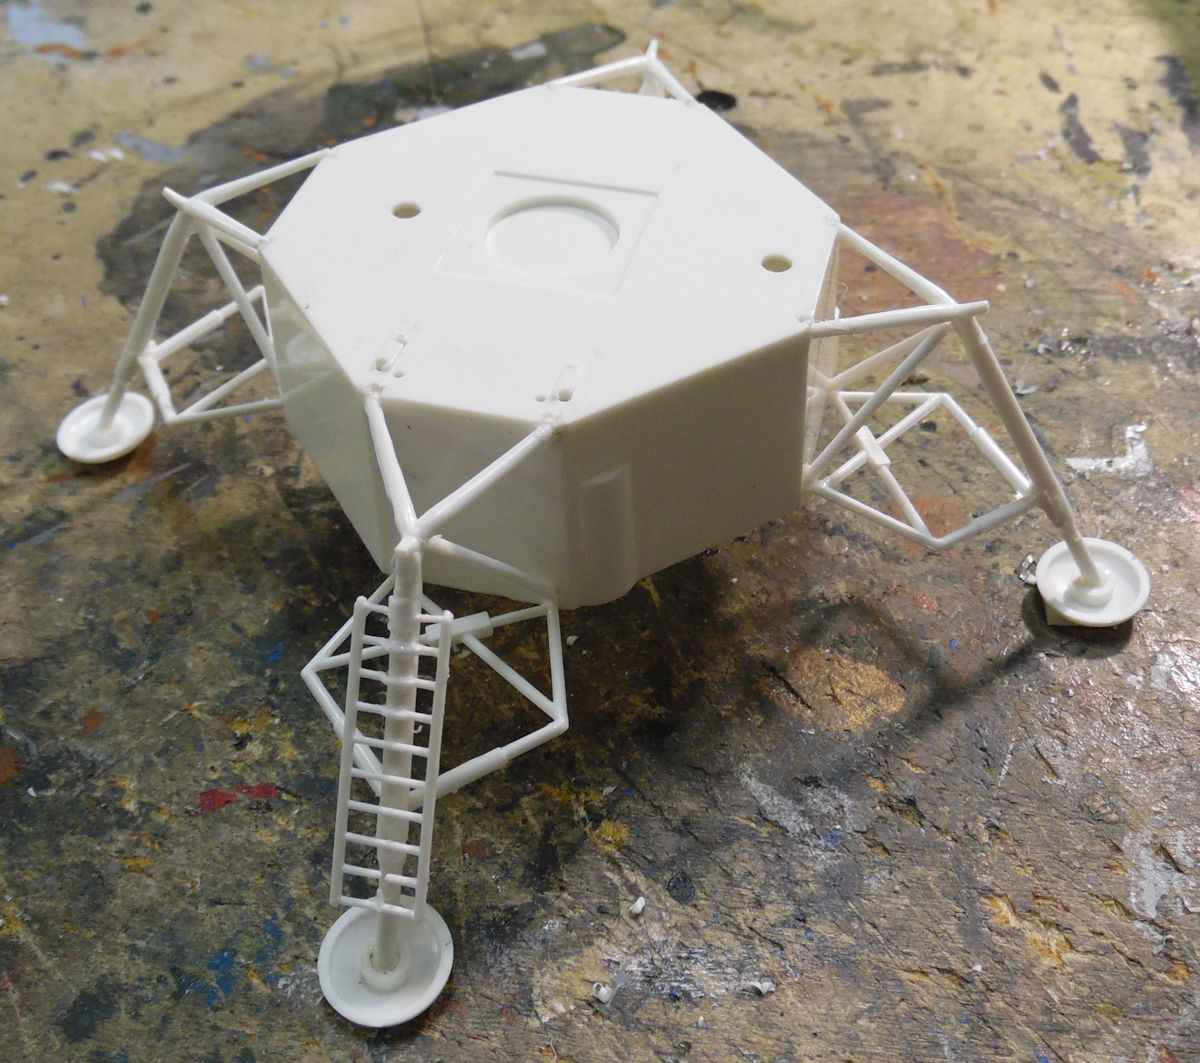
These is a base included, but in my opinion it's too small, given the number of experiments this includes in this kit. Here it is with the lower part on it:
I like how it has the footprints on the surface!
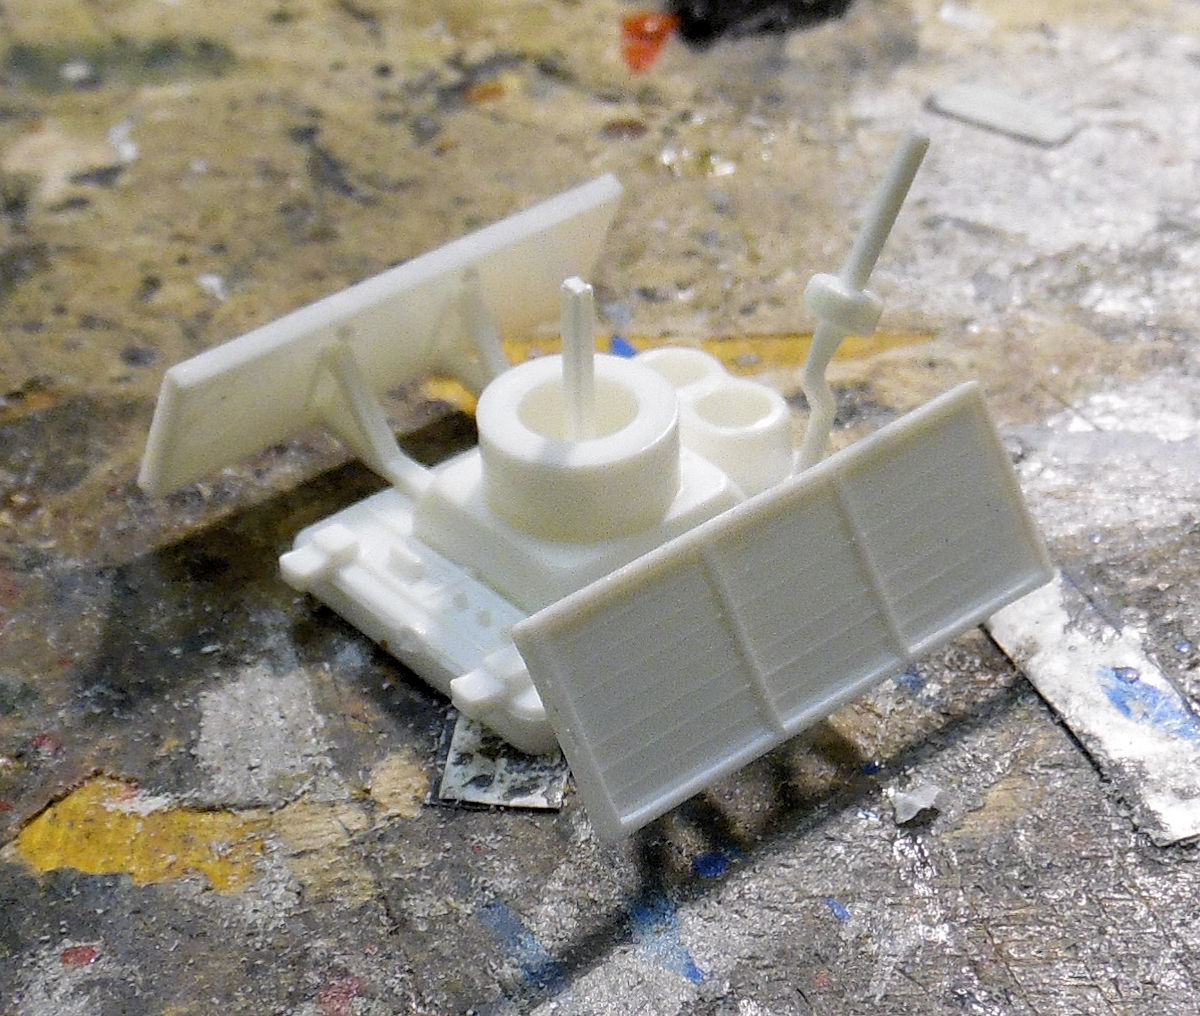
Here's one of those experiments that is part of this:
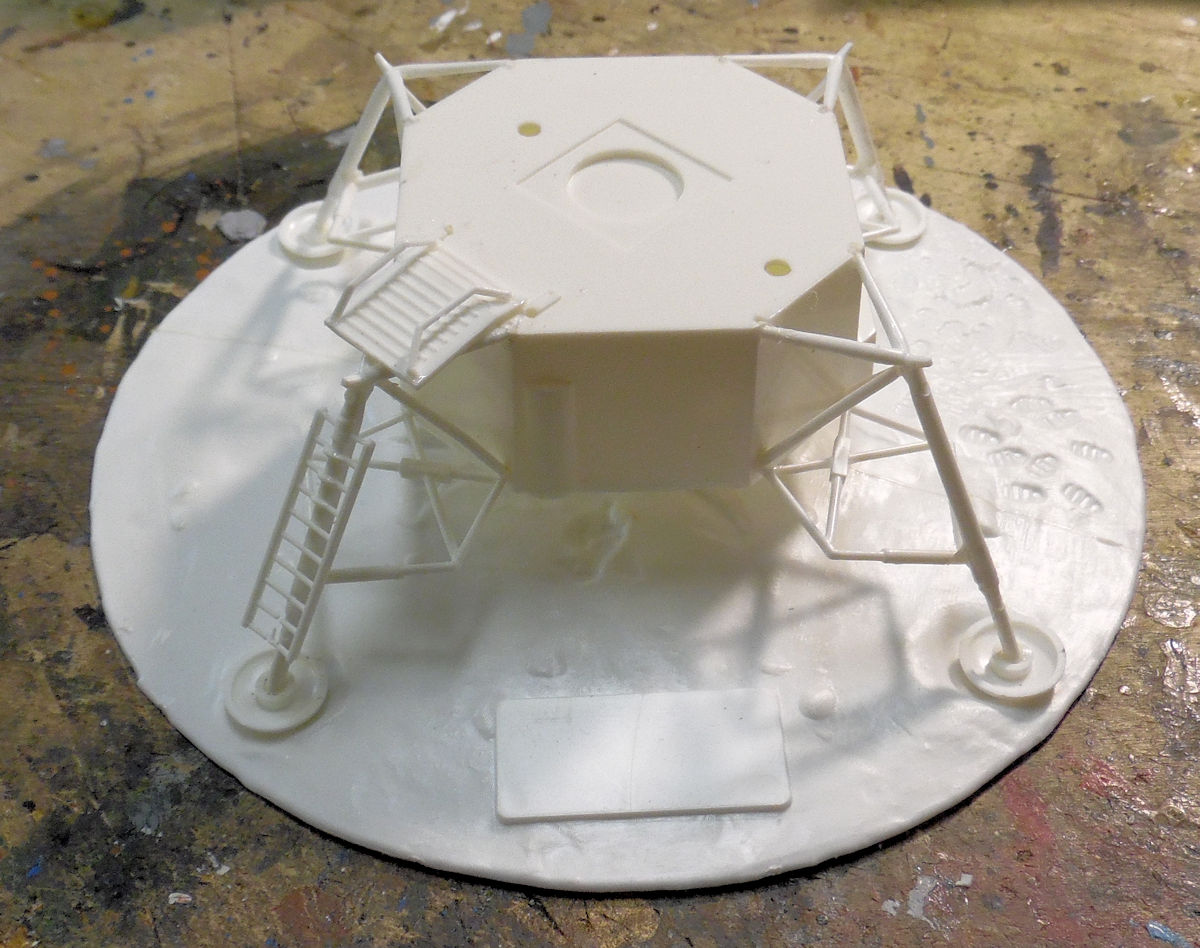
After that I built the upper stage:
Here you can see everything together on the base. The experiment is tucked away on the right so you can see what I mean about the lack of space.
See what I did there?
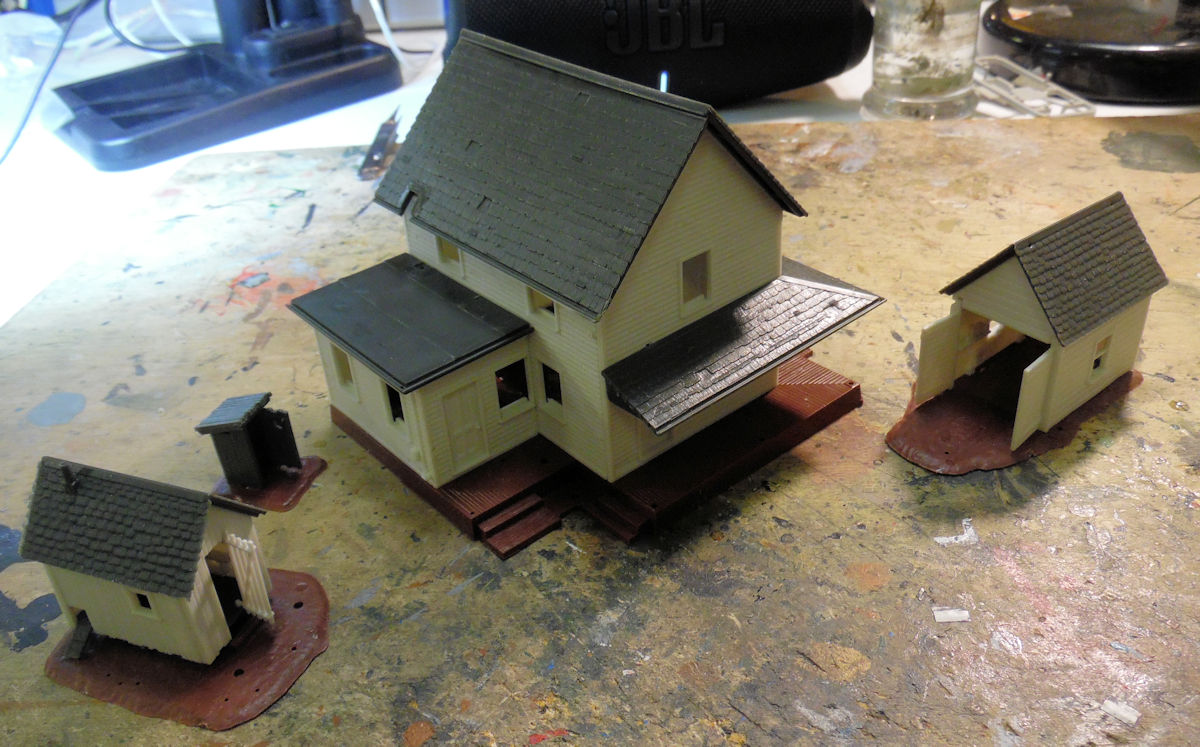
We have some more construction happening in the back lot as well. Along with the Gazebo, the Lumber Mill and the Blacksmith shop, we now have a farm house with a garage, chicken coop and outhouse going up:
Finally, a little entertainment for the workers here; we have the old Airfix Zoo set under construction for them now too:
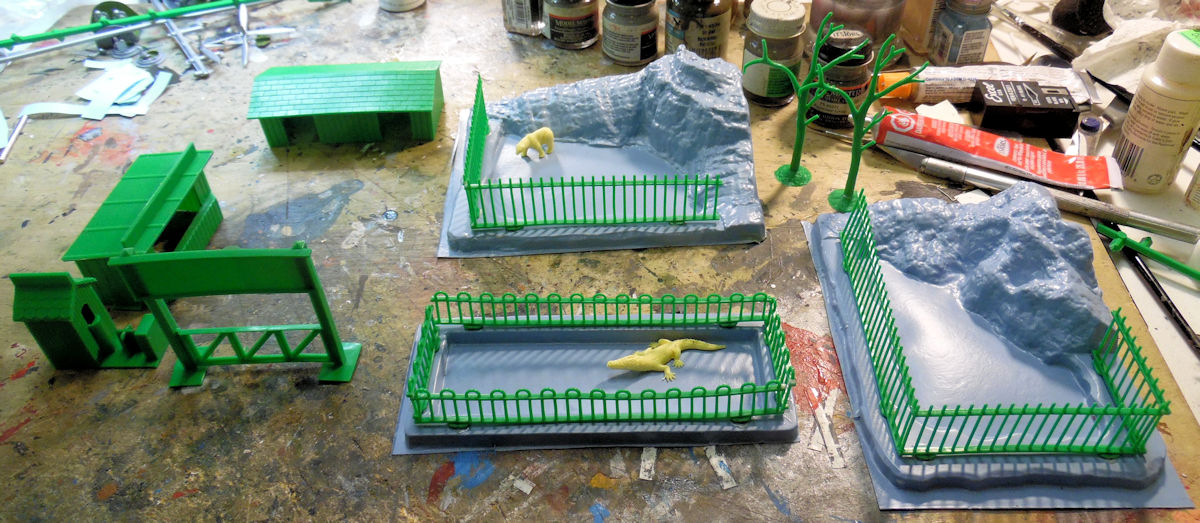
That is gonna be fun!
That's the end of this tour for today, thanks all for looking in and remember comments are always welcome.